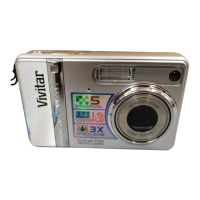
Do you have a question about the Vivitar Vivicam 5110 and is the answer not in the manual?
Information about registered trademarks used in the manual.
Details about product specifications, variations, and manual illustrations.
Critical safety precautions regarding camera usage, damage, and handling.
Important cautions on battery insertion, flash usage, impact, environment, and cable handling.
A general description of the camera's high-quality imaging and storage capabilities.
List of items included with the digital camera upon purchase.
Recommended accessories that can be purchased separately for the camera.
Identifies and explains the components visible on the front of the camera.
Identifies and explains the components visible on the rear of the camera.
Details the buttons and controls located on the camera's control panel.
Explains the meaning of different LED indicator lights and their status.
Describes various scene modes and their suitability for different shooting situations.
Explains the various icons and indicators displayed on the LCD monitor during still image recording.
Continues explanation of LCD monitor icons for still image recording, covering flash and white balance.
Explains indicators for playback mode, card status, and battery level during image playback.
Explains indicators for movie mode, recording status, video counter, and battery level.
Explains indicators for playback mode, battery level, card status, and elapsed time during video playback.
Step-by-step guide on how to insert AA batteries into the camera.
Instructions for inserting and removing an SD memory card for expanded storage.
Procedure for setting the camera's date and time.
Steps to select the preferred OSD language for menus and messages.
Guide on how to securely attach the camera strap to prevent accidental drops.
Instructions on how to power the camera on and off.
How to use the LCD monitor for composing images and navigating menus.
Guide to using the camera in Normal mode for general shooting.
How to use the digital zoom feature to get closer to subjects.
Explanation of the camera's flash modes and how to use them.
Details on choosing the appropriate flash mode for different shooting conditions.
How to use the self-timer for group shots or delayed captures.
Guide to using macro mode for close-up photography of small subjects.
How to adjust image size and quality settings for optimal results.
Table showing approximate number of images that can be stored based on settings.
How to use the Auto mode for automatic camera adjustments and simple shooting.
How to use Sports mode for capturing fast-moving subjects.
How to use Night Scene mode for capturing subjects in low light.
How to use Portrait mode to emphasize the subject with blurred background.
How to use Landscape mode for capturing distant scenery.
How to use Backlight mode to brighten subjects against strong backlighting.
Instructions on how to record video clips using the camera's movie mode.
How to view still images one by one on the LCD monitor.
How to enlarge images to view fine details during playback.
How to display nine thumbnail images simultaneously for quick scanning.
Steps to select and play recorded video clips.
How to set up and play back images automatically in a slideshow format.
How to protect selected or all images from accidental deletion.
Steps to delete single images or video clips from the camera.
Procedure to delete all images and video clips from the camera.
How to format the SD memory card or internal memory, erasing all data.
Steps for connecting the camera to a PictBridge compatible printer.
How to select print size, paper type, and initiate printing.
Lists the CPU, OS, memory, and disk space needed for transferring files.
Instructions for installing the USB driver from the CD-ROM.
Guide on connecting the camera to the computer using a USB cable.
How to copy images and video clips from the camera to the computer.
Instructions for installing Ulead Photo Explorer software for media management.
Guide to installing Adobe Acrobat Reader for viewing PDF manuals.
Instructions for installing the user's manual from the CD-ROM.
Instructions for installing the PC camera driver for webcam functionality.
Guide to connecting the camera to the computer for PC camera use.
How to use applications like Windows NetMeeting for videoconferencing.
Details the settings available within the camera's Capture menu.
Explanation of how to set image resolution and quality.
How to select different scene modes for various shooting conditions.
How to adjust exposure value (EV) for brighter or darker images.
How to adjust white balance for accurate color reproduction in different lighting.
How to set ISO sensitivity and adjust color parameters.
How to adjust image saturation and sharpness.
How to adjust image sharpness for clearer edges.
How to enable or disable date imprinting on captured images.
Explains options like Delete, Copy to Card, Slide Show, and Protect.
Details EV and White Balance settings specific to video recording.
Overview of settings like Date/Time, Format, Beeper, Language, LCD Brightness, Power Off.
How to change menu language and adjust LCD screen brightness.
How to configure auto power off and reset the camera to default settings.
Detailed technical specifications of the camera's hardware and features.
Details on white balance modes, file formats, interface, power, dimensions, and weight.
| Megapixels | 5.1 MP |
|---|---|
| Digital Zoom | 4x |
| LCD Screen | Yes |
| LCD Screen Type | TFT |
| Image Sensor Type | CMOS |
| Lens | Fixed |
| Storage Media | SD Card |
| Video Resolution | 320 x 240 |
| Video Recording | Yes |
| Power Source | 2 x AA Batteries |
| Connectivity | USB |
| Resolution | 2560 x 1920 |
| Maximum Resolution | 2560 x 1920 |
| LCD Screen Size | 1.5 inches |
| Battery Type | AA |
| Storage | Internal and External |
