Do you have a question about the Vivitar ViviCam 5119 and is the answer not in the manual?
Lists the items included with the digital camera package.
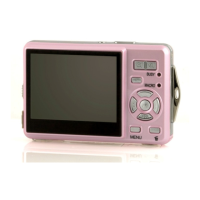
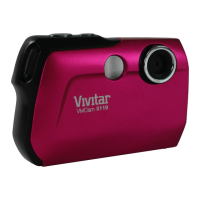
Identifies and describes the buttons, screen, lens, and ports of the camera.
Instructions for inserting batteries and the SD memory card into the camera.
Steps to power on the digital camera and access the menu.
Details on battery use, recommendations, and SD card insertion.
How to press the power button to turn the camera on.
How to take pictures, default mode, and saving photos.
Steps to record videos and save them.
How to view, edit, or delete captured photos and videos.
Minimum configuration for Windows PCs to use the Vivitar software.
Minimum configuration for Mac PCs to use the Vivitar software.
Steps to turn the camera on, sound, LED, and screen indicators.
How to turn the camera off manually and auto power off.
Step-by-step guide to capturing a photo using the camera.
Explanation of available flash modes and how to change them.
How to use the T and W buttons to zoom in/out on subjects.
Setting up a delay for taking photos, allowing the user to be in the shot.
Selecting desired image sizes for photos.
Adjusting frequency for fluorescent lighting to avoid image waves.
Reducing image distortion from camera movement during capture.
Changing the camera's display language from available options.
Resetting camera settings to original factory defaults.
Steps to switch the camera to video recording mode.
Selecting video resolution (VGA or QVGA).
Viewing captured still images and zooming into them.
Playing recorded video clips from the SD memory card.
Navigating and selecting images in a grid format for viewing.
Removing unwanted files from the memory card directly from the camera.
Deleting all content from the memory card permanently.
Using PictBridge to print photos directly from the camera to a printer.
Steps for installing the Vivitar Experience Image Manager software on PC and Mac.
Instructions for physically linking the camera to a computer using a USB cable.
Steps to transfer files from the camera to the computer using the provided software.
Manual file transfer steps for Windows users via file explorer.
Manual file transfer steps for Macintosh users via Finder.
Methods for importing photos and videos to an iPad using connectors or card readers.
Guidance on camera care and information about the Sakar warranty.
Solutions for common problems encountered with the camera's operation and file transfer.
| Digital Zoom | 4x |
|---|---|
| LCD Screen Size | 2.4 inches |
| Video Resolution | 640 x 480 |
| Image Sensor Type | CMOS |
| Storage Media | SD/SDHC Card |
| Sensor Resolution | 5 MP |
| Image Resolution | 2592x1944 pixels |