Do you have a question about the Vivo DESK-V103E and is the answer not in the manual?
Essential safety guidelines for operating the electric desk frame to prevent electrical hazards.
A comprehensive list of all components included in the desk frame package for assembly.
Caution regarding small parts that may pose a choking risk to young children.
Align and place the telescopic crossbar over the upside-down side brackets.
Use the Allen wrench to loosen the eight screws on the crossbar.
Place the crossbar assembly on the desktop and adjust its length.
Tighten all screws with the Allen wrench to fix the crossbar's adjusted length.
Drill pilot holes under the desktop and remove the crossbar assembly.
Secure the lifting columns to the frame using M6x10 bolts.
Mount the feet onto the lifting columns with M6x16 bolts.
Fasten the fixing plate to the crossbar using M4x6 flat head bolts.
Connect motor, panel, and power cables to the control unit.
Slide the control unit onto the prepared fixing plate.
Fix hooks to the shelf with M4x6 bolts and hang shelf onto the frame.
Tighten the installed thumbscrews to secure the shelf.
Press the anti-vibration pads into the desktop mounting holes.
Secure the desktop to the frame using 7/8" screws.
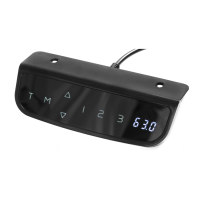
Drill pilot holes and attach the control panel to the desktop.
Connect power, adjust foot pads for leveling, and note sleep mode.
Guidelines for desk operation: weight limits, motion clearance, balance, and cable slack.
Details for customer support, including contact methods and response times.
| Brand | Vivo |
|---|---|
| Model | DESK-V103E |
| Category | Controller |
| Language | English |