Product Use
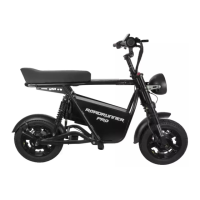
How to Assemble the EMOVE RoadRunner Pro
Tools: Multitool, scissors, stand (optional)
Parts: Scooter, foot pegs, stem adapter, battery, multitool
Unbox the Scooter
1. Remove the foam inserts on top to make it easier to pull the scooter out of the box.
2. The foot pegs (2), stem adaptor (1), and multitool (1) are enclosed in one of the
foam inserts. The battery will also be separately packaged in the box.
3. We suggest that you get assistance from one other person to help you lift the
scooter out of the box rather than cutting it open.
a. NOTE: You should save the box and packing materials. These will come in handy if
you need to store or ship the scooter.
4. Stand the scooter upright on its kickstand or place it on a scooter stand.
5. Locate the stem adaptor. Using the multitool, remove the two screws at the
bottom of the adapter.
Assemble the Scooter
1. Slide the stem adapter over the stem on the frontend. Position the adapter so the
logo is facing outward. Replace the two screws and tighten the adapter in place.
2. From the center, remove the long metal post and stem adapter cap. Around the
adapter, you’ll notice solid metal rings (black). You can remove some of these
rings if you want to position the handlebars lower on the stem.
3. Next, use scissors to cut the zip tie securing the handlebars to the scooter.
4. Slot the handlebars over the stem adapter with the display facing the seat.
5. Slide the long metal post down the center of the stem, and secure the stem
adapter cap in place with your multitool.
6. Make sure the handlebars are centered (not askew to left/right from seated
position).
7. Using the multitool, tighten the two screws that secure the handlebars to the stem.
8. Now that the handlebars are attached, you can reposition the TFT display so that
it’s easy for you to see from a seated position.
9. Using the multitool, loosen and retighten the two screws on the frontside of the
handlebars to rotate the screen up or down. Check that the screw on the rear of
the display is tight.
10. Using scissors, cut the zip ties along the handlebars to remove the protective
foam.
Distributed by and property of VoroMotors 4
 Loading...