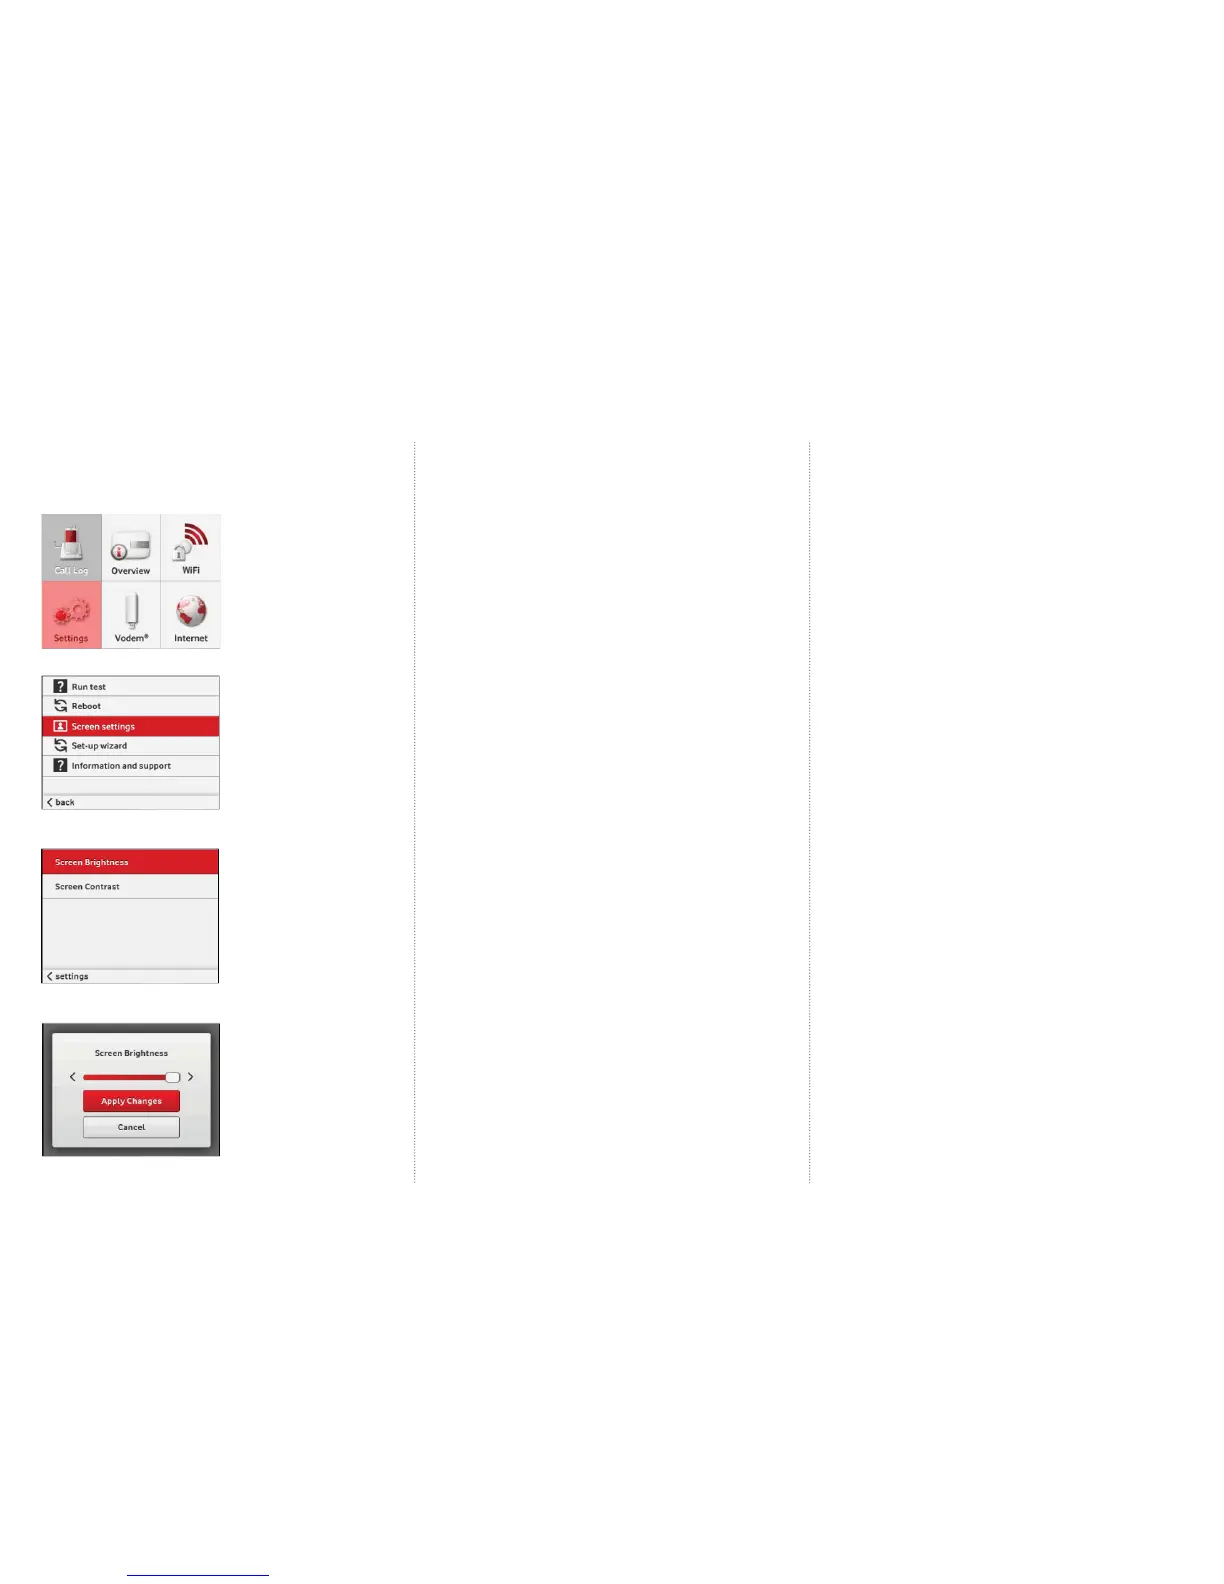
3.3 Adjust LCD screen intensity
To adjust the brightness on the screen of your Vodafone Station;
1. On the LCD, select Settings
2. Select Screen settings
3. Select either Brightness or Contrast
depending on what you want to adjust
4. Use the arrows to adjust the slider and select
Apply Changes when done
4. Instructions
4.1 Web portal
You can manage every aspect of your Vodafone Station from simple
to advanced settings by accessing the web portal.
• See the general state of your connections.
• View your Call History to enter numbers in the phonebook.
• Customise your WiFi username and password.
• Set up hard drive and printer sharing with one simple click.
• And, if you’re an advanced user, you can edit the advanced
settings for the Vodafone Station.
To access the web portal, open the internet browser on your computer and
type in the URL bar: http://vodafone.station
If you are using a custom DNS server, you can access the Vodafone Station
by typing in 192.168.1.1
4.2 Home storage function
(hard drives)
Set up a Network hard drive
The Vodafone station supports many types of USB hard drives. Setting up a
network hard drive will provide faster access to your content than accessing your
content through the web portal.
Set up instructions
1. Plug your external hard drive into the side or back USB port of your
Vodafone Station. A message should display on the LCD screen
advising that a USB device has been detected
2. Login to the Vodafone Station by browsing to
http://vodafone.station OR 192.168.1.1
3. Click on Sharing
4. Under Hard Drives, you should see your hard drive listed
5. Slide the Share All switch to On
6. Click on the arrow next to your hard drive, this will tell
you the network location of your drive.
7. If you have multiple partitions on your hard drive, these will be listed here.
8. Simply click on the drive and you can upload, download,
delete and open fi les
9. You can also map this network drive so it appears on your computers
storage system. Instructions for this vary depending on the type and version of
your operating system.
Mapping a network drive in Windows 8
1. From the Start screen click windows explorer.
2. From the menu on the left hand side of the window click Computer.
3. Select the Computer tab at the top of your screen.
4. Select Map network drive
5. In the Folder fi eld, enter the network location of your drive (identifi ed in
step 6 of the setup instructions above). This should look something like \\
vodafone.station\a
6. Click Finish
Mapping a network drive in Windows 7
1. Open My Computer
2. Select Tools from the menu bar
3. Select Map a network drive
4. In the Folder fi eld, enter the network location of
your drive (identifi ed in step 6 of the setup instructions).
This should look something like \\vodafone.station\a
5. Click Finish
Mapping a network drive in Windows Vista
1. Open My Computer
2. Select Map Network Drive from the toolbar and the Map Network Drive
window will open
3. Choose an available letter from the dropdown list located next to the
Drive: option. If any drives are currently mapped they will have a folder name
displayed next to the letter.
4. Enter the network name
of of your drive (identifi ed in step 6 of the setup
instructions) This should look something like \\vodafone.station\a
5. Click the “reconnect at login” check box if this network drive should be
mapped permenantly, otherwise this will only be temporary until you log out
of your computer
6. Click fi nish
 Loading...