CONTROLS
AND
EQUIPMENT
Fron t seats
The correct adjustment of the seats is im-
portant
for:
-
reaching the controls safely and quickly
-
relaxed low-fatigue body position
-
maximum protection from the
seat belts and the Airbag System.
Warning
•
It is
important
to
maintain
a
distance of at least 25 cm from
the steering
wheel
or instrument
panel so
that
the
front
seat
occu-
pants
will
benefit
from the
greatest possible protective ef-
fect of the airbag system should
it be triggered. Furthermore, the
front
seats and head restraints
must always be adjusted to suit
the body size of the occupant.
Please adjust your seat as detailed on the
following
pages. Please also note the basic
positions
for the driver's and passenger
seats on this page.
Warning
No items should be
kept
in the
footwell, as these could block
the pedals in the case of a sudden
braking or driving manoeuvre.
You
would no longer be able to
brake, change gear or acceler-
ate!
Feet should remain in the foot-
well
when
the vehicle is moving
-
never resting on the instrument
panel or seats.
i
Driver's seat
We recommend that you position the
diver's seat as follows:
-
Set the driver's seat forwards/back-
wards in such a way that the pedals can
be fully depressed with a slightly angled
leg.
-
Set the backrest in such a way that it is
fully against your back and that you can
reach the upper point of the steering
wheel
with your arms at a slight angle.
Front passenger seat
We recommend that you position the front
passenger seat as follows:
-
Backrest in an upright position.
-
Place the feet in the footwell in a
com-
fortable
position.
-
At the same time push the seat back as
far
as possible.
74
SEATS
AND
STOWAGE
CONTROLS
AND
EQUIPMENT
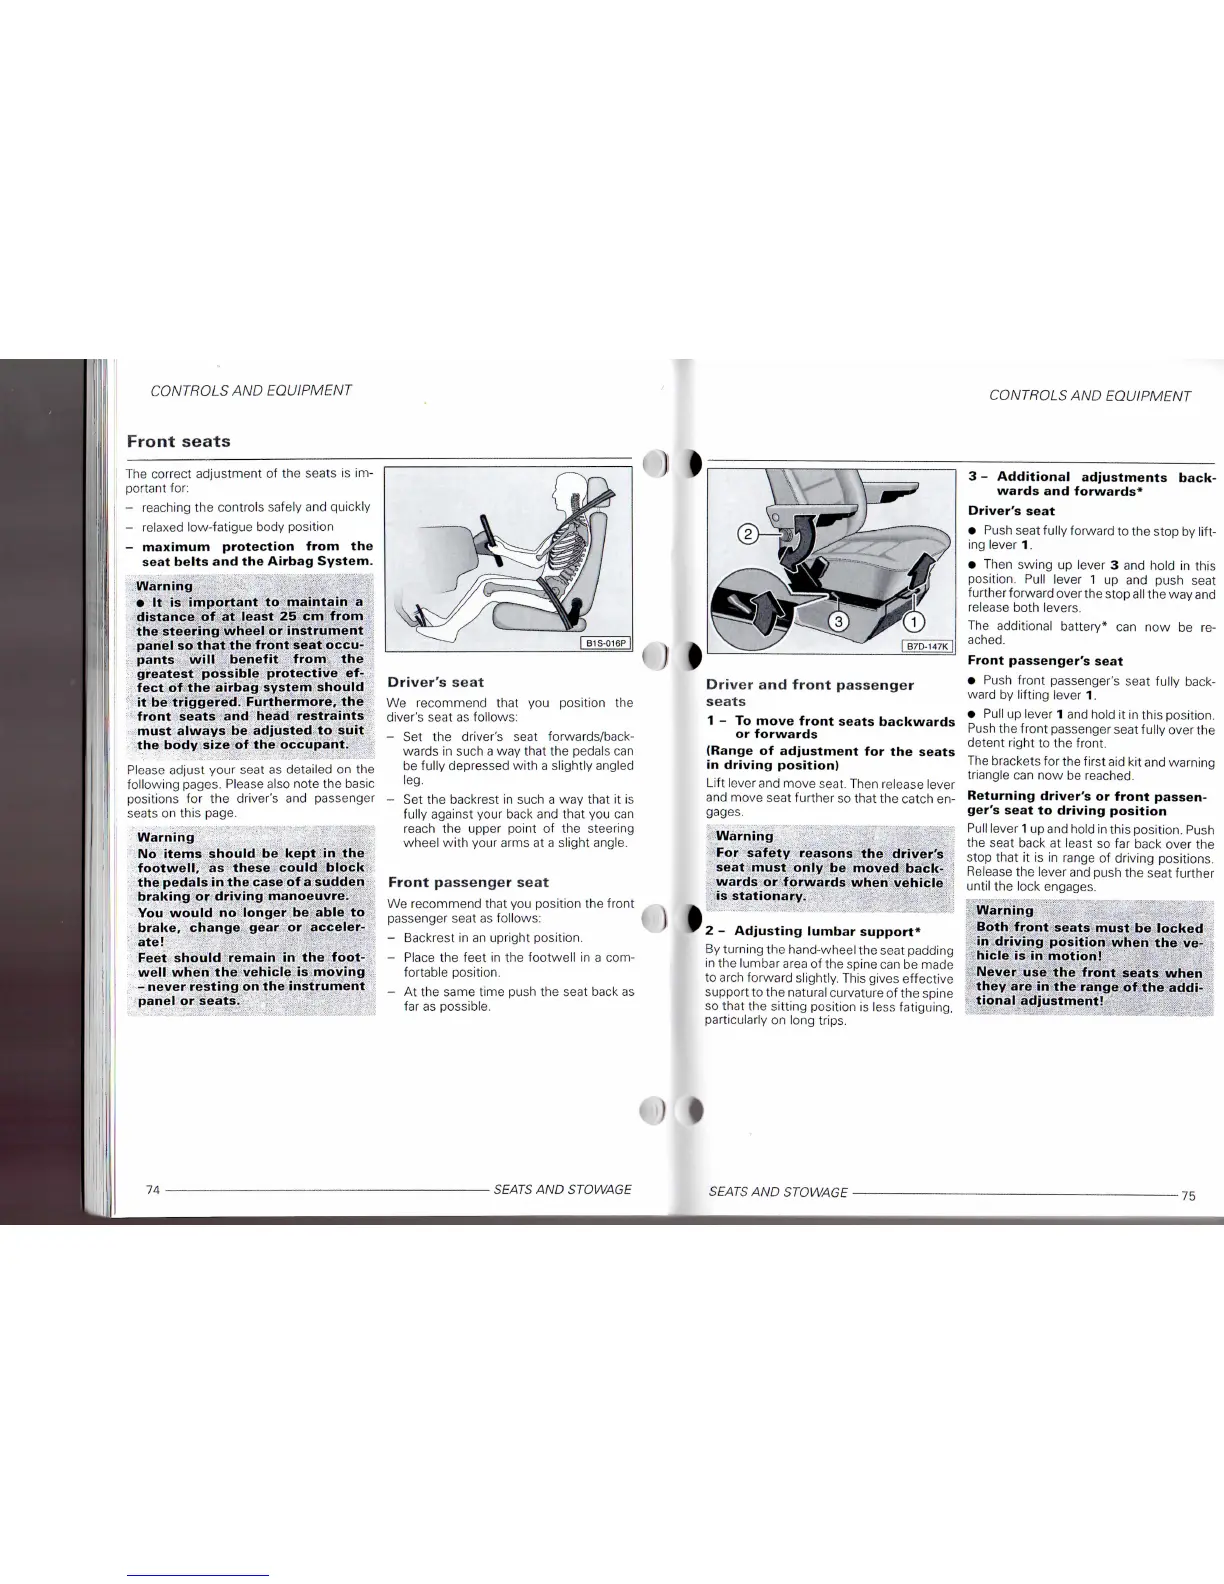
Driver and
front
passenger
seats
1 - To move
front
seats backwards
or forwards
(Range of adjustment for the seats
in driving position)
Lift
lever and move seat. Then release lever
and move seat further so that the catch en-
gages.
Warning
For
safety reasons the driver's
seat must only be moved back-
wards or forwards
when
vehicle
is
stationary.
^2 - Adjusting lumbar support*
By turning the hand-wheel the seat padding
in the lumbar area of the spine can be made
to
arch forward slightly.
This
gives effective
support
to the natural curvature of the spine
so that the sitting position is less fatiguing,
particularly on long trips.
3 - Additional adjustments back-
wards and forwards*
Driver's seat
•
Push seat fully forward to the stop by
lift-
ing
lever 1.
•
Then swing up lever 3 and hold in this
position.
Pull lever 1 up and push seat
further
forward
over the stop all the way and
release both levers.
The additional battery* can now be re-
ached.
Front passenger's seat
•
Push front passenger's seat fully back-
ward
by lifting lever 1.
•
Pull up lever 1 and hold it in this position.
Push the front passenger seat fully over the
detent
right to the front.
The brackets for the first aid kit and warning
triangle can now be reached.
Returning driver's or
front
passen-
ger's seat to driving position
Pull
lever 1 up and hold in this
position.
Push
the
seat back at least so far back over the
stop
that it is in range of driving positions.
Release the lever and push the seat further
until
the lock engages.
Warning
Both
front
seats must be locked
in driving position
when
the ve-
hicle is in motion!
Never use the
front
seats
when
they
are in the range of the addi-
tional adjustment!
SEATS
AND
STOWAGE
75
 Loading...