b) Video recording
• In the main menu of “ViewPlayCap” go to the menu item “Option”, and click on “Preview”. The camera
image is displayed on the computer monitor as a preview, clicking on “Preview” again switches the preview
off again. A recording is stored in the folder “Videos”, if “Capture” → “Set Time Limit” → “Use Time Limit”
has been selected. If this is not the case, the video will be stored at the storage location designated at
“Set Capture File”.
• In the main menu of “ViewPlayCap” go to the menu item “Capture”, and click on “Start Capture”. Conrm
the recording of the video with “OK”. The video recording starts; it ends automatically as soon as the set
time limit is reached. If the latter is not available, the recording is ended as soon as the maximum le size
to be stored is reached. Abort a recording by pressing on “Start Capture”.
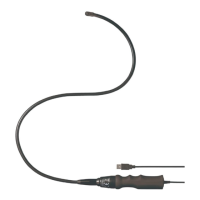
• Adjust the brightness of the LEDs by rotating the brightness control knob (4).
Reduce Increase
c) Recording a snapshot
• To record snapshots, in the “Snapshot” menu, select the menu item “Still Image Snapshot”. The snapshot
image is opened in the Windows Photo Viewer and stored in the folder “My Images”.
• The default setting on the computer is set to 640 x 480. The recording takes place after a delay of
2 seconds. Therefore make sure to hold the camera very still for 2 seconds or rest it against something.
• If the recording is executed on the computer, the max. resolution is 12 MP. The image size 1600 x 1200
and the color space YUY2 must be selected for this. After you have changed the image size/color space,
you must rst select “Original”. Only after that the resolution can be reset in MP.
For operating systems prior to Windows
®
7 the availability of the settings (e.g. resolutions/image
sizes) for ViewPlayCap may vary.
d) Main menu bar of “ViewPlayCap”
• All other settings are available from the main menu bar.
File Set Capture File Select the storage location and the lename for video
recordings without any time limit. Select the le type .avi or
.asf. User is also prompted to enter the maximum le size.
Exit Close the software.
Devices - For this product select “USB Video Device”.
Options Preview Switch the preview (life streaming) on/off.
Preview Format Select the preview format (resolution and compression).
Video Capture Pin
Video format:
■ Video Standard (cannot be changed)
■ Frame Rate (cannot be changed)
■ Color Space / Compression (select YUY2)
■ Output Size (select from the list)
Compression: (cannot be changed)
Accept with “Apply” and conrm the settings with “OK”.
Video Capture Filter A new window “Capture Filter Properties” opens. It contains the
tabs “Video Proc Amp” and “Camera Control”. We recommend
not changing this setting.
Audio Capture Filter No function on this product.
Mirror+Flip Rotates the image through 180°. Press “Mirror+Flip” again, to
return to the original view.
Capture Start Capture Begins video recording. Conrm with “OK”. Press “Start
Capture” again to end the recording.
Capture Audio No function
Set Time Limit Set max. time limit for recording in seconds.
AVI format
ASF format
Select the video le type .avi or .asf.
Snapshot Still Image Snapshot Create snapshot image.
Still Image Format First select “Original“ in the “Snapshot“ menu. Then select the
required image size under “Still Image Format”.
PNG Format
JPG Format
BMP Format
Select the le type .png, .jpg or .bmp. The le type is preset to
“JPG Format” (.jpg).
→12M
→ 8M
→ 5M
→ 2M
Original
Select image resolution for snapshot in MP (Mega Pixels).
Snapshot must be executed on the computer.
First select “Original” in the “Snapshot“ menu. Then select the
required image size under “Still Image Format”.
View Always on Top
No function
Show FPS Displays the current frame rate. The function can be switched
on and off.
Open Desktop Opens the desktop.
Open My Videos Opens the folder “My Videos”.
Open My Pictures Opens the folder “My Pictures”. Snapshot images are stored
here.
Help About ViewPlayCap... Displays the software version and the publisher.
e) Attachments
• To use any of the attachment, place it on camera head (6) grove and lock it. Rotate at any time at will.
Magnet attachment - magnet attachment enables the localization and xing of small ferromagnetic parts
(e.g. made from steel, nickel or cobalt) at places that are hard to reach
Hook attachment - can be used to retrieve small non-metallic items
Mirror attachment - can be used to inspect harder to reach places e.g. around corners
f) Installing “Voltcraft OTG scope” app (on Android device)
The “Voltcraft OTG scope” app is a user friendly Android application which allows you to
perform live inspections, record videos, take pictures and store them on your device. It also
supports playback and other functions. Only basic operations are explained in this manual.
For more details refer to the instructions on the app itself.
• Search and download the “Voltcraft OTG scope” app via the Google Play store. Open the app after
successful installation.
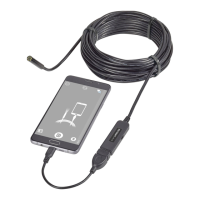
• Connect the USB plug (3) to the USB OTG connection cable (2) and then the other end of the adaptor to
the micro-USB port of your Android device.
g) Using “Voltcraft OTG scope” app
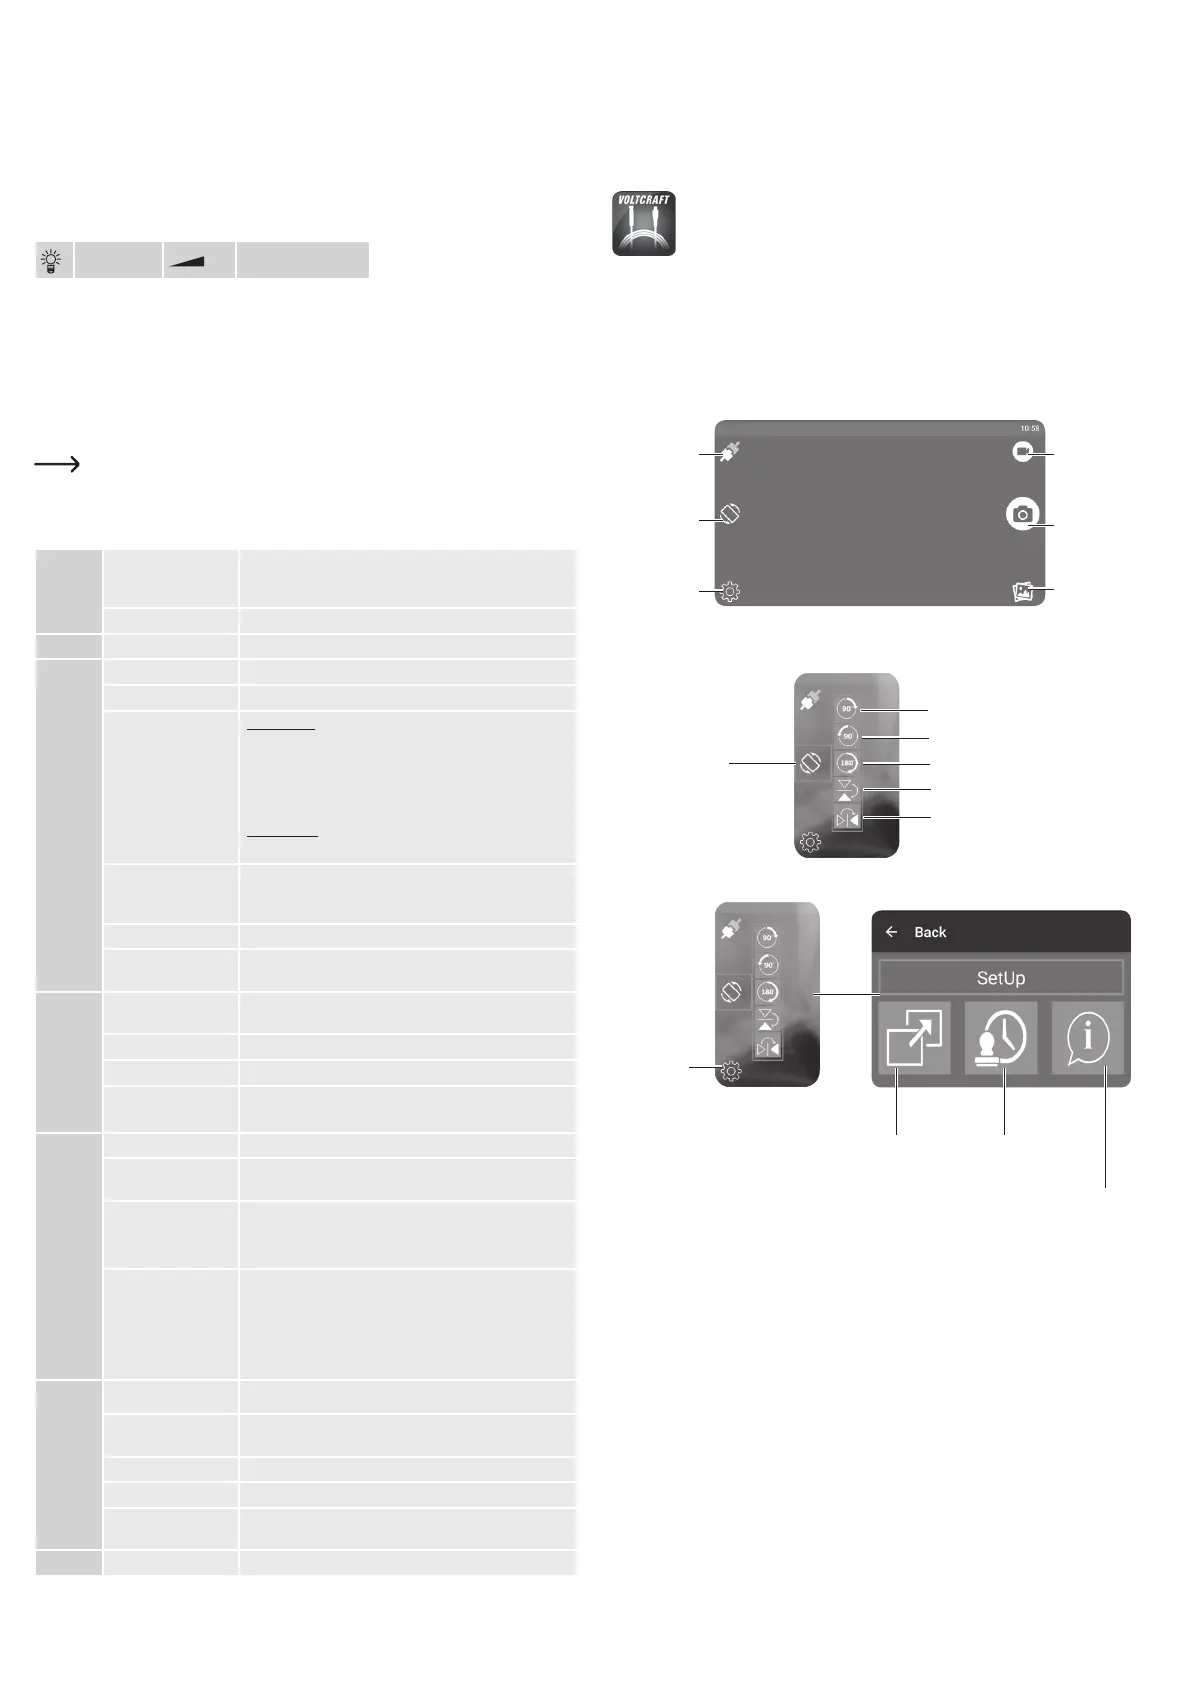
Main screen
Click to switch
the preview
(life streaming)
on/off
Click to toggle
between taking
photos and
recording videos
Click to take a photo
or record a video
Click to open photo /
video gallery
Click to rotate the
image
Click to change
settings
Changing screen angle
Click to rotate image right by 90°
Click to rotate image left by 90°
Click to rotate image right by 180°
Click to ip the image vertically
Click to ip the image horizontally
Click to open screen
rotation menu
Setup menu
Click to open
settings menu
Click to choose video mode (full
screen or framed screen)
Click to activate / deactivate the
photo time watermark
Click to view system
information
Cleaning and care
• Disconnect the USB plug from the computer or any other connected device before cleaning.
• Do not use any aggressive cleaning agents, rubbing alcohol or other chemical solutions as they can cause
damage to the housing and malfunctioning.
• Clean the outside of the product with a soft, dry, ber-free cloth.
• Rinse the camera and USB cable thoroughly in clean water after every use in liquids and dry it before
storing it.
• Do not immerse the USB plug with brightness control knob or USB OTG connection cable in water.
 Loading...