V-ONE USER MANUAL
6
Prepare the Dispenser Assembly
The V-One comes with 2 identical dispensers for the 2 ink cartridges: conductive ink and
solder paste. Be sure the dispenser’s plunger is fully retracted before assembling.
If the plunger is too far out it can push ink out during assembly.
Protect the Nozzle
The golden rule of high quality dispensing is to protect the dispensing nozzle. If the nozzle
tip is dented, bent, broken, or contaminated with dry ink, print quality will suffer. To ensure
optimal performance, follow the guidelines below:
Refrigerate the Inks
If the inks were left out by accident, we recommend that you purge the uid in the nozzle
by manually turning the dispensing gear gently. If no uid is coming out you must replace
the nozzle.
The conductive ink and solder paste must be stored in a refrigerator or a cool place
between 4-10°C (40-50°F), with caps on, to preserve their shelf life. The probe can be
stored at room temperature.
A clogged nozzle can be identied by either no or inconsistent material ow. A clogged
nozzle can be the result of many factors including improper material storage, expired
material, or a damaged nozzle.
Note: Do not try to clear the clog by force. This can puncture the piston in the cartridge.
Before replacing the nozzle, be sure to inspect the clogged nozzle for damage and inspect
the material cartridge for its expiration date.
1. Remove the dispensing cap from the cartridge sheath. Remove the green lids from the conductive
ink cartridge.
2. Insert conductive ink cartridge into the sheath with the ink level visible through the viewing window.
3. Twist the dispensing unit back into the cartridge sheath.
4. Carefully twist the nozzle onto the end of the cartridge.
1. Connect the V-One to your computer with the provided USB cable.
2. Turn on the V-One by pressing the power button.
3. Open the desktop application software.
• Gently wipe the nozzle with a clean tissue to remove material build-up before and after use.
• Always store the dispenser with the tip cap on to prevent accidental damage.
• When removing the tip cap, twist to loosen and then pull straight away from the nozzle.
Run the Software
Note: The V-One may require a rmware update on startup. Do not disconnect or turn off
the V-One during the rmware update!
Maintenance
V-ONE USER MANUAL
7
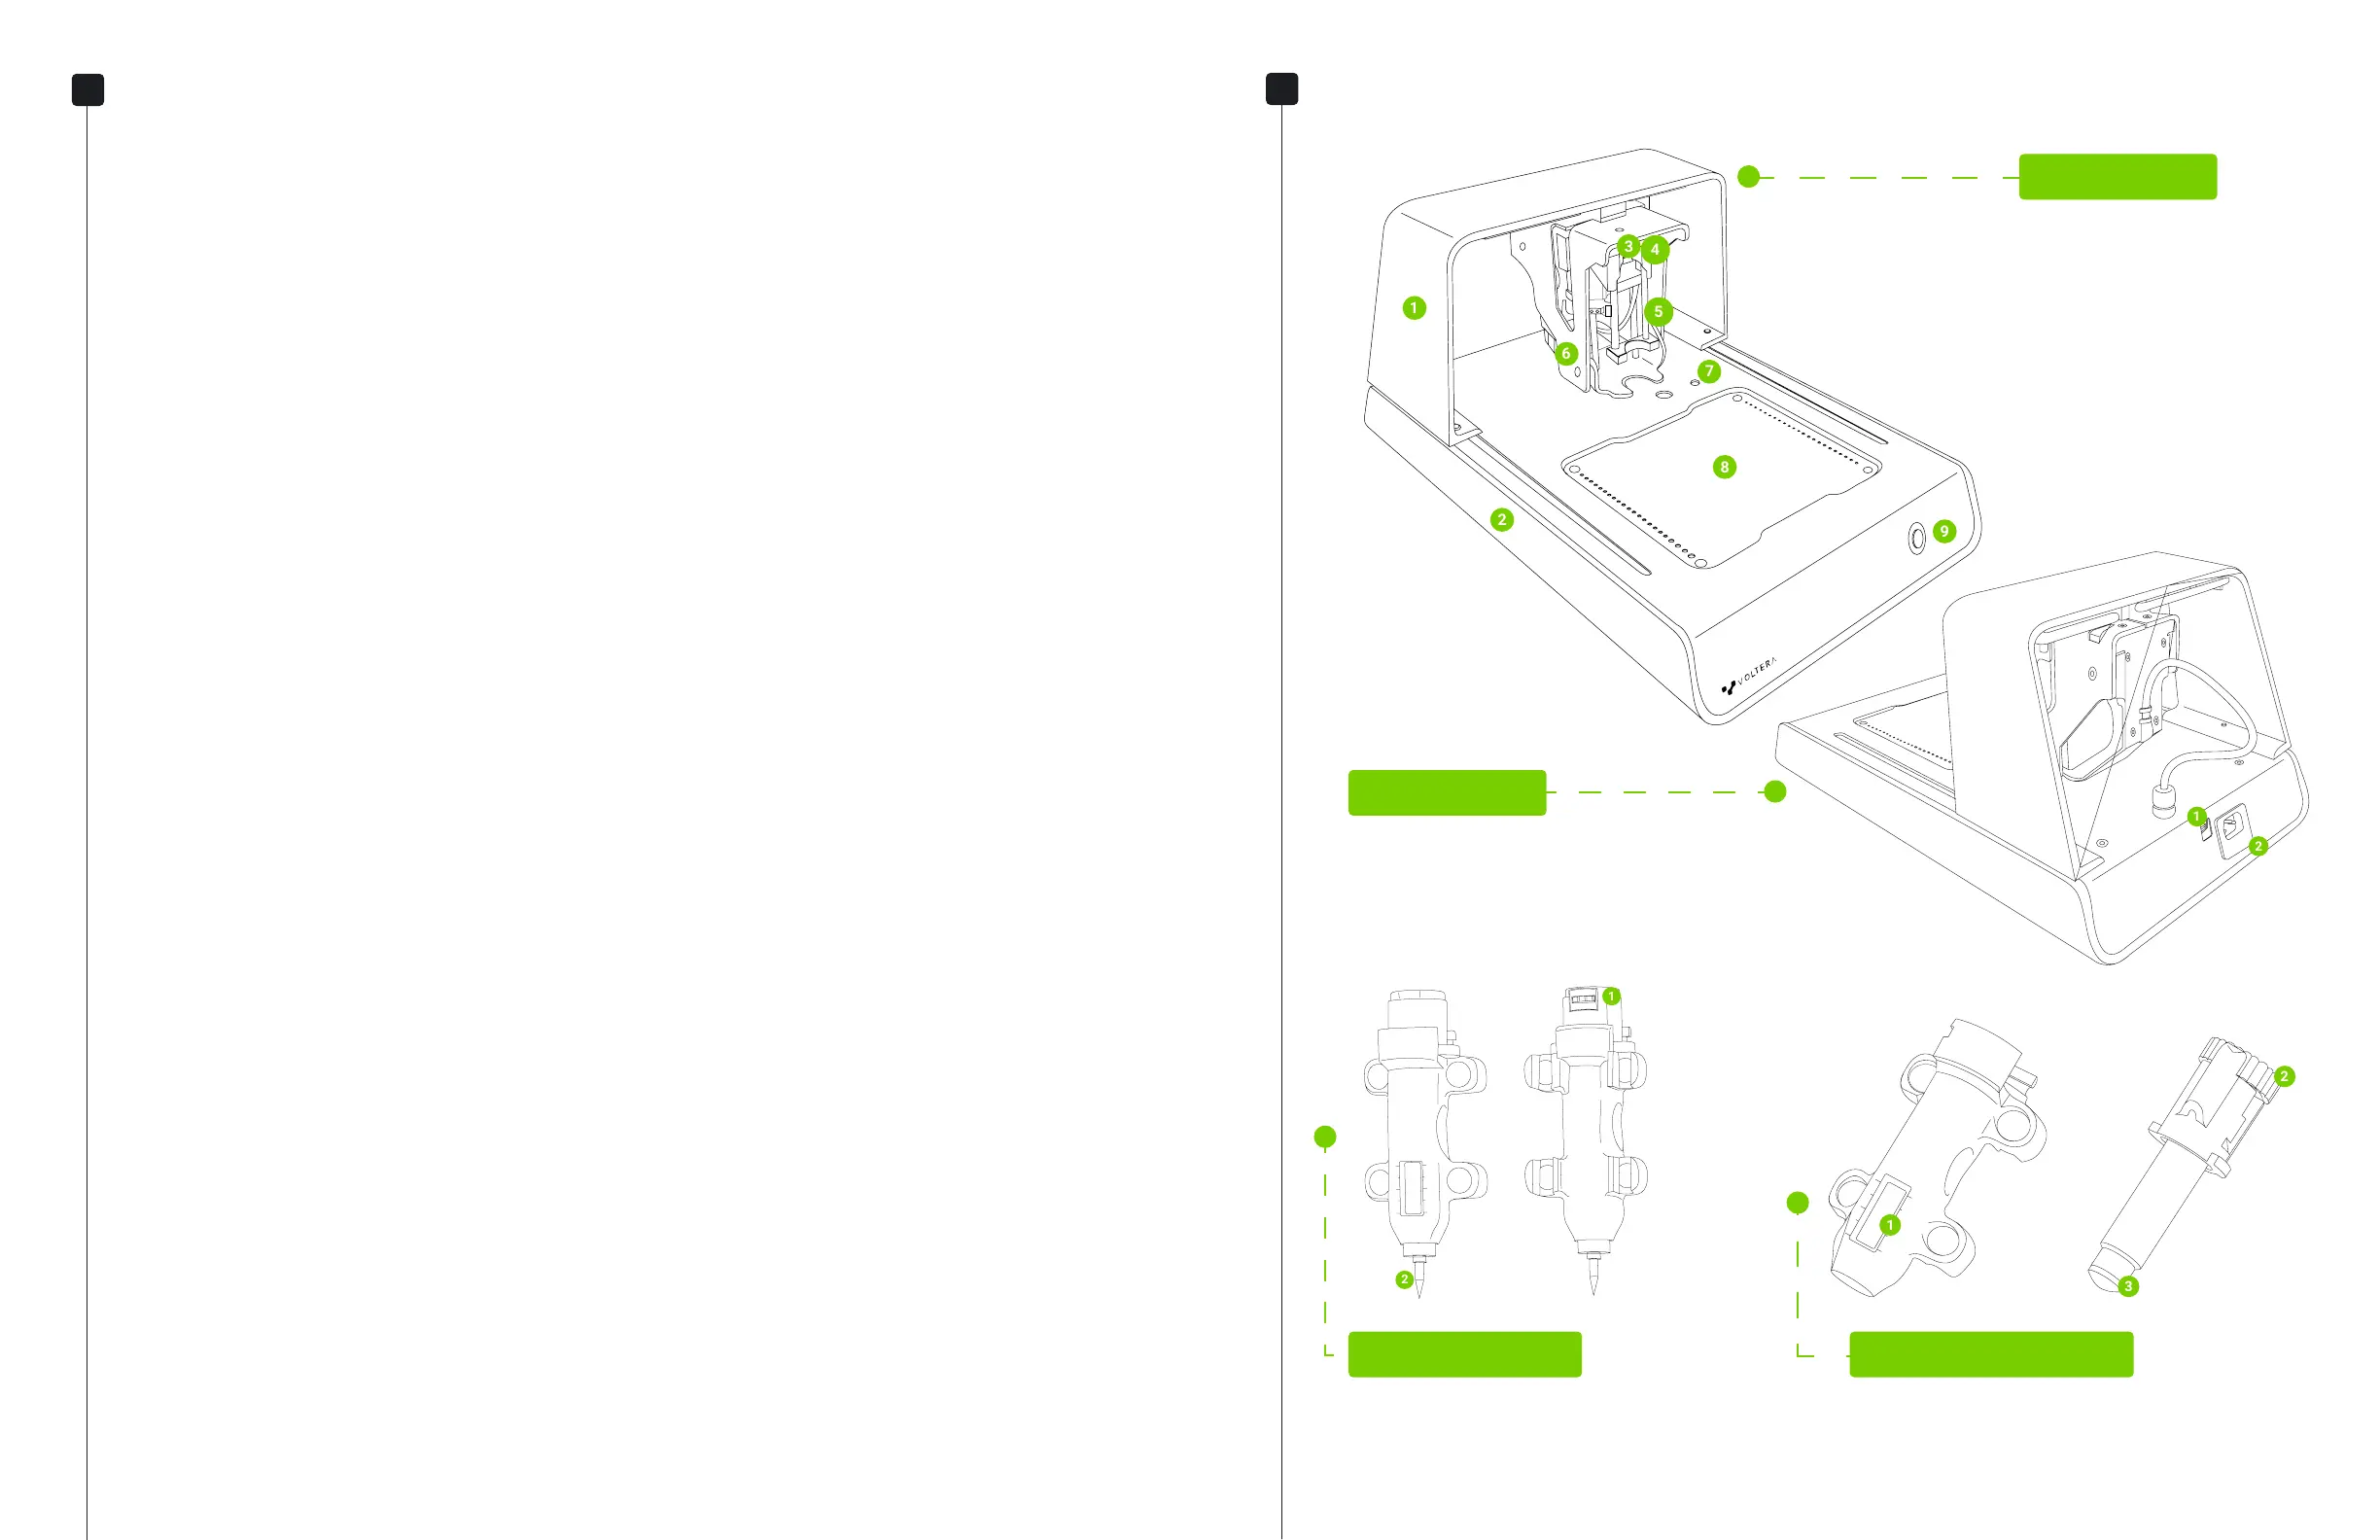
Printer Anatomy
V-One (Front)
1. Bridge
2. Base
3. Carriage Gear
4. Probe Pins
5. Mounting Rods
6. Carriage
7. Calibration Switches
8. Heated Bed
9. Power Button
V-One (Back)
1. USB (Type B)
2. Power (C14 Receptable)
Probe Assembly
1. Contact Pads
2. Probe Tip
Dispenser Assembly
1. Ink Level Window
2. Dispensing Gear
3. Dispensing Plunger
Dispensing Sheath Dispensing Unit