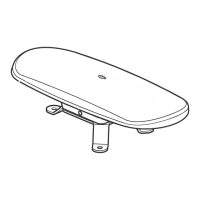
Propeller Replacement
Removing the SX-A Propeller
NOTICE! This “get home” (emergency) procedure will
require you to have tools and spare prop(s) and nuts
on hand.
1. Turn ignition switch to RUN I (key on, engine off).
2. Tilt drive up.
3. Turn ignition switch off O and remove key.
4. Shift remote control into FORWARD to lock prop
shaft.
21181
5. Remove cotter pin 6 and keeper 5.
6. Remove prop nut 4 using a 1-1/16 wrench.
7. Remove thrust washer 3 and prop 2. Ensure that
thrust bushing 1 is not stuck on prop.
8. Clean prop shaft. Inspect for fishing line or other
debris which could ruin the seals; remove if pres-
ent.
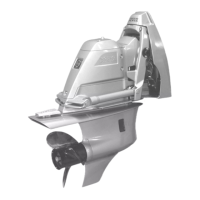
Installing the SX-A Propeller
22864-a
NOTICE! Failure to install all components could result
in loss of propeller and damage to drive unit next time
the boat is operated.
1. Ignition switch must be OFF.
2. Make sure remote control is in NEUTRAL.
3. Coat full length of prop shaft and inside of prop
hub with Volvo Penta prop shaft grease; removal
of prop will be difficult if this is not done.
4. Ensure thrust bushing 1 is on prop shaft with inner
taper toward gearcase to match taper on prop
shaft.
5. Install the prop 2 onto the prop shaft, aligning
splines, and push prop onto thrust bushing until
splines are exposed.
6. Install thrust washer 3 on prop shaft splines.
7. Shift remote control into REVERSE gear to lock
prop shaft.
8. Install and tighten prop nut 4 until it is seated
against thrust washer.
9. Loosen nut, then turn it back against thrust
washer until finger tight. Tighten nut an additional
1/3 to 1/2 turn.
NOTICE! Before your next outing, use a torque
wrench to tighten the propeller nut to
70 – 80 ft. lb. (96 – 108 Nm).
10. Index keeper 5 on prop nut until it is aligned with
cotter pin hole.
11. Install cotter pin 6 and bend ends to secure; use
a new cotter pin if necessary.
12. Shift remote control into NEUTRAL. The prop
should turn freely.
Troubleshooting
120 47701898 12-2010