Service and maintenance
166 Fuel system
168.
Fuel filter/water separator
The frequency of draining water from the fuel filter/water separator
is determined by the contamination level of the fuel. Inspect or
drain the collection bowl daily.
Replace the element every 500 hours or if high restriction causes
a power loss.
NOTE! Dispose of fuel and contaminants in an environmen-
tally safe manner.
Models G710B to G730B
The fuel filter/water separator is mounted between the fuel tank
and the fuel lift pump. It is located in the right-hand engine com-
partment at the front.
To drain water and contaminants:
1 Turn the engine off.
2 Open the vent plug in the filter head.
3 Place a container under the drain valve in the bowl and open the
valve.
4 When all of the contaminates have been drained out of the bowl,
close the drain valve.
5 Close the vent plug and start the engine.
To change the filter element:
1 Turn the engine off.
2 Close the 2 fuel tank shut-off valves. There is one on the supply
line and one on the return line.
3 Remove the lid screws, lid, spring cassette, and filter element.
4 Install a new filter element and refit the spring cassette.
5 Replace the lid gasket.
6 Fit the lid while checking for correct positioning. Insert the
screws and tighten.
7 Prime the fuel system and check for leaks.
Models G740B to G780B
The fuel filter/water separator is mounted between the fuel tank
and the fuel lift pump. It is located in the right-hand engine com-
partment, at the front. There are two fuel filter/water separators
available for the G740B, G746B, and G780B. The standard unit
has an integral primer pump in the filter head. The optional unit
has a larger capacity with a T-handle on the top for easier service.
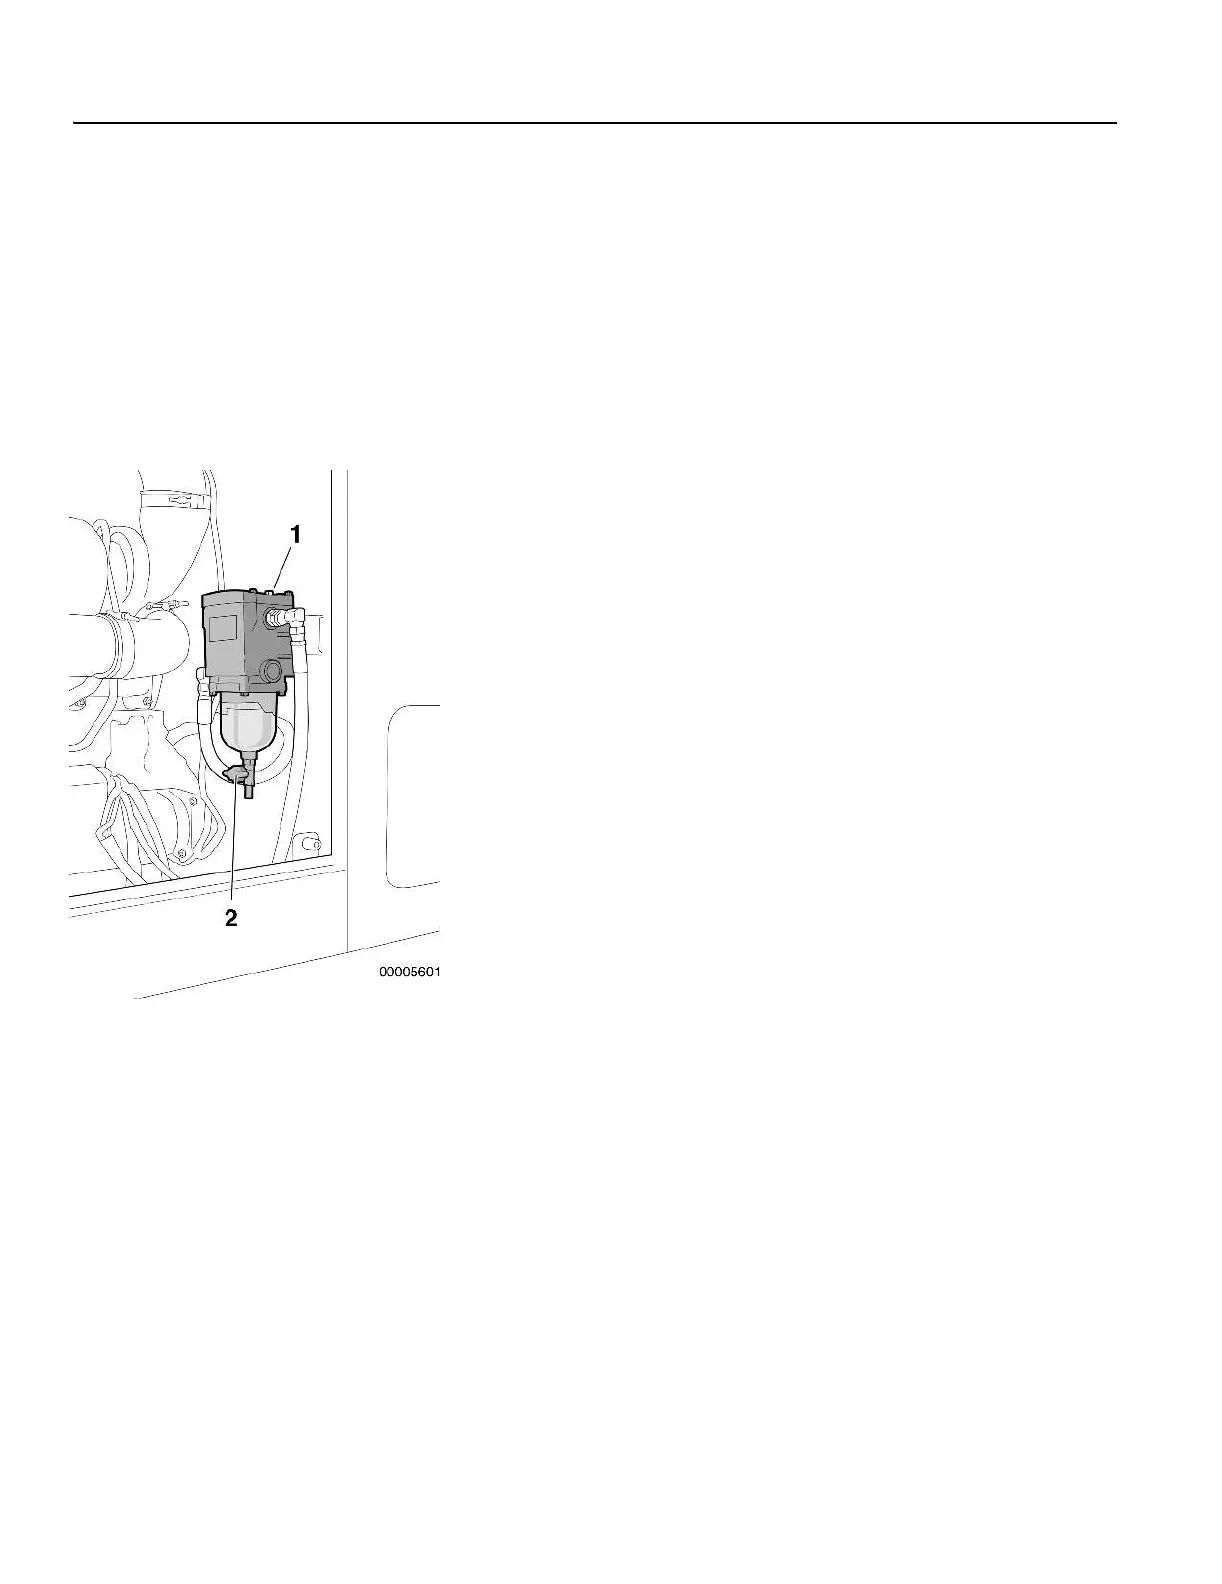
Standard fuel filter/water separator (with integral primer)
To drain water and contaminants:
1 Turn the engine off.
2 Place a container under the drain valve in the bowl and open the
valve.
3 When all of the contaminates have been drained out of the bowl,
close the drain valve.
1 Vent plug
2 Drain valve
 Loading...