ICON USER’S MANUAL: SECTION 3 VIRGINIA PANEL CORPORATION
3-1 For the most current information available, visit www.vpc.com.
6/7/18
ICON RECEIVER MOUNTING
PART # 310 123 101
5.10
129.54
5.39
136.91
.90
22.86
1.45
36.83
.28
6.99
.15
3.68
R
.16
MAX TYP.
4.06
5.
RECOMMENDED PANEL
CUTOUT
TOLERANCES ARE:
.XX =
.01[.25]
.XXX =
.005[.13]
UNLESS OTHERWISE SPECIFIED
FOR MOUNTING USE
[2.79].11 THRU HOLE,
2-56 OR M2.5 METRIC
TAPPED HOLE
(SUPPLIED WITH 4X, 2-56 SCREWS,
LOCK WASHERS & NUTS)
5
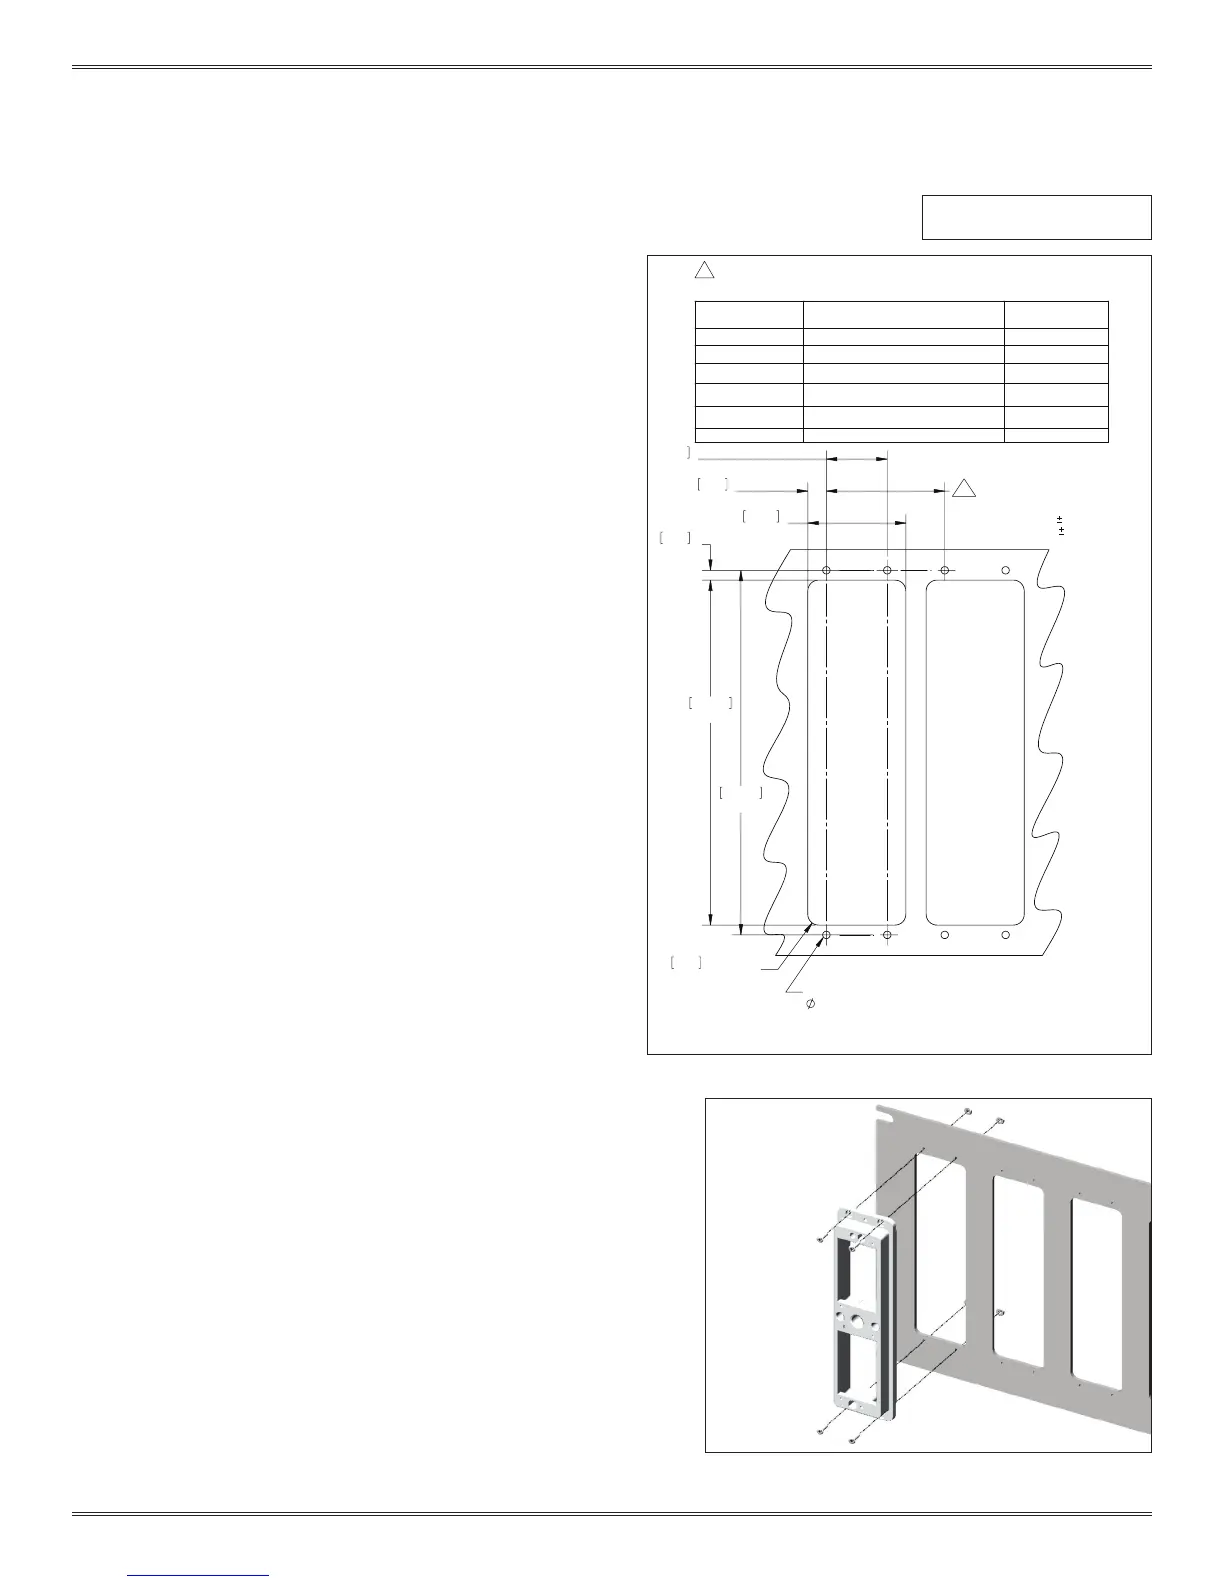
SEE TABLE 1 FOR MINIMUM DISTANCE OF SUBSEQUENT SIDE BY SIDE CUTOUTS.
TABLE 1
PART NUMBER
DESCRIPTION
RECEIVER CUTOUT
SPACING
410123101
ITA, iCon
1.75 [44.45]
410123102
ITA, iCon, EMI-Shielded
2.20 [55.88]
410123106
ITA, iCon, with Large Cable Clamp
2.20 [55.88]
410123111
ITA, iCon, with Threaded Coupling
Adapter
2.20 [55.88]
410123116
ITA, iCon, with Large Cable Clamp,
with EMI Housing and Handle
2.20 [55.88]
410123122
ITA, iCon with Oversized Backshell
2.20 [55.88]
TOOLS REQUIRED
Phillips Head Screwdriver
MOUNTING INSTRUCTIONS
1. Prepare the mounting surface using the dimensions
provided in Figure A.
2. Attach the iCon receiver to the panel with the provided
2-56 Phillips head screws and nuts (Figure B). Torque
screws to 2 in-lbs [0.23 Nm].
NOTE: If the mounting surface is thicker than 0.125” [3.18
mm], longer screws may be needed.
NOTE: If the mounting surface has threaded holes, the
nuts will not be needed.
NOTE: M2.5 hardware can be used in place of the
provided 2-56 hardware.
Figure A. Recommended panel cutout.
Figure B. If you prefer metric hardware, you can replace
the supplied 2-56 screws with M2.5 hardware.
Dimensions shown: [millimeters]
inches
 Loading...