IMPORTANT
Please retain this booklet with your sales receipt as proof of the date of purchase.
Customer Service
If you require assistance in operating this product, please call the TecHelp Information Line on
1300 369 193 or contact VTech by e-mail at: tcpsupport_au@vtech.com.
Voluntary Product Enquiry
In addition to your Statutory Rights and subject to the conditions below, VTech warrants that this product will be
free from any defect in materials or workmanship under conditions of normal use for a period of 24 months from
date of purchase.
VTech does not warrant that the product will be free from defects if defects are caused by an accident, misuse,
abuse, improper installation or operation, vermin infestations, lack of reasonable care, unauthorised modification,
loss of parts, tampering or attempted repair by a person not authorised by VTech; or where the product has been
damaged by lightning or a mains power surge.To make a claim under this Voluntary Product Warranty you must call
the TecHelp Information Line on 1300 369 193 or contact VTech by e-mail at: tcpsupport_au@vtech.com where a
Customer Service Representative will inform you of the product return process. You will need to ensure that:
• You provide proof of purchase;
• Your product is suitably packaged (original packaging is not required); and
• You have included all components from the original purchase.
For your records
Date of purchase:
Place of purchase:
Serial number:
For Voluntary Product Warranty purposes, proof of purchase is required so please keep your receipt.
The benefits conferred by this Voluntary Product Warranty are in addition to other rights and remedies that are
available to you under law, which cannot be excluded. The processes for this Voluntary Product Warranty in no way
limit your rights which arise as a result of your Statutory Rights.
This Voluntary Product Warranty is given by:
VTech Telecommunications (Australia) Pty Ltd ABN 70 136 672 627
Address: 24 Gilby Road, Mount Waverley 3149
IMPORTANT NOTE: THIS IS NOT A PRODUCT RETURN OR SERVICE ADDRESS – PLEASE CONTACT TECHELP BY
PHONE OR EMAIL FOR PRODUCT AND WARRANTY SUPPORT. NO LIABILITY WILL BE ACCEPTED BY VTECH FOR
PRODUCTS RETURNED TO THIS ADDRESS UNDER THIS VOLUNTARY PRODUCT WARRANTY.
Phone number: 1300 369 193
Email address: tcpsupport_au@vtech.com
Statutory Rights
Our goods come with guarantees that cannot be excluded under the Australian Consumer Law. You are entitled to
a replacement or refund for a major failure and compensation for any other reasonably foreseeable loss or damage.
You are also entitled to have the goods repaired or replaced if the goods fail to be of acceptable quality and the
failure does not amount to a major failure.
When you are not going to use the baby monitor for some time, store the parent unit, the baby unit and the
adaptors in a cool and dry place.
Below are the questions most frequently asked about the soother. If you cannot find the answer to your question,
please contact TecHelp on 1300 369 193.
Why does the baby
monitor not respond
normally?
Try the following (in the order listed) for common cure:
1. Disconnect the power to the baby units and the parent unit.
2. Wait a few seconds before connecting power back to the baby units and the parent unit.
3. Turn on the baby units and the parent unit.
4. Wait for the parent unit to synchronize with the baby units. Allow up to one minute
for this to take place.
Why don’t the
power-on light of the
baby unit and parent unit
go on when I switch on
the units?
Perhaps the parent unit is not connected to the power. Insert the appliance plug into
the parent unit and put the adaptor in a wall socket. Then, slide the ON/OFF to
switch on the parent unit and to establish connection with the baby unit.
Perhaps the baby unit is not connected to the power. Insert the appliance plug into the
baby unit and put the adaptor in a wall socket. Then, slide the ON/OFF switch to ON to
switch on the baby unit and to establish connection with the parent unit.
Why doesn’t my parent
unit charge while
connected to AC power?
Make sure the power is not controlled by a wall switch.
Why is my screen in black
and white?
The screen is in black and white during night-time or in a dark room when the night
vision feature is activated. This is normal.
Why do I get glare or
blurry display on my
screen when viewing my
baby at night?
During night-time or in a dark room, the surroundings and other interfering factors,
like lightings, objects, colors and backgrounds may affect the image quality on your
parent unit screen. Adjust the baby unit’s angle or place the baby unit at a higher level
to prevent glare and blurry display.
Why does the baby
monitor produce a
high-pitched noise?
The parent unit and baby units may be too close to each other.
• Move the parent unit away from the baby units until the noise stops; OR
• Turn down the volume of your parent unit.
Why does the parent unit
beep?
The baby units may be out of range. Move the parent unit closer to the baby units (but
not less than 1 metre).
The parent unit may not have enough charge for the parent unit to perform normally.
Charge the battery in the parent unit for up to 11 hours.
The temperature of your baby’s room may be too high or too low.
Why don’t I hear a
sound/Why can’t I hear
my baby cry?
The parent unit speaker volume may be too low. Press VOL to increase the volume, or
use the parent unit menu to change sound sensitivity level to the highest level (level 5).
Why can’t I establish a
connection? Why is the
connection lost every now
and then? Why are there
sound interruptions?
The baby units may be out of range. Move the parent unit closer to the baby units (but
not less than 1 metre).
Other electronic products may cause interference with your baby monitor. Try installing
your baby monitor as far away from these electronic devices as possible.
If you power on only one baby unit, your parent unit may display and the POWER
LED light flashes. Switch to the baby unit you have powered on via menu.
Frequently asked questions
Mount the baby unit (optional)
Storage
Customer service and product warranty
Parent unit overview (Con’t)
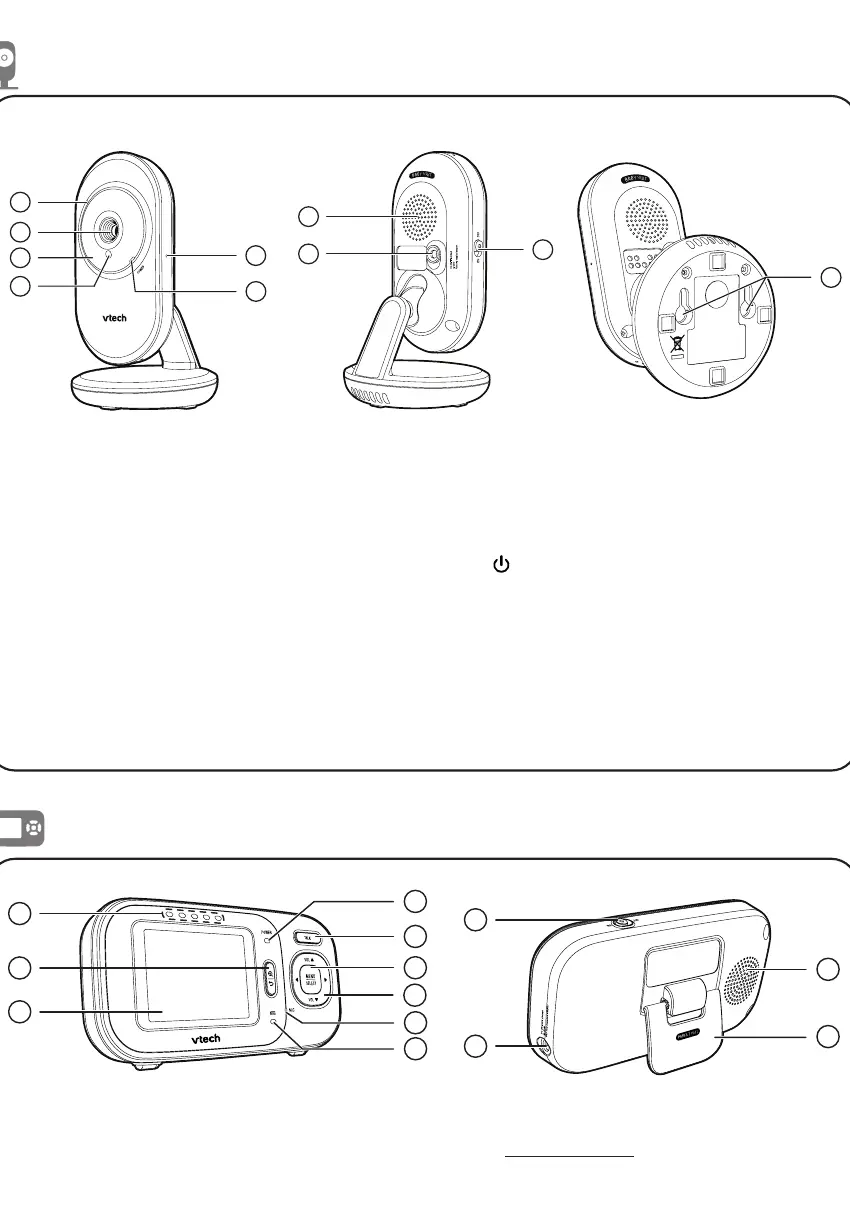
3 MENU/SELECT
• Press to enter or exit the menu.
• While in a sub-menu, press to
choose
an item, or save a setting.
4 Arrow keys and VOL / VOL
VOL /
• Press to increase the parent unit
speaker volume.
• While in a menu, press to scroll up,
or to enter an item’s sub-menu.
• While zooming, press and hold to
move the zoomed image upward.
VOL /
• Press to decrease the parent unit
speaker volume.
• While in a submenu, press to scroll
down.
• While zooming, press and hold
to move the zoomed image
downward.
• While in a menu, press to choose
the next item on the left.
• While zooming, press and hold to
move the zoomed image leftward.
• While in a menu, press to choose
the next item on the right.
• While zooming, press and hold to
move the zoomed image rightward.
5 Microphone
6 Battery indicator
• Red when battery is charging.
• Flashes red when battery is low.
7 Visual sound indicators
The visual sound indicators can show the
sound level detected by the baby unit.
Sound level detected by the baby unit
• One to three
green lights indicate a moderate
sound level detected by the baby
unit.
• Additional red
lights indicate a higher sound level
detected by the baby unit (e.g. baby
crying loudly).
8
Zoom/ back
• Press to zoom in or out while
viewing image.
• Press to return to the previous
screen.
9 LCD display
10 Speaker
11 Stand
12
ON/OFF switch
• Slide to turn on or off the parent unit.
13 Power jack
2
3
4
7
8
9
5
6
10
13
12
11
Status icons
Connection status
• or displays when
strong signal strength is
detected between the baby
unit and the parent unit.
• or or displays when
moderate or low signal strength
is detected between the baby
unit and the parent unit.
• displays when the link
between the baby unit and
the parent unit is lost.
Current view status
• Displays camera when baby
unit successfully linked to
parent unit.
Zoom
• Displays when the current
image on the parent unit has
zoomed in.
Night vision
• Displays when the baby unit
being viewed has activated the
night vision feature.
Mute alert
• Displays when the parent unit
is talking to the baby unit.
or
Real-time temperature
• Displays the real-time
temperature detected by the
baby unit in Fahrenheit (
o
F) or
Celsius (
o
C) (e.g. 57
o
F or 14
o
C).
Battery status
• animates
when the battery is charging.
• displays solid when the
battery is fully charged.
• displays when the battery
is low and needs charging.
Speaker volume
• Displays the parent unit
speaker volume level while
adjusting.
Parent unit icons
Main menu icons
Brightness
• You can change the brightness of
the parent unit screen.
LCD screen off timer
• You can set a specific time to
turn the screen off.
VOX sensitivity
• With this feature, you can
choose to hear sounds from the
baby unit all the time, or to hear
sounds that exceed a certain
level. You can use the parent
unit to adjust the microphone
sensitivity of your baby unit.
The higher the sensitivity level,
the more sensitive the baby
unit is in detecting sounds for
transmitting to the parent unit.
Sound-activated screen
• When the baby unit detects
no sound, the parent unit
screen stays off to save power.
Once a sound is detected, the
parent unit screen turns on
automatically. It will then turn
off again after 50 seconds of no
sound detection.
Temperature
• You can turn on the temperature
alert tone so that the parent
unit beeps whenever the room
temperature detected by the
baby unit falls outside of the
desired temperature range.
You can choose in Fahrenheit (
o
F)
or Celsius (
o
C) as the temperature
format displayed, or set the
maximum/minimum temperature
limit for alerts.
Warning icons and messages
The selected baby unit is out of
range or is turned off.
The battery is empty and needs
to be recharged.
or
The temperature detected by
the baby unit is higher/lower
than the desired temperature
alert range.
The parent unit is searching for
baby units.
The parent unit is connected to
AC power.
Status icons
Main menu icons
Note
• The types of screws and anchors
you need depend on the
composition of the wall.
The baby unit has infrared LEDs that allow you to see your baby clearly at night or in a dark
room. When the baby unit being viewed detects low light levels, the infrared LEDs are switched
on automatically. The images from the baby unit are in black and white, and appears on the
screen.
Notes
• It is normal if you see a short white glare on your parent unit screen as the baby unit is adapting to the
dark environment.
• When the infrared LEDs are on, the images are in black and white. This is normal.
Tip
• Depending on the surroundings and other interfering factors, like lightings, objects, colors and
backgrounds, the display resolution may vary. Adjust the baby unit’s angle or place the baby unit at a
higher level to prevent glare and blurry display.
To keep this product working well and looking good, follow these guidelines:
• Avoid putting it near heating appliances and devices that generate electrical noise (for example, motors or
fluorescent lamps).
• DO NOT expose it to direct sunlight or moisture.
• Avoid dropping the product or treating it roughly.
• Clean with a soft cloth.
• DO NOT immerse the parent unit and the baby unit in water and do not clean them under the tap.
• DO NOT use cleaning spray or liquid cleaners.
• Make sure the baby unit and parent unit are dry before you connect them to the mains again.
Night vision
General product care
The dim mode is to help you save the parent unit power. Your parent unit display will dim
automatically after 10 minutes of inactivity, in which there is neither key pressed nor alert received
from the baby unit.
Notes
• While the screen is dimmed, any keypress or alert message will trigger the screen to return to the preset
brightness level. After 10 minutes of inactivity, it will dim again.
Dim mode
1 Pair hole
• Your baby units and parent unit
provided are already paired.
2 POWER LED light
• On when the baby unit is turned on
and is paired to the parent unit.
• Flashes when the baby unit is not
being viewed;
or when the link to the parent unit is
lost.
3 Microphone
4 Camera
5 Infrared LEDs
6 Light sensor
7
ON/OFF switch
• Slide to turn on or off the baby unit.
8 Speaker
9 Power jack
10 Wall mount holes
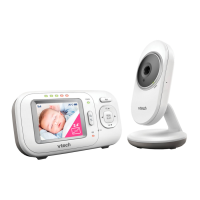
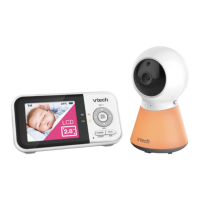
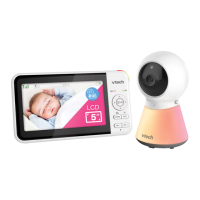
Baby unit overview
Parent unit overview
1 POWER LED light
• Green when the parent is powered
on.
• Flashes green when no link to
camera.
2 TALK
• Press and hold to talk to the selected
baby unit.
2
3
4
7
8
9
5
6
1
 Loading...