Part number 20046, Rev 0
12
DIGITAL MICROPROCESSOR TEMPERATURE CONTROLLER
The digital microprocessor temperature controller is designed to provide on/off control of refrigerators
or freezers. The controller also provides a constant readout of the air temperature inside of the unit. A
touch keypad allows the user to easily select the display units, set point, differential set point, and
heating or cooling mode.
Please Note: The digital temperature controller has been factory set and tested to
allow your unit to operate at its designed temperature cycle. Adjusting the settings on
the controller will alter these factory settings. Please allow the unit to operate at
least 8 hours after the initial startup before making any temperature adjustment. WE
STRONGLY RECOMMEND YOU CONTACT OUR TECHNICAL SERVICE DEPARTMENT
BEFORE MAKING ANY ADJUSTMENTS TO THIS CONTROLLER.
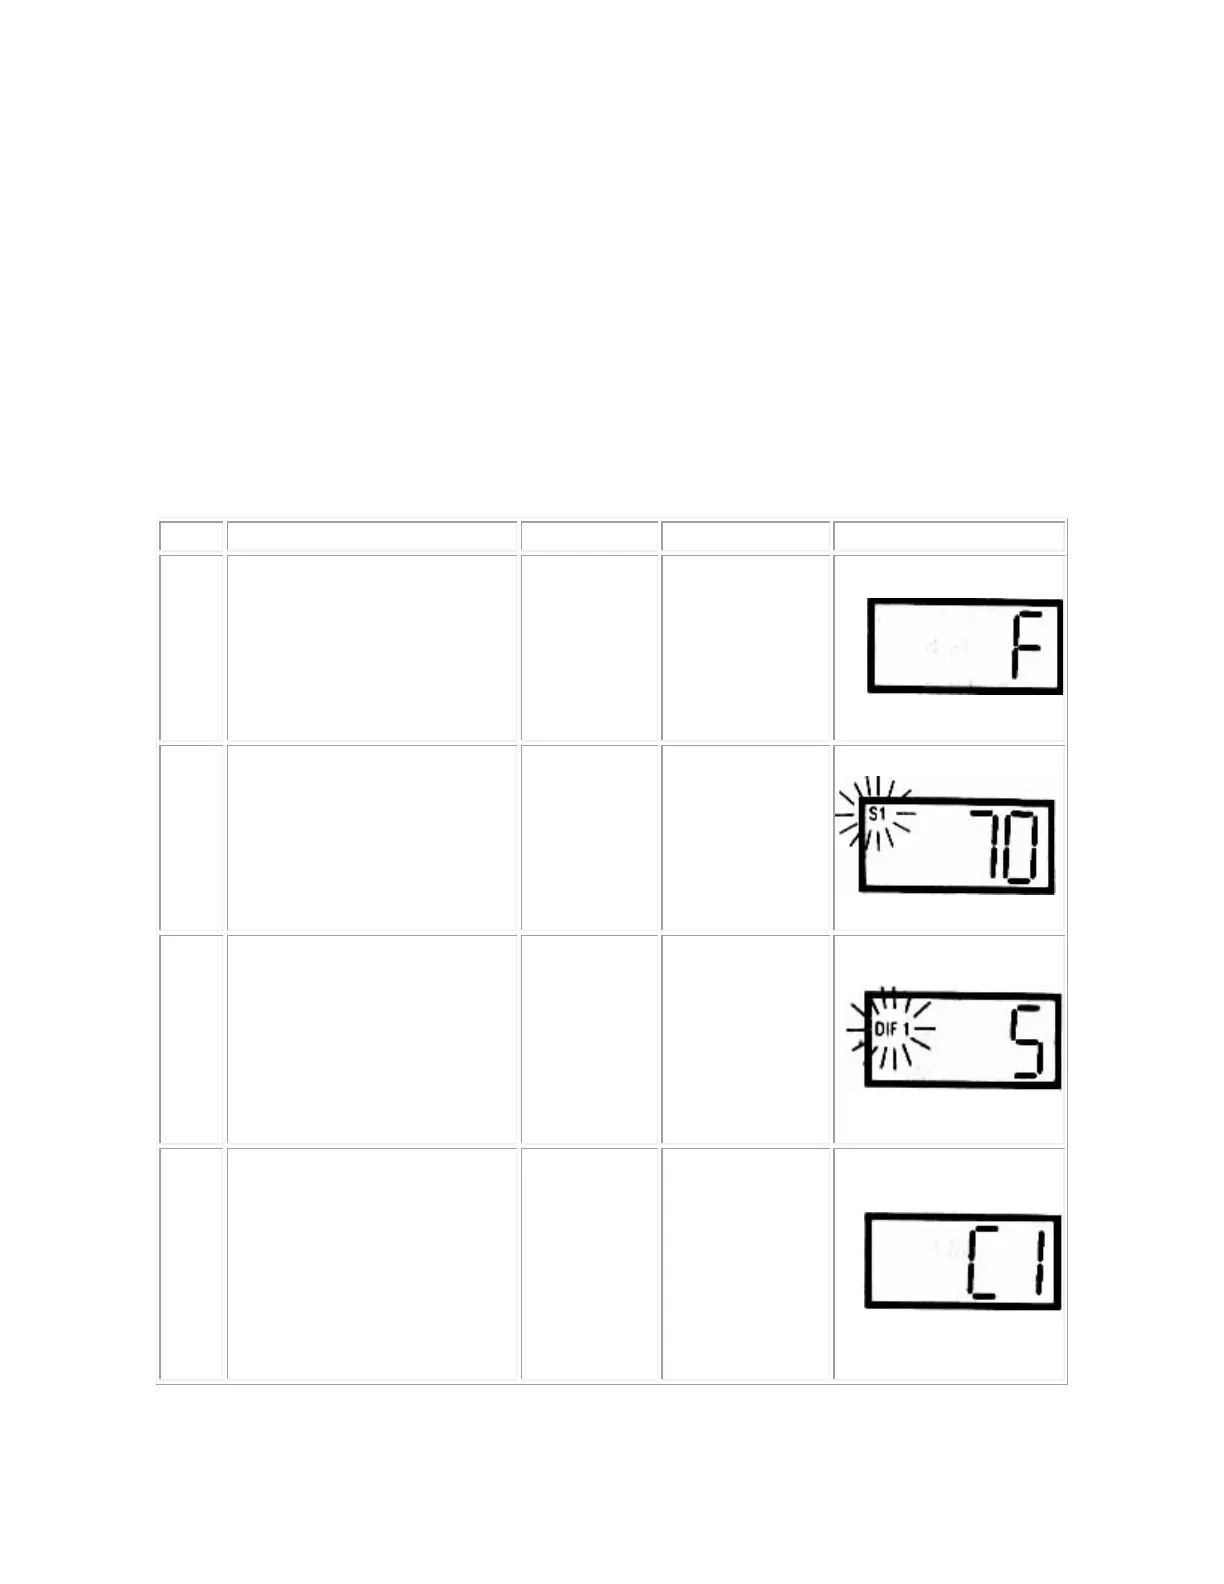
Step
1
To start programming, press the
SET
key once to access the
Fahrenheit/Celsius mode. The
display shows the current
status,
F
for degrees Fahrenheit
or
C for degrees Celsius. Press
either up or down arrow to
toggle between the F or C.
F or C
Fahrenheit or
Step
2
Press SET key again to access
the setpoint mode. The LCD will
display the current setpoint and
S1 will be blinking to indicate
that the control is in the setpoint
mode. Press the up and down
keys to adjust the set point to
the desired setting.
S1 (blinking)
Setpoint
Step
3
Press SET key again to access
the differential mode. The LCD
will display the current
differential and
DIF1 will be
blinking to indicate that the
control is in the differential
mode. . Press the up and down
keys to adjust the differential to
the desired setting.
DIF 1
(blinking)
Differential
Step
4
Press SET key again to access
the cooling or
heating mode.
The LCD will display the current
mode, either
C1 for cooling or
for heating. Then press the
up or down key to toggle
between the
C1 or H1
SET key
once more and programming is
complete.
C1 / H1
Cooling or
mode