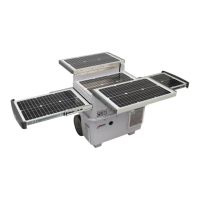
Solar e Power™ Cube 1500 Plus by Wagan Tech
®
English
www.wagan.com
19
• Excessive engine cranking can damage the vehicle’s starter motor. If the engine fails
to start after seven attempts, discontinue the jump start procedure and look for other
problems that may need to be corrected.
User supplied jump start cables can be connected to the high power DC Battery Terminals for
boosting a 12V engine starting battery. Jump start cables are available from most auto parts
stores. Review the Jump Start Warnings above and follow the instructions in sequence for a
Negative grounded system (typical on most vehicles)
1. Review the Jump Start Warnings above
2. Make sure the Solar e Power Cube is fully charged.
3. Turn off the vehicle ignition and all accessories.
4. Make sure the vehicle is in park/neutral and the emergency brake is applied.
5. Make sure the Battery Disconnect Switch is OFF, and the Inverter switch on the control
panel is OFF. Remove any plugs connected to the Accessory Outlets or USB ports.
6. Position the Solar e Power Cube a convenient distance from the vehicle’s battery and
make sure the jump start cables will reach the vehicle battery without coming in contact
with any moving parts of the engine.
7. Remove the covers from the Battery Terminals and place them in the Storage Hatch.
8. With user-supplied jump start cables, securely connect the RED (+) cable clamp to the
red Battery Terminal on the Solar e Power Cube.
9. Connect the other “vehicle” end of the jump start cable’s RED (+) cable clamp to the
positive battery terminal.
10. Connect the BLACK (−) cable clamp to the BLACK (−) Battery Terminal on the Solar e
Power Cube.
11. Connect the vehicle end of the jumper cable’s BLACK (−) cable clamp to the vehicle’s
chassis or engine block. Do not connect the black negative clamp directly to the nega-
tive battery terminal.
12. Turn ON the Battery Disconnect Switch.
13. Allow a few minutes for the Solar e Power Cube battery to trickle charge the vehicle’s
battery.
14. Turn ON the vehicle ignition switch and crank the starter in three-second bursts until the
engine starts.
15. If the vehicle fails to crank after seven tries, disconnect the jump start cables in reverse
order of steps 8–11. Investigate for additional reasons the engine will not start.
16. After the vehicle starts while the cables are still connected, run the motor at fast idle for
5 minutes to fast charge the Solar e Power Cube’s battery. After charging, remove the
jumper cables in reverse of steps 8–11.
17. Turn OFF the Battery Disconnect Switch.
 Loading...