31
Description of parts (Fig. 1)
A. Blade set
B. On/oswitch
C. Charging indicator light
D. Appliance socket
E. Attachment comb small = cutting lengths 3 mm and 6 mm
F. Attachment comb large = cutting lengths 9 mm and 12 mm
G. Cleaning brush
H. Oil for blade set
I. Plug-in transformer
J. Appliance plug
Chargingthebattery
Beforetheapplianceisusedforthersttimeitshouldbechargedfor2hours.
1. Connect the appliance plug (J) on the plug-in transformer to the appliance socket (D) (Fig. 2).
Battery overcharging is prevented thanks to intelligent charge management.
2. Connect the plug-in transformer to the mains socket
3. Switchotheapplianceusingtheon/oswitch(Fig.3b).
•Duringcharging,thechargingindicator(C)ashesatevenlyspacedintervals.Whenthebatteryis
fullycharged,thechargingindicatorashesatadierentrate(16on/1o).
• It should take around 2 hours for the appliance to charge to full capacity
BatteryOperation
1. Switchontheapplianceusingtheon/oswitchandswitchoafteruse(Fig.3a/b).
• When the battery is fully charged, the appliance can be used for up to 100 minutes without mains
connection. This capacity is attained after approx. 5 - 10 charging cycles.
• Insucientmaintenanceofthebladesetwillreduceoperatingtimeconsiderably.
Mains Operation
1. Connect the appliance plug (J) on the plug-in transformer to the appliance socket (D) (Fig. 2).
2. Insert the plug-in transformer into the mains socket.
3. Switchontheapplianceusingtheon/oswitchandswitchoafteruse(Fig.3a/b).
OPERATION
Cutting with the attachment comb
The appliance can also be operated with attachment combs. The following attachment combs are
included as standard:
• Attachment comb small = cutting lengths 3 mm and 6 mm
• Attachment comb large = cutting lengths 9 mm and 12 mm
• The cutting length (in mm) is shown on the attachment comb.
• Oneattachmentcombcanbeusedfortwodierentcuttinglengths.Forthesecondcuttinglength,all
you need to do is remove the attachment comb, rotate and replace.
• The advantage of these attachment combs is that no matter the angle at which you approach the hair,
you always achieve the same cutting length.
Attaching/removing the attachment comb
1. Place the attachment comb onto the cutting edge of the blade set and press it down onto the blade set
into the knobs in the direction of the housing until it clicks into position (Fig. 4a).
2. The attachment comb can be removed by pushing it in towards the cutting edge (Fig. 4b).
Changing the blade set
Removing the blade set:
1. Switchtheapplianceousingtheon/oswitch(Fig.3b)anddisconnectfromthepowersupply.
2. Slidethebladesetothehousinginthedirectionofthearrow(Fig.5a).Removethebladeset.
Replacing the blade set:
1. Replace the blade set by hooking it into the housing. The small lug at the base of the blade should
be aligned with the indent on the clipper casing. Press the blade down until it clicks into position
(Fig. 5b).
BatteryRemoval,DisposalandReplacement
For removal instructions see page 33
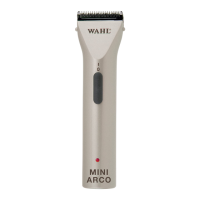
Model: MINI ARCO CORD / CORDLESS DOG TRIMMER - WM6565


 To Next Page