Do you have a question about the Walker Edison BR3DNS and is the answer not in the manual?
Verify all components and hardware are present before starting assembly.
Adhere to each instruction meticulously for correct product assembly.
Assistance from a second person is advised for easier assembly.
Identify the primary hardware components: wood dowels, screws, and bolts.
Apply glue to dowel holes for secure wood dowel placement.
A Phillips head screwdriver is essential for assembling the product.
Refrain from using power tools during assembly to prevent damage.
Insert dowels and glue into specified parts for initial assembly.
Connect frame side panels to the central piece using screws.
Fasten front crossbeams to the side panels with screws.
Secure the top panel to the main body using screws.
Fasten the upper front crossbeam to the unit body with screws.
Attach feet to the unit using screws, glue, and the Allen key.
Attach the back panel to the unit using nails.
Insert dowels into the drawer runner components.
Assemble drawer components, including sides, back, bottom, and knobs.
Insert dowels into drawers and install them into the unit.
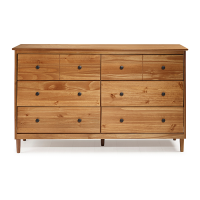
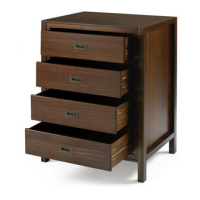
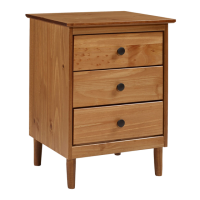
This document outlines the assembly and maintenance instructions for a three-drawer nightstand, identified as Item #: BR3DNS. The primary function of this device is to provide storage and a surface for items in a bedroom or similar setting. Its design incorporates three drawers, offering organized storage space, and a flat top surface that can be used for lamps, books, or other personal items.
The assembly process is designed to be straightforward, though it is recommended that two people work together for ease of construction. The main types of hardware used in assembly are wood dowels, screws, and bolts, ensuring a sturdy and durable final product. A key feature of the assembly is the use of glue with wood dowels, which enhances the structural integrity and longevity of the furniture. Users are instructed to apply a small amount of glue into the dowel holes before inserting the dowels, and to wipe away any excess glue immediately to maintain a clean finish. For subsequent steps involving dowels, glue should be applied to the end of the dowel itself before attachment.
The assembly begins with the construction of the main body of the nightstand. This involves attaching the top panel, right and left side panels, and various crossbeams using a combination of wood dowels and screws. The drawer runners are also integrated into the side panels during these initial steps, which are crucial for the smooth operation of the drawers later on. The back panel is secured using nails, providing a complete enclosure for the main structure.
A notable usage feature of this nightstand is its emphasis on smooth drawer operation. The instructions include a dedicated section on maintenance, specifically for the wooden guide rails of the drawers. This highlights the manufacturer's attention to the long-term functionality and user experience of the product.
Maintenance features are detailed to ensure the drawers continue to glide smoothly over time. The manual recommends applying wax to the wooden guide rails, specifically suggesting bee's wax or paraffin wax from a standard candle. This application should be done by rubbing the wax directly onto the guide rails where wood-on-wood contact occurs during drawer opening and closing. It is important to note that the wax should be at room temperature and not melted onto the wood, as this could affect its performance and potentially damage the wood. This maintenance routine is advised every few months for the first year of use, and then as needed thereafter, to preserve the smooth sliding action of the drawers. This proactive maintenance helps prevent friction and wear, extending the lifespan and usability of the nightstand.
The design of the nightstand includes three drawers, each assembled separately before being integrated into the main body. Each drawer consists of a front panel, left and right side panels, a bottom, and a back panel. The drawer components are secured using screws, and a knob is attached to the front panel of each drawer for easy pulling. The assembly process for the drawers also involves inserting the drawer bottom into grooves, ensuring a secure and stable drawer structure.
The overall design is functional and practical, providing essential storage and surface space. The assembly instructions are clearly laid out with diagrams to guide the user through each step, from attaching the main panels to securing the back panel and assembling the individual drawers. The inclusion of a hardware list with quantities and descriptions, along with a parts list, ensures that users can verify all components are present before beginning assembly. A Phillips head screwdriver is required for assembly, and power tools are explicitly discouraged to prevent damage to the furniture. This emphasis on manual assembly underscores the precision required for proper construction and the delicate nature of some components.
In summary, this device is a three-drawer nightstand designed for storage and display. Its usage features include three smoothly operating drawers and a stable top surface. The key maintenance feature involves regular waxing of the wooden drawer guide rails to ensure continued smooth operation and longevity. The assembly process is detailed and user-friendly, with clear instructions and a focus on careful, manual construction to achieve a durable and functional piece of furniture.
| Product Name | Walker Edison BR3DNS |
|---|---|
| Category | Indoor Furnishing |
| Material | Wood |
| Weight Capacity | 100 lbs |
| Assembly Required | Yes |
| Style | Modern |
| Number of Drawers | 3 |