Installation Instructions
CAUTION!
Risk of a hazardous situation if kit is installed
improperly or modifi ed in any way. Damage to
the machine could result. Read and follow all
installation and setup instructions.
W091
The assembly of the PT322 Kit depends on the 3-point hitch
configuration of your tractor. Illustrations in this document show
typical assembly method. This procedure is one-time only.
Normal 3-point hook up procedure can follow once your 3-point
hitch is set up.
Preparation
• Basic shop tools are required, including 15/16" and 1-1/8"
wrenches and sockets.
• Make sure the tractor and the area around it is clean and
free of debris. Park on dry, level ground with the brake
applied and the engine shut off. Place the PT322 kit on the
ground behind the 3-point hitch.
• Leave backhoe on the shipping skid.
Step 1
• On the backhoe skid, unclip the safety catches (if equipped)
from the backhoe stabilizer arms.
• On the backhoe control valve, push the stabilizer control
levers forward (to allow oil to cycle through the control
valve) while manually pushing each stabilizer arm down.
• Assemble left- and right-hand backhoe brackets (items 8
and 9) to the backhoe. Use 4 each of Z71620 5/8"NC x 2"
(item 18) and Z72261 5/8"NC Locknut (item 23).
• Torque-tighten to 180 lbf•ft (215 N•m).
8
9
1823
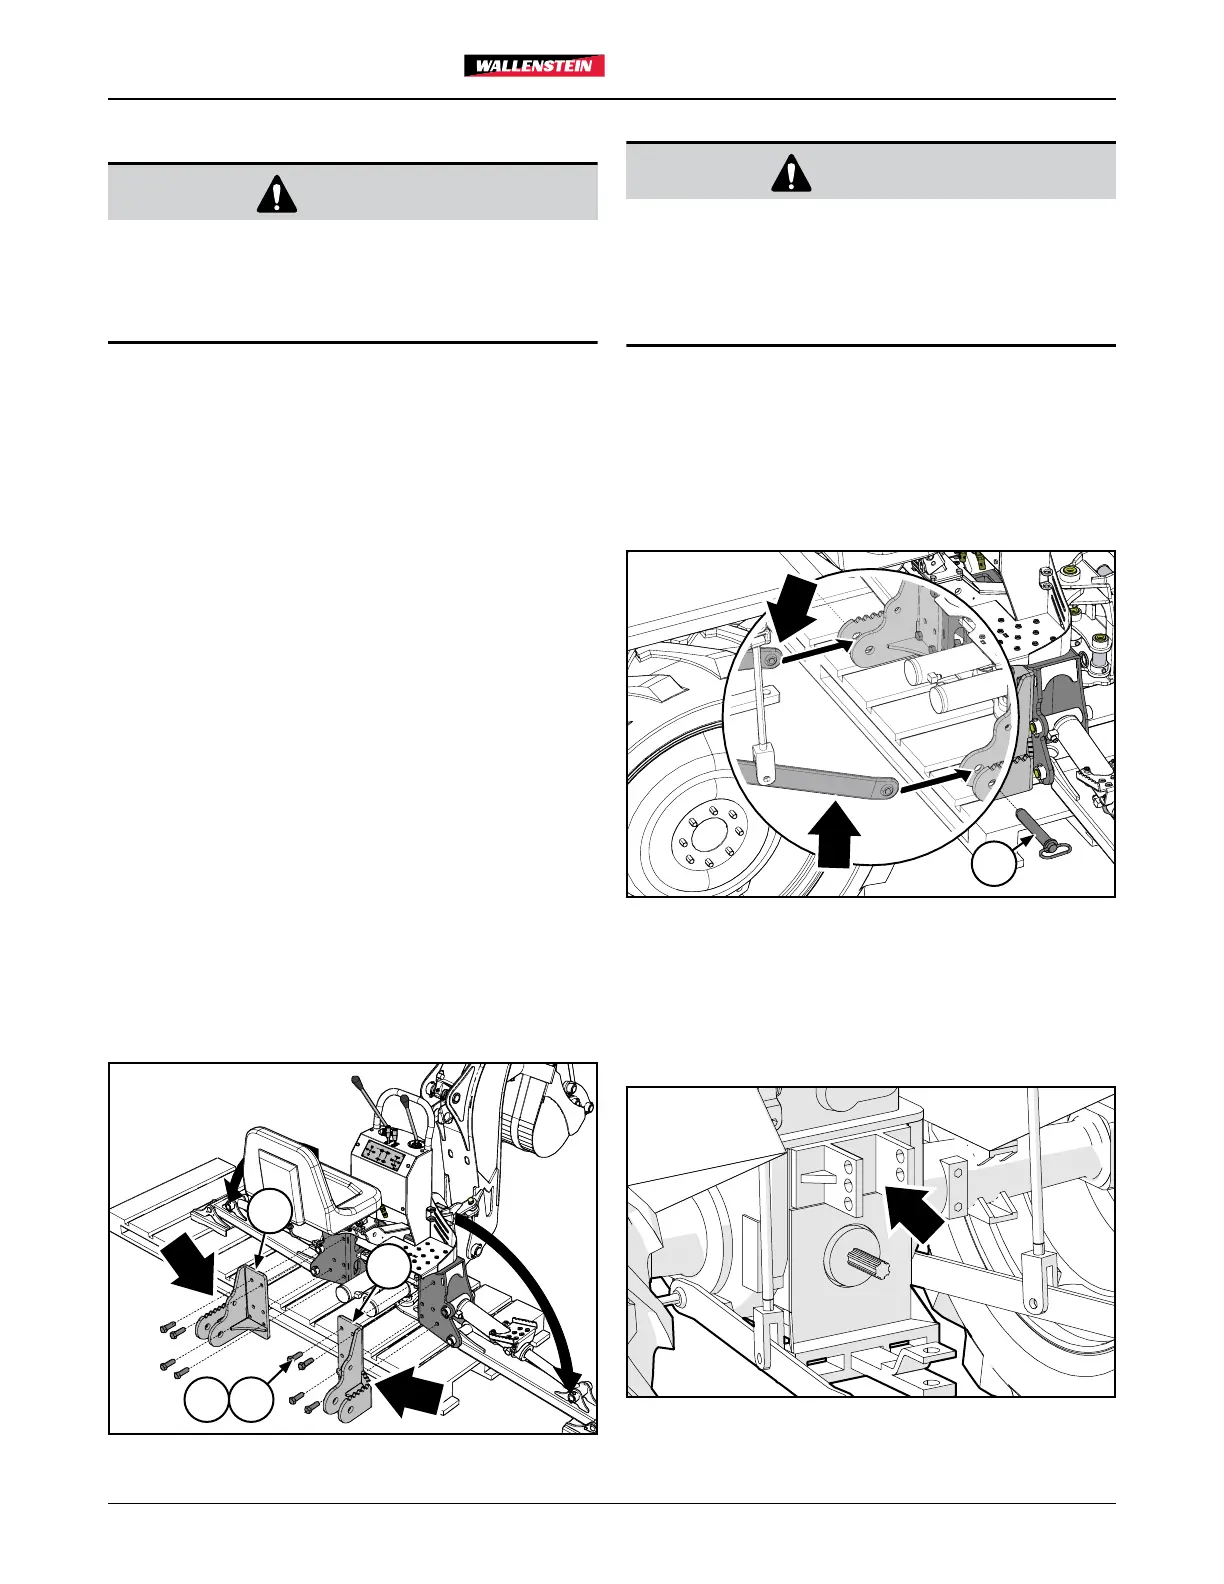
Step 2
WARNING!
Never let anyone stand between the tractor and
the implement during hitching. Too fast of an
approach or the operator’s foot slipping from the
clutch can lead to injury or fatality to the person
standing nearby.
W048
Start the tractor and carefully back up to the backhoe. Attach
the tractor lower lift arms to the left- and right-hand backhoe
brackets. Use Z11271 1-1/8" Hitch Pin (item 14) and Z12250
Hitch Pin Clip (item 17).
Connect the backhoe pressure and return hydraulic lines to the
tractor.
14
Step 3
Remove the tractor's toplink and pin. Check to see if 3042M102
Toplink Bushing (item 5) can fit inside the tractor's top link
mount. If the bushing is too wide, it needs to be cut to fit for
Step 4.
4
PT322
 Loading...