Do you have a question about the WamBam Yard & Pool Vinyl Gate and is the answer not in the manual?
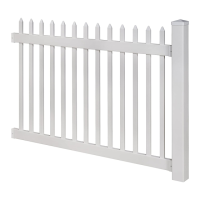
Understand fence instructions before gate installation for integration.
Temporarily assemble the gate frame to check parts, order, and fit.
Install gate posts early for a more forgiving custom fit.
Connect gate hinge post to fence panel for better performance and longevity.
Notes on fence height, gate swing, and latch height for safety standards.
Warning about the gate brace potentially conflicting with pool code as a climbing surface.
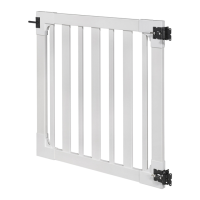
Lists all items included in the gate box and items sold separately.
Provides diagrams and dimensions for gate assembly and installation.
Assemble the bottom rail and vertical stiles using glue and screws.
Insert pickets and assemble the top rail and arch bracket.
Secure the gate frame and brackets by screwing them together.
Attach the gate hinges and latch to the gate brackets using screws.
Assemble the gate brace using bolts, washers, and nuts, then screw it into place.
Position, adjust, and align the gate, then secure hinges to the posts.
Level the gate and adjust the hinges for proper fit and tension.
Align and fasten the gate latch and catch to ensure proper function.
| Brand | WamBam |
|---|---|
| Model | Yard & Pool Vinyl Gate |
| Category | Fencing & Gates |
| Language | English |