9
HANDLING
Before continuing any further with the
installation of this re please read the following:
• Two people should be sucient to lift the
re.
• When lifting always keep your back
straight. Bend your legs and not your
back.
• Avoid twisting at the waist. It is better to
reposition your feet.
• Avoid upper body / top heavy bending.
Always bend from the knees rather
than the waist. Do not lean forward or
sideways whilst handling the re.
• Always grip with the palm of your hand.
Do not use the tips of ngers for support.
• Always keep the product as close to the
body as possible to prevent unnecessary
and undue strain on the body.
• Use gloves to provide additional grip.
• Always use assistance if required.
UNPACKING THE PRODUCT
The unit is supplied in a single package
carton. Carefully unpack the product using the
following procedure:
• Ensure that the product is in the correct
position with the carton wording legible.
• Remove the straps and sleeve.
• Carefully lift the replace out of the box.
• Remove the protective packaging and
bag from the suite.
IMPORTANT:
Always ensure there is enough
room to place it.
Please ensure that there is an accessible
electrical socket within the space for
installation. The electrical socket must not be
behind or above the suite.
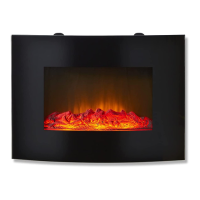
INSTALLATION
This appliance is designed to be permanently
xed to a wall at a minimum height of 30cm.
The wall bracket must be tted horizontally
and the cable routed to the bottom right of the
heater. It is recommended that the distance
between the bottom of the replace and the
oor is of at least 60cm.
To wall-mount the replace, carry out the
following instructions:
1. Using the bracket as a template, mark
ve drill positions on the wall. Make
sure these holes are level. Observe the
recommended xing dimensions.
2. Put the bracket aside and drill holes with a
depth of 35 mm using an 8 mm drill bit.
3. Clean the holes thoroughly and insert one
plug in each hole. Make sure the edge of
each plug is ush with the surface
4. Hold the bracket in position and x it with
screws.
5. Attach the xing angle to the bottom of
the appliance using the short screws.
6. Carefully lift the appliance and hook it to
the wall bracket. DO NOT let go of the
appliance until you are sure it is safely
engaged to the bracket, as this could
cause you physical harm as well as
damage the appliance.
7. Now mark the hole position for xing the
angle. Carefully remove the appliance from
the bracket and once again drill holes with
a depth of 35 mm using an 8 mm drill bit.
8. Clean these new holes thoroughly and
insert one plug in each hole. Make sure
the edge of each plug is ush with the
surface
9. Lift the appliance up again, engage it to
the bracket and x the angle with screws.
IMPORTANT: Do not connect the appliance
until it is properly xed to the wall and the
instructions have been read fully.
Select a location that is not prone to moisture
and is located at least 36” away from any
combustible materials, such as curtain drapes,
furniture, bedding, paper, etc.
 Loading...