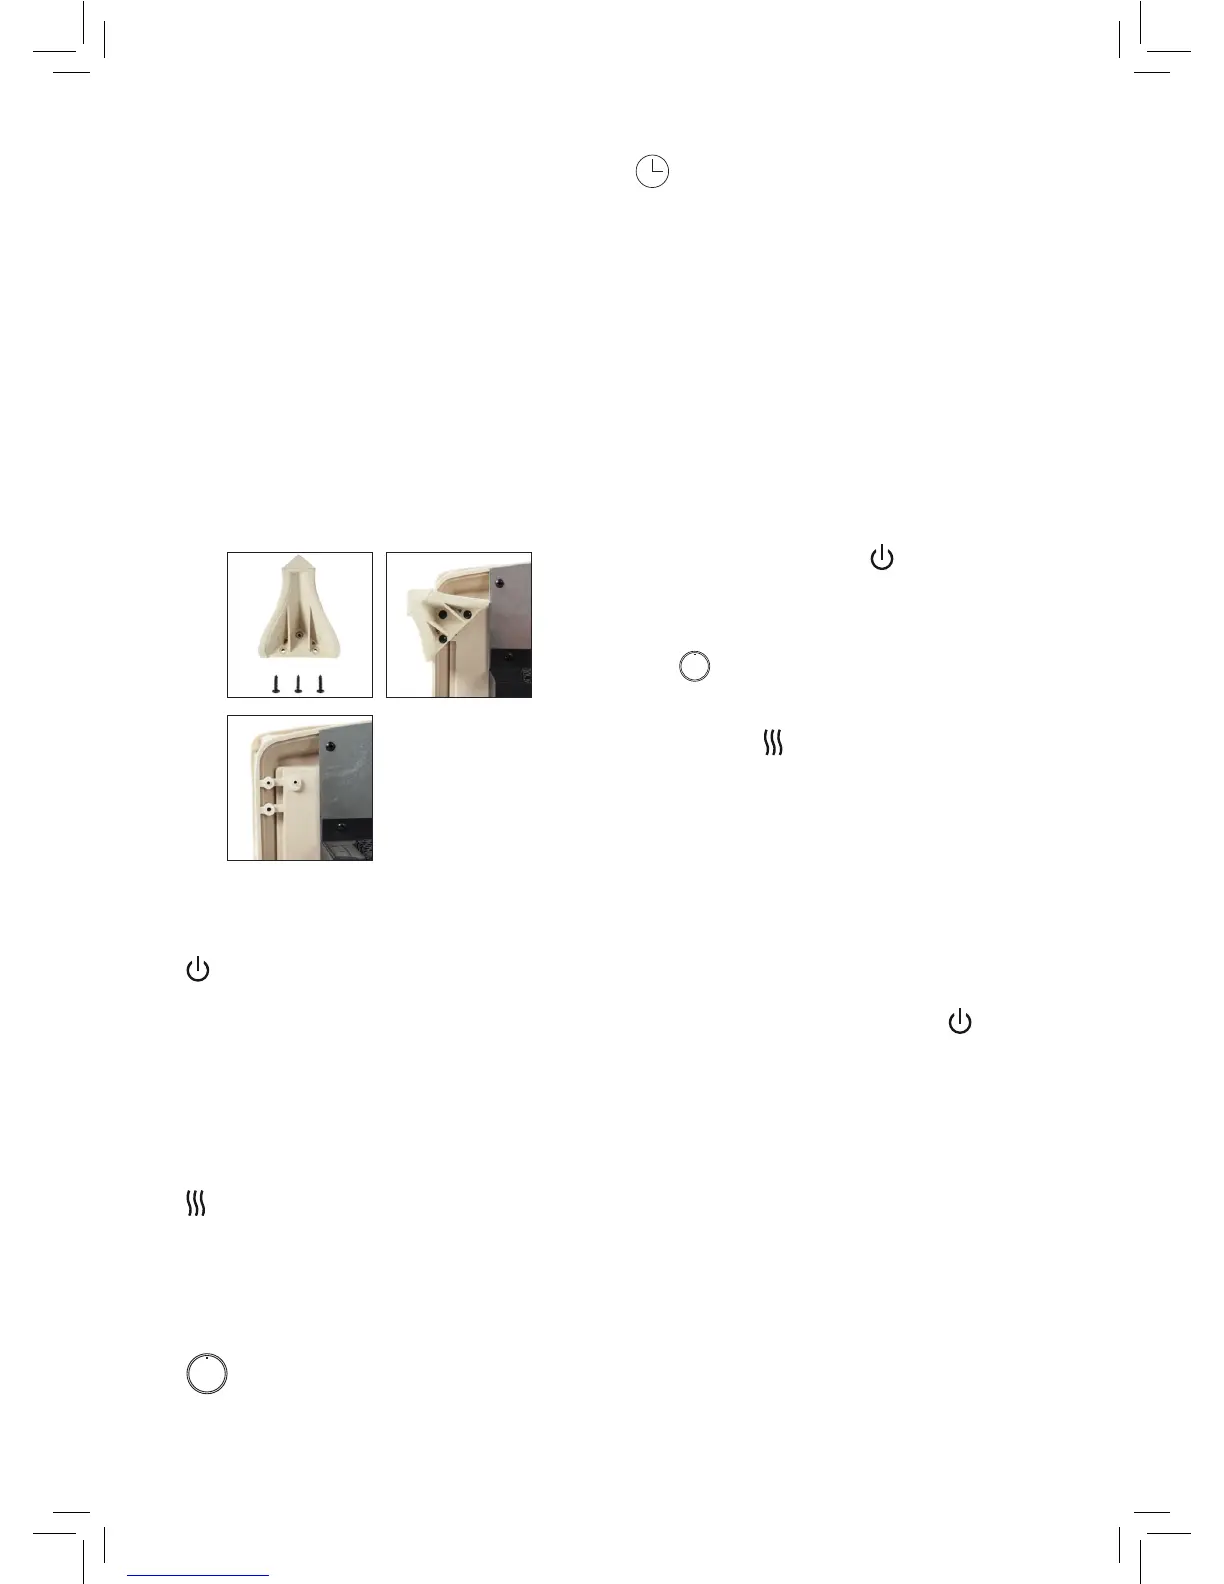
INSTRUCTIONS FOR ATTACHING LEGS
TO MAIN UNIT.
1. Turn product on its side to start attaching
the legs.
2. Place a leg on each corner and use 3
screws for each leg.
3. Tighten the screws clockwise until each
leg is rmly secured.
4. Turn the unit back up to standing position
making sure it is stable.
5. Place the unit in the required location and
plug it in.
CONTROLS
Power Button - Turns the heater
ON/OFF. The heating element will
stop working once the power is
o. The power can be controlled
by pressing the power button on
the control panel or the supplied
remote.
Heat Setting - Use to select the
between two heat settings. Low is
is 1000W and High is 2000W. The
heat setting can also be used to
turn o the heat.
Flame Brightness – Adjusts the
brightness of the ame.
Timer - Press the button to select
the length of time you want the
heater to be on. The timing
sequence is:
(0.5h/1.0h/2.0h/3.0h/4.0h/5.0h/6
0h/7.0h/8.0h)
Note: The maximum time the heater can be on
is 8 hours.
USING YOUR APPLIANCE
1. Plug the heater into the mains socket and
switch it on. Press the
button on the
rear of the appliance or on the remote.
2. On the control panel or remote, press the
to adjust the brightness of the ame
or to turn it o.
3. Press the
button on the remote or on
the heater to toggle between two heat
settings: Low or High.
4. To set the timer, press the timer button on
the control pad or remote control to select
a time between 30 minutes to 8 hours.
Please refer to the timing sequence in the
Controls section.
5. To turn the heater o, press the
button
and unplug the heater from the mains
socket.
OVERHEAT SAFETY FEATURE
This heater is equipped with a overheat safety
feature. When the heater’s internal components
reach a certain temperature that could cause
it to overheat and possibly cause a re, the
heater will automatically shut o.