EasyManua.ls Logo

Warmtec T510 User Manual

Warmtec T510
2 pages
To Next Page IconTo Next Page
Page #1 background imageLoading...
Page #1 background image
V. 1.02
WARMTEC Sp. z o.o., Al. Jana Pawła II 27, 00-867 Warszawa
biuro@warmtec.pl
www.warmtec.pl
1
T510
Weekly Programming Thermostat
with
LCD Screen
Installation Manual
Weekly Programming Thermostat
with
LCD Screen
Weekly circulation,
it is possible to set 6 periods called events
each day with
different temperatures, also you can select
"manual mode" or " temporary
control
mode" according to your individual
requirements. The thermostat is
recommended for
the control of
electric heating devices or on/off valve actuator
used in
water-based heating systems.
Technical data:
Voltage
:
AC230V
(AC110V/AC24V available)
Power consumption
: 2W
Setting range
: 5~90
Limitation range
: 5~99
(factory setting: 35)
Switching differential
:0.5~10
(factory setting:
±1)
Ambient temperature
: -5~50
Protective housing
: IP20
Housing material
: self-extinguishing PC
Daily use of the thermostat
1
on/off " "
2
In the manual mode
press " "
or" "to make temporary control
3
Press" "
or" "
to increase or decrease pre- set temperature.
4
Press" "
and" "and hold for 5 seconds at the same time to adjust
time. Press
" " to choose object to adjust;
Press" "
or " "
to
increase or decrease your set values; Press " " to
confirm and exit.
5
Press the " " key to select manual mode or clock -controlled program
mode.
6
It displays the time or the preset temperature alternately, and it displays
the measured temperature directly.
7
When you press " " and" "at the same time and hold for 5 seconds,
the thermostat will be locked/unlocked. When it is locked, no operation
can be carried out until it is unlocked.
Display symbols
Manual mode
Period control mode
Heating
Getting up, the first period
Out in the morning, the second period
Going home at noon, the third period
Out in the afternoon, the forth period
Going home in the evening, the fifth period
Sleeping at night, the sixth period
Period programming
Press " " and hold for 5s to enter the mode of Period programming.
Key
Period
Symbol
Time
Temperature
weekday
1 06:00
Set the
start/end time
20
Set programmed
temperature
2 08:00 15
3 11:30 15
4 12:30 15
5 17:00 22
6 22:00 15
weeken
d
1
08:00
22
2
23:00
15
Advanced setting (qualified person preferred )
When
the thermostat
is turned off, You can press" "
and turn on it at the
same time ,then you can enter the mode of advanced setting.
Symbol
Setting
or
1
ADJ
Temperature
calibration
Adjust measured temperature
2
SEN
Sensor mode
IN:
built-in sensor
OUT:
floor sensor
ALL:
both sensors
3.
LIT
Limitation
temperature
Adjust
limitation
value,
Limitation range:5
~60
4
DIF
Switching
differential
Adjust switching differential
5
LTP
Antifreeze
function
Turn on/off Anti-frozen
function
6
PRG
Set vacation
mode
00: 5/2 day mode
01: 6/1 day mode
02: 7 day mode
7
RLE
Potential-
free
output and main
power output in
the
same/different
way
Change the present
linkage way
8
DLY
Delay time of
Potential-
free
output
Change linkage delay time
9
HIT
M
ax t
emperature
Limitation temperature
setpoint
AFAC
Reset to
factory
settings
Press" "and hold for 5s
all
parameters will
be reset
Sensor failure:
Please select the right sensor mode when operation, it will display
the
"Err" symbol on screen far sensor failure, thermostat must be
checked till
the fault is eliminated
Explanation of symbols:
Period mode
Antifreeze
temperature
Lock key
heating
power
NTC
Decrease keyIncrease key
Menu
Week
Time
Six period
Manual mode
Dimension:
Unit: mm
86
86
13
43
Question and Answer IconNeed help?

Do you have a question about the Warmtec T510 and is the answer not in the manual?

Warmtec T510 Specifications

General IconGeneral
BrandWarmtec
ModelT510
CategoryThermostat
LanguageEnglish

Summary

Installation Manual

Advanced Settings

Access and configure advanced thermostat settings for qualified personnel.

Temperature Calibration

Adjust the measured temperature calibration for accurate readings.

Sensor Mode Selection

Choose between internal, floor, or combined sensors for optimal control.

Limitation Temperature

Set the upper limit for the temperature to prevent overheating.

Switching Differential

Define the temperature difference for heating/cooling cycles.

Antifreeze Function

Enable or disable the antifreeze protection for the heating system.

Vacation Mode Setting

Configure vacation mode and select day modes for energy saving.

Output Linkage Configuration

Modify how potential-free outputs link with the main power.

Output Delay Setting

Adjust the delay time for potential-free output signals.

Maximum Temperature Setpoint

Set the maximum allowable temperature limit.

Factory Reset

Restore the thermostat to its original factory default settings.

Sensor Failure Troubleshooting

Address "Err" symbol indicating sensor issues and required checks.

Display Symbols Explanation

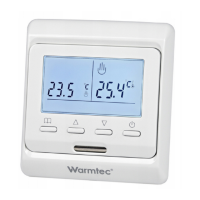
Interpret various icons displayed on the thermostat's LCD screen.

Dimension Specifications

View the physical dimensions of the thermostat in millimeters.

Daily Thermostat Usage

Learn how to operate the thermostat for everyday temperature control.

Manual Mode Operation

Control temperature manually using +/- buttons for temporary adjustments.

Temperature Adjustment

Set desired temperatures by increasing or decreasing values.

Time Setting Procedure

Follow steps to accurately set the current time on the thermostat.

Mode Selection

Switch between manual and programmed clock-controlled modes.

Display Information

Understand how the thermostat alternates time and temperature displays.

Lock and Unlock Function

Secure the thermostat by locking/unlocking the control panel.

Period Programming

Configure the weekly heating schedule with multiple time/temperature periods.

Programming Schedule Setup

Define start/end times and temperatures for six daily periods.

Mounting Steps

Front Cover Removal

Release the front cover by inserting a screwdriver into the bottom crack.

Backing Plate Separation

Take apart the backing plate according to the provided diagram.

Backing Plate Mounting

Mount the backing plate securely in the wall socket using a screwdriver.

Wiring and Reassembly

Connect wires, mount the thermostat on the backing plate, and remount the cover.

Connection Diagram

Illustrates the wiring connections for the thermostat and sensor.