WARMTECH WT01 Instructions warmtech.com.au | 10
FIG. 6&7 – MOUNTING THE THERMOSTAT
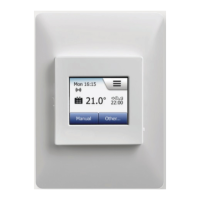
FIG. 8 – OPERATING THE THERMOSTAT
Connect the wires in accordance with the diagram. The wires must be connected as follows:
Term. 1: Neutral (N)
Term. 2: Live (L)
Term. 3-4: Output, max. 16 A
Term. X: Do not connect
Term. 5-6: External floor sensor
1. Mount the thermostat in the wall socket.
2. Fit the frame and carefully press the cover onto the thermostat — starting with the upper part of the cover, then
the lower part of the cover. Ensure that both the power slide button on the cover and the power switch pin in
the thermostat are down.
3. Click the cover into place by applying light, even pressure.
Warning! Do not apply pressure to the corners of the display cover or to the display itself.
DO NOT open the thermostat by releasing the four fixing clips on the back.
FIG. 5 – CONNECTIONS
There is an ON/OFF switch on the left side of the thermostat: UP = ON and DOWN = OFF.
The resistive touchscreen requires a soft tap with your fingertip to register the touch.
Installer Wizzard
The first time the thermostat is connected, push the power slide button to On “I” The Installer Wizard on the
touchscreen will guide you through the set up of:
1. Region
2. Language
3. Date
4. Time
5. Floor Type