Do you have a question about the Warwick RockBass and is the answer not in the manual?
High-quality, sealed, self-lubricating precision tuners (20:1 ratio) ensure tuning stability and low maintenance.
Tuners are slanted towards the player for improved ergonomics and handling. Resistance is adjustable.
Quick access via a cover unlocked by a flat screwdriver, facilitating truss rod adjustments.
Adjust truss rod for slight forward bow. Clockwise tightens (back bow), counterclockwise loosens (forward bow).
Utilizes 'Just A Nut III' for optimal tonal characteristics, fine adjustability, and stability.
Use a 1.5mm Allen wrench. Check string height at the 3rd fret; it should be minimal.
Secure ball end at the bridge. For RockBass, use slotted pins and align with string.
Cut string 8cm behind tuner, insert into post slot. Wind 2-4 times for secure tuning.
Specifications for Warwick Black Label Acoustic Bass Strings (4, 5, 6-string models).
Specifications for Warwick Red Strings Acoustic Bass Strings (4, 5, 6-string models).
For strings thicker than .125", tapered core strings are recommended for proper fit in the ball end holder.
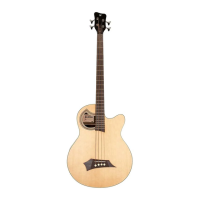
All Alien models feature Fishman Transducer systems. Visit fishman.com or warwick.de for more information.
Unplugging the instrument cable between uses extends battery life.
Details Volume and Tone controls for the Fishman Sonitone preamp on RockBass Alien Standard.
Covers low battery indicator, tuner, volume, EQ (Bass, Middle, Treble), Notch, Brilliance, and Phase controls.
Features a chromatic tuner with flat/in-tune/sharp LEDs. Mutes sound when activated.
EQ controls (Bass, Middle, Treble), Notch Filter, and Brilliance control for detailed sound sculpting.
Compensates for phase shifts, aids in feedback control, and affects tone. Optimize by ear.
Details Notch Filter, battery indicator, Volume, Bass, Contour, Treble, Brilliance, Phase, Contour Frequency, and Tuner.
Semi-parametric filter (250Hz-10kHz) to shape tone via Contour Level and Frequency sliders.
Built-in tuner with LED indicators. Phase switch addresses acoustic phase issues and feedback.
Clean satin-finished bodies with a damp cloth or a non-abrasive spray cleaner for optimal appearance.
Maintain high-polish finishes with damp cloths, cleaners, or polishes to preserve shine and remove scratches.
Sealed necks require minimal care. Fingerboards may need occasional cleaning to prevent roughness.
Easy access via fingernail. Push battery until it clicks. Ensure correct polarity.
Located near output jack. Open with fingernail, insert battery, and close lid. Observe polarity.
Assembly involves thread, ring, and nut. Securely attach to strap holes.
Install at the neck joint where wood is sturdy. Pre-drill a 2mm hole.
Press the button to unlatch the lock, allowing strap attachment or removal.
Contains essential accessories: Trussrod Tool, Warwick Polish Cloth, and Warranty Card.
Standard warranty is 2 years, varying by country. Consult local dealers for specifics.
Contact via email (info@warwick.de, service@warwick.de) or visit official websites for assistance.
| Neck Wood | Maple |
|---|---|
| Number of Frets | 24 |
| Fingerboard Wood | Rosewood |
| Scale Length | 34 inches |
| Hardware | Chrome |
| Bridge | Warwick Two-Piece Bridge |
| Electronics | Active or passive |