EasyManua.ls Logo

Waterway SVL56 User Manual

Waterway SVL56
11 pages
To Next Page IconTo Next Page
Page #1 background imageLoading...
Page #1 background image
OWNER'S GUIDE
INSTALLATION
INSTRUCTIONS
G
ENERAL
D
ESCRIPTION
Crystal Water/Aqua Clean Cartridge Filters are high
performance swimming pool and spa filters.
Manufactured from durable, corrosion-proof
Thermoplastic.They are designed for continuous or
intermittent operation, for installation above or
below the pool water line. For fresh or salt water
swimming pools or spas. Crystal Water/Aqua Clean
Cartridge Filters utilize multiple reusable, reinforced
polyester filter cartridge elements to provide a high
degree of water clarity and long filter cycles with
absolute minimum care.
CRYSTAL WATER/AQUA CLEAN CARTRIDGE
FILTER SYSTEM OWNER'S MANUAL
INSTALLATION INSTRUCTIONS
Descripcion General
Los Filtros Crystal Water/Aqua Clean son filtros para
piscinas de alto rendimiento de filtracion.
Frabricados en materiales PermaGlass durable y
resistentes a la corrosion. Estos filtros han sido dis-
eñados para un uso continuo o intermitente, para ser
instalados por ensima o por debajo de la linea de
agua. Para piscinas y spas de agua fresca o salada.
Los Filtros Crystal Water/Aqua Clean utilizan multi-
ples, reusables, y reenforsables elementos de cartu-
cho en polyester con el fin de proporcionar un alto
grado de limpieza de el agua y cyclos de filtrado
duraderos con un minimo de mantenimiento.
MANUAL DEL
USUARIO
INSTRUCCIONES
DE INSTALACION
Serie Filtro de Cartucho
CRYSTAL WATER/AQUA CLEAN FILTRO DE
CARTUCHO MANUAL DEL USUARIO
INSTRUCCIONES DE INSTALACION
Crystal Water/Aqua Clean
Cartridge Filter System
IMPORTANT SAFETY INSTRUCTIONS
READ AND FOLLOW ALL INSTRUCTIONS
A) Carefully read and follow all instructions.
B) When installing and using this equipment, basic
safety precautions must always be followed. This
filter operates under high pressure. Failure to fol-
low instructions may result in serious injury.
C) Make sure clamp is located properly over the fil-
ter flange. The clamp must be tightened firmly
and evenly until spring coils touch each other
(See illustration step 20, page 6).
D) CAUTION: All suction and discharge valves
must be open when starting the system.
Failure to do so could result in severe per-
sonal injury and/ or property damage.
CAUTION:
We strongly recommend having a qualified pro-
fessional install this product.
PRECAUCION: Recomendamos hacer la instalacion del
producto por un profesional calificado.
INSTRUCCIONES DE SEGURIDAD
IMPORTANTES
A)Lea cuidadosamente y siga todas la instrucciones.
B) Cuando este equipo se instale y se use, deben
tomarse precauciones basicas de seguridad. Este
filtro trabaja a alta presion. Si estas instrucciones
no se respetan, pueden ocurrir daños de
gravedad.
C) Asegurese de que la abrazadera esta colocada
correctamente sobre la pestaña del filtro. La
abrazadera debe apretarse firme y uniforme-
mente hasta que los resortes se toquen entre si
(ver ilustracion paso 20, pagina 6).
D) Atencion: todas las valvulas de succion y
de descarga deben estar abiertas cuando
se arranque el sistema. Si esto no se hace,
pueden producirse lesiones personales
graves y/o daños a la propiedad.
810-0133
Question and Answer IconNeed help?

Do you have a question about the Waterway SVL56 and is the answer not in the manual?

Waterway SVL56 Specifications

General IconGeneral
BrandWaterway
ModelSVL56
CategorySwimming Pool Pump
LanguageEnglish

Summary

Installation Instructions

Important Safety Instructions

Read and follow all instructions. Basic safety precautions must be followed. Failure to follow may result in injury.

Pump Selection and Location

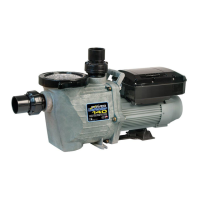
Select a continuous duty pump designed for pool/spa service and determine its location. Consider pump lift ability and output range.

Filter Location

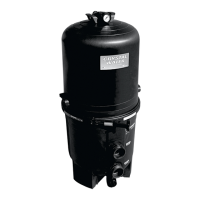
Position filter close to pool, in a well-drained area on a level surface. Ensure clearances and accessibility for operation and maintenance.

Plumbing

Use 11/2", 2" or 21/2" piping. Connections are 2" slip (solvent weld).

Valves

Recommend ball or gate valves for water flow control. Provide valves for backflow prevention when filter is below water level.

Connecting Skimmers and Drains

Connect pool skimmers and main drains to the inlet and return lines to the outlet. Use two or more drains per pump. Install pressure gauge carefully.

Drain Plug and Air Valve

Filter drain plug for complete draining. Manual Air Valve (MAR) aids in bleeding air. Internal auto air vent removes air during operation.

Electrical Connections

All electrical connections must be made in accordance with local codes.

Child Safety Positioning

Position filtration system, pumps, and heater to prevent access by young children as per ANSI/NSPI-4 standard.

Pre-Operation Chemical Balancing

Obtain chemicals and test kit. Balance pool water by adding chemicals per manufacturer's instructions.

Initial Filter Start-Up

Ensure clamp and MAR are secure, drain plug closed. Open air vent screw. Prime and start pump. Close air vent when water stream emerges.

Pressure Gauge Interpretation

Pressure rises as filter collects dirt. Clean filter when pressure increases 8-10 psi above start pressure. Clean more frequently for new/dirty pools.

Cartridge Cleaning Preparation

Shut off pump. Close valves if filter is below water level to prevent backflow before removing cartridges.

Draining the Filter

Unscrew and remove drain plug to drain water. Reinstall plug before refilling. Open air relief assembly (MAR) to assist drainage.

Filter Disassembly

Shut off pump. Loosen spring barrel assembly, then remove clamp and lid to expose dirty elements. Handle clamp carefully to prevent failure.

Removing Cartridges

Remove plug and manifold. Remove cartridges from bottom manifold by rocking gently and lifting up.

Cleaning Cartridge Elements

Clean elements by pressure washing inside and out. Allow to dry, then brush pleated surfaces to remove fine particles.

Advanced Cartridge Cleaning

Soak cartridges in cleaner solution if debris remains. For calcium/mineral deposits, soak in muriatic acid solution (1:10 ratio) with caution.

Reinstalling Cartridges

Flush and drain filter tank. Replace cartridges over manifold assembly. Secure manifold plug into top of cartridges.

Reinstalling Tank Lid

Clean and lubricate O-Ring with silicone. Seat lid on tank, pressing firmly and evenly to ensure proper seal.

Final Start-Up Procedure

Install drain plug, open suction/return valves. Proceed with initial start-up as per step 10 on page 3.

Tank Lid Reassembly and Securing

O-Ring Seating and Clamp Positioning

Ensure O-Ring is seated correctly. Position clamp center segment over tank flanges and bring ends together, inserting T-bolt.

Spring Barrel Assembly and Tightening

Hand-tighten nut with wrench, then use socket/ratchet to tighten. Tap clamp while tightening until spring coils touch.

Periodic Spring Coil Check

Check spring coils monthly to ensure they touch each other. Repeat tightening step if they separate.

Winterizing the Filter

Draining and Cartridge Removal

Drain filter and remove/clean cartridges when sub-freezing temperatures are expected. Remove drain plug to prevent cracking.

General Operation and Maintenance

Pool Chemistry Guidelines

Maintain chlorine 1-3 ppm and pH 7.2-7.6 for sanitization. Imbalanced chemistry promotes algae/bacteria growth and hinders filtration.

Service and Repairs

Consult Authorized Dealer

For service and repairs, consult your local authorized Waterway dealer or service center. No direct factory returns without authorization.

Installing Body O-Ring

O-Ring Placement and Initial Draw

Start at the back, place O-Ring around filter lip, drawing it towards you between thumb and forefinger.

Drawing O-Ring and Avoiding Twists

Continue drawing O-Ring towards you, keeping thumb/forefinger between O-Ring and lip. Ensure O-Ring does not twist.

Final O-Ring Check and Lid Replacement

After finishing, ensure O-Ring is not twisted. Replace the filter lid.

Related product manuals