5. Operation
Controlling the Temperature
Your thermostat has several ways to control your oor warming system. It
is factory set to operate in the program schedule selected but this can be
overridden to meet your needs.
Program Schedule
The thermostat will operate normally in the program schedule selected.
When heat is called for, HEATING will show on the display and
full power is supplied to the oor warming system. This also
signals to turn on any SunStat Relays that may be connected to
your thermostat.
Temporarily Overriding the Temperature
You can temporarily adjust the temperature setpoint as follows. This will hold
until the next scheduled program time:
1. Press the down or up arrow button and hold for 1 second to adjust the
setpoint temperature.
2. Wait 5 seconds and the thermostat will return to the normal operating
mode, saving your adjustment.
3. To cancel this temporary override and return to the normal
schedule temperature, press the HOLD/RETURN button briey.
Hold a Selected Temperature
You can hold the current setpoint temperature indenitely,
especially useful when you are on vacation.
1. Press the HOLD/RETURN button and hold for 1 second. HOLD will show on
the display and the setpoint temperature shown will be maintained until you
cancel this hold.
2. To cancel this hold, press the HOLD/RETURN button and hold for 1 second.
HOLD will disappear from the display.
3. Press Hold/Return briey and the thermostat will return to the
normal schedule temperature.
Setback
You can use the Setback button to override the current setpoint
temperature. This is especially useful if you have an alternate
temperature you repeatedly select when you are away.
1. Press the SETBACK button briey. SETBACK will show on the display and
its temperature. This setpoint will hold until the next scheduled program time.
2. To hold this Setback temperature indenitely, press the HOLD/RETURN
button and hold for 1 second. To cancel this hold, press the HOLD/RETURN
button again and hold for 1 second.
3. To cancel this Setback temperature and return to the normal schedule
temperature, press the SETBACK button briey.
To change the temperature stored in the SETBACK button:
1. Press the SETBACK button and hold for 1 second. SETBACK will show on
the display and its temperature should be blinking.
2. Press the down or up button to adjust the temperature.
3. Press the HOLD/RETURN button or wait 5 seconds and the thermostat will
return to the normal operating mode, saving your adjustment.
Remote Control Override
If your thermostat was installed with Remote Control input from a home
automation system (see section 2 “Installation”), this will override the
thermostat when the remote control system closes its output switch or relay.
SETBACK and HOLD will show on the display and it will operate in the Setback
temperature indenitely. To cancel this, the Remote Control switch or relay
must be opened.
MO
M
A
SET TEMP
LIMIT
FLOOR
°F
MO
°C
AIR
SET TEMP
SET BACK
LIMIT
FLOOR
USAGE
CYCLE
M
A
M
P
M
A
M
P
°C
°F
°C
°F
TU WE TH FR SA SU
HOLD
GFCI
TRIP
HEATING
°F
P1
P2
P3
P4
LOCK
MO
M
A
HEATING
MO
SET TEMP
CYCLE
M
A
°F
HOLD
USAGE
MO
CYCLE
M
A
°F
TU WE TH
FR
MO
CYCLE
M
A
°F
SET BACK
FLOOR
FLOOR
MO
M
A
SET TEMP
LIMIT
FLOOR
°F
MO
°C
AIR
SET TEMP
SET BACK
LIMIT
FLOOR
USAGE
CYCLE
M
A
M
P
M
A
M
P
°C
°F
°C
°F
TU WE TH FR SA SU
HOLD
GFCI
TRIP
HEATING
°F
P1
P2
P3
P4
LOCK
MO
M
A
HEATING
MO
SET TEMP
CYCLE
M
A
°F
HOLD
USAGE
MO
CYCLE
M
A
°F
TU WE TH
FR
MO
CYCLE
M
A
°F
SET BACK
FLOOR
MO
M
A
SET TEMP
LIMIT
FLOOR
°F
MO
°C
AIR
SET TEMP
SET BACK
LIMIT
FLOOR
USAGE
CYCLE
M
A
M
P
M
A
M
P
°C
°F
°C
°F
TU WE TH FR SA SU
HOLD
GFCI
TRIP
HEATING
°F
P1
P2
P3
P4
LOCK
MO
M
A
HEATING
MO
SET TEMP
CYCLE
M
A
°F
HOLD
USAGE
MO
CYCLE
M
A
°F
TU WE TH
FR
MO
CYCLE
M
A
°F
SET BACK
FLOOR
FLOOR
MO
CYCLE
M
A
°F
FLOOR
Air Sensing and Regulator Modes
Your thermostat is factory set to operate based on the oor sensor
temperature. This is the recommended method to properly control your oor
warming system.
However, it is also possible to also operate your thermostat in either the air
sensing mode or regulator mode temporarily if the oor sensor was damaged
or not installed. A new oor sensor should be installed to enable operation
in Floor Sense Mode as soon as possible. These modes must be used with
caution to avoid overheating the oor.
• Air Sensing Mode – This mode operates by an air sensor inside the
thermostat. If your oor sensor is connected, you must set a Floor Limit
temperature to avoid overheating the oor coverings (see Floor Limit
below). Note: the internal heating in the thermostat may affect the sensor
temperature.
• Regulator Mode– In this mode the user selects the amount of time the
oor warming system heats during a 15-minute repeating cycle. There is no
temperature sensing in this mode. (see section 5 “Operation”)
If you want it to operate in the air sensing mode or regulator mode, you may
change this as follows:
1. Press the OPTIONS button and hold for 1 second.
2. Press the OPTIONS button again until SENS shows on the
display.
3. Press the down or up button to toggle this to Air or rEGu. (If
using Regulator Mode, please see details for adjustment within
the Regulator Mode subtopic.)
4. Press the HOLD/RETURN button to return to the normal operating mode.
Floor Limit
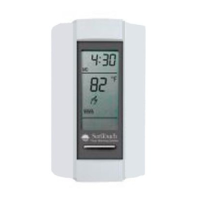
If you set your thermostat to operate in Air Sense Mode, the display will show
the air temperature but will also monitor the oor sensor if it is connected.
To avoid possibly overheating your oor, you must set a Floor Limit temperature
so it turns off the system if the oor sensor temperature exceeds this Floor
Limit. Some wood and laminate oor manufacturers recommend a maximum
of 82 to 84°F (27° to 28°C). Check with manufacturer. It is factory set to 99F
(37C) and can be adjusted as follows:
1. Press the OPTIONS button and hold for 1 second.
2. Press the OPTIONS button again until SET TEMP and FLOOR
LIMIT shows on the display with the current Floor Limit temperature.
3. Press the down or up button to adjust this.
4. Press the HOLD/RETURN button to return to the normal operating
mode.
Calibration
Your thermostat allows the ability to slightly adjust the display temperature.
Normally this is not recommended nor required. However, in special
circumstances this may be necessary, and can be done as follows:
1. Press the OPTIONS button and hold for 1 second.
2. Press the OPTIONS button again until CAL shows on the display
with the current sensor temperature and the current offset value.
The offset value is factory set to zero.
3. Press the down or up button to adjust this.
4. Press the HOLD/RETURN button to return to the normal
operating mode.
SET TEMP
LIMIT
FLOOR
°F
MO
°C
AIR
SET TEMP
SET BACK
LIMIT
FLOOR
USAGE
CYCLE
M
A
M
P
M
A
M
P
°C
°F
°C
°F
TU WE TH FR SA SU
HOLD
GFCI
TRIP
HEATING
°F
P1
P2
P3
P4
LOCK
MO
M
A
HEATING
MO
SET TEMP
CYCLE
M
A
°F
HOLD
USAGE
MO
CYCLE
M
A
°F
TU WE TH
FR
MO
CYCLE
M
A
°F
SET BACK
FLOOR
FLOOR
MO
CYCLE
M
A
°F
FLOOR
MO
M
A
SET TEMP
LIMIT
FLOOR
°F
MO
°C
AIR
SET TEMP
SET BACK
LIMIT
FLOOR
USAGE
CYCLE
M
A
M
P
M
A
M
P
°C
°F
°C
°F
TU WE TH FR SA SU
HOLD
GFCI
TRIP
HEATING
°F
P1
P2
P3
P4
LOCK
MO
M
A
HEATING
MO
SET TEMP
CYCLE
M
A
°F
HOLD
USAGE
MO
CYCLE
M
A
°F
TU WE TH
FR
MO
CYCLE
M
A
°F
SET BACK
FLOOR
FLOOR
MO
CYCLE
M
A
°F
FLOOR
Resetting Factory Defaults
Your thermostat has the ability to reset all programming, settings, and usage
times to the factory defaults. If you are certain you want to do this:
1. Press the OPTIONS button and hold for 1 second.
2. Press the OPTIONS button again until the software version
Soft 1.4 or similar shows on the display.
3. Press the down and up buttons at the same time and hold
for 1 second. Done and rst will show on the display. The
thermostat will go through a startup mode and return to the
normal operating mode.
SmartStart
Your thermostat is factory set with the “SmartStart” feature turned on. The
thermostat automatically determines the best time to begin heating so it
reaches your setpoint temperature at the scheduled time.
If this feature is not desired, you may turn it off:
1. Press the OPTIONS button and hold for 1 second.
2. Press the OPTIONS button again until SSt shows on the display.
3. Press the down or up button to toggle this On or Off.
4. Press the HOLD/RETURN button to return to the normal
operating mode.
MO
M
A
SET TEMP
LIMIT
FLOOR
°F
MO
°C
AIR
SET TEMP
SET BACK
LIMIT
FLOOR
USAGE
CYCLE
M
A
M
P
M
A
M
P
°C
°F
°C
°F
TU WE TH FR SA SU
HOLD
GFCI
TRIP
HEATING
°F
P1
P2
P3
P4
LOCK
MO
M
A
HEATING
MO
SET TEMP
CYCLE
M
A
°F
HOLD
USAGE
MO
CYCLE
M
A
°F
TU WE TH
FR
MO
CYCLE
M
A
°F
SET BACK
FLOOR
FLOOR
MO
CYCLE
M
A
°F
FLOOR

 Loading...