2 / 2
Watts reserves the right to change or modify product design, construction, specifications, or materials without prior notice and
without incurring any obligation to make such changes and modifications on Watts products previously or subsequently sold.
Wiring for On/Off Type
Installation Instruction
Wiring for Modulation Type
0~10V DC
JP1 SWITCH SETTING
Start
V/mA
DA/RA
PCB
Notes
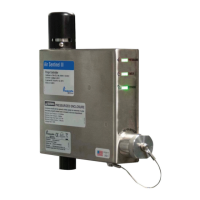
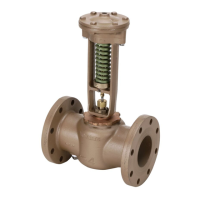
1.The actuator’s screw is preset upwards to the top (position of fully open valve) in the factory, allowing for direct connection with the valve. If
the actuator is electrically tested before installing (for example in the 0V status) and the screw is set downwards to the bottom; the screw
must be set to the top by powering on or manual operation before installation, in order to connect to the valve.
2.Leave enough space over the actuator for easy disassembly and maintenance.
3.The actuator must be protected against water leakage and damage to the internal components.
4. Manual operation is forbidden when the actuator is powered on.
Self-stroking for W-AR2M modulation type actuator: Do not need to disassemble the housing. Press the Learn/Reset Button SW1 on the
shell after the actuator is power on. The actuator will drive the screw downwards and check the position for closing the valve, then upwards
and stop after it returning to the preset position. The self-stroking is completed and the actuation will automatically enter the operation
status. The MCU (chip) will automatically save the parameters during the self-stroking and the parameters will not be lost after powering off.
Control signal and status shift of W-AR2M modulation type actuator: Disassemble the housing by straight screwdriver. Set the JP1 switch
(refer to the table above) correctly according to the required functions after powering on. Then press the SW1 Learn/Reset button. The
indicator light flashes in the Learn status, the actuator will drive the screw downwards and check the position for closing the valve, then
upwards and stop after returning to the preset position. The indicator light stops flashing and is on after self-stroking is completed. The
actuation will automatically enter the operation status.
W-AR1S
4
4~20mA DC
SW1
LED1
OFF
SW2
ON
JP1
2~10V DC 0~ 20mA DC
OFF
0%=
100%=
RA
0%=
100%=
DA
ON OFF ON OFF ON OFF ON
OFF ON OFF ON OFF ON OFF ON
M M
5mm
Cut 0ff The Power Supply Before Manual Operation
Mode
Ctrt Signal
SWITCH 1=V/mA
CONTROL SIGNAL
VOLTAGE(OFF)
CURRENT(ON)
SWITCH 2= DA/RA STATUS
DA(OFF)/RA(ON)
SWITCH 3= CONTROL
SIGNAL START SETTING
0V/0mA(OFF); 2V/4mA(ON)
STUDY/RESET BUTTON
INDICATOR LIGHT
ACTORY
PRESET
AC 24V
POWER & SIGNAL COMMON
SIGNAL INPUT 0(2)~10V DC
(0)4-20mA DC
FEEDBACK OUTPUT O~10V DC
INPUT CONTROL SIGNAL
RA STATUS
0V
10V
SCREW
ACTUATOR
DOWNWORDS
UPWARDS
W-AR2M
AC 110~240V
L
N
(Red)
(Blue)
(Blue)
(Brown)
(Yellow)
(Green)
1 2 3 4
W-AR-EN-2007

 Loading...

![Preview: Watts AERCO Edge [ii]](https://data.easymanua.ls/products/808371/200x200/watts-aerco-edge-ii.webp)