8
STEP 8
LUBRICATING AND ADJUSTING THE GUIDES
Lubricate the insides of guides with weather resistant lubricating spray. Move the door up and down to check for
proper operation. Adjust the guides if necessary to allow for proper clearance and operation.
If door is difficult to move up or down due to spring imbalance, continue
on to STEP #9 and return to STEP #8 once springs are properly adjusted.
STEP 9
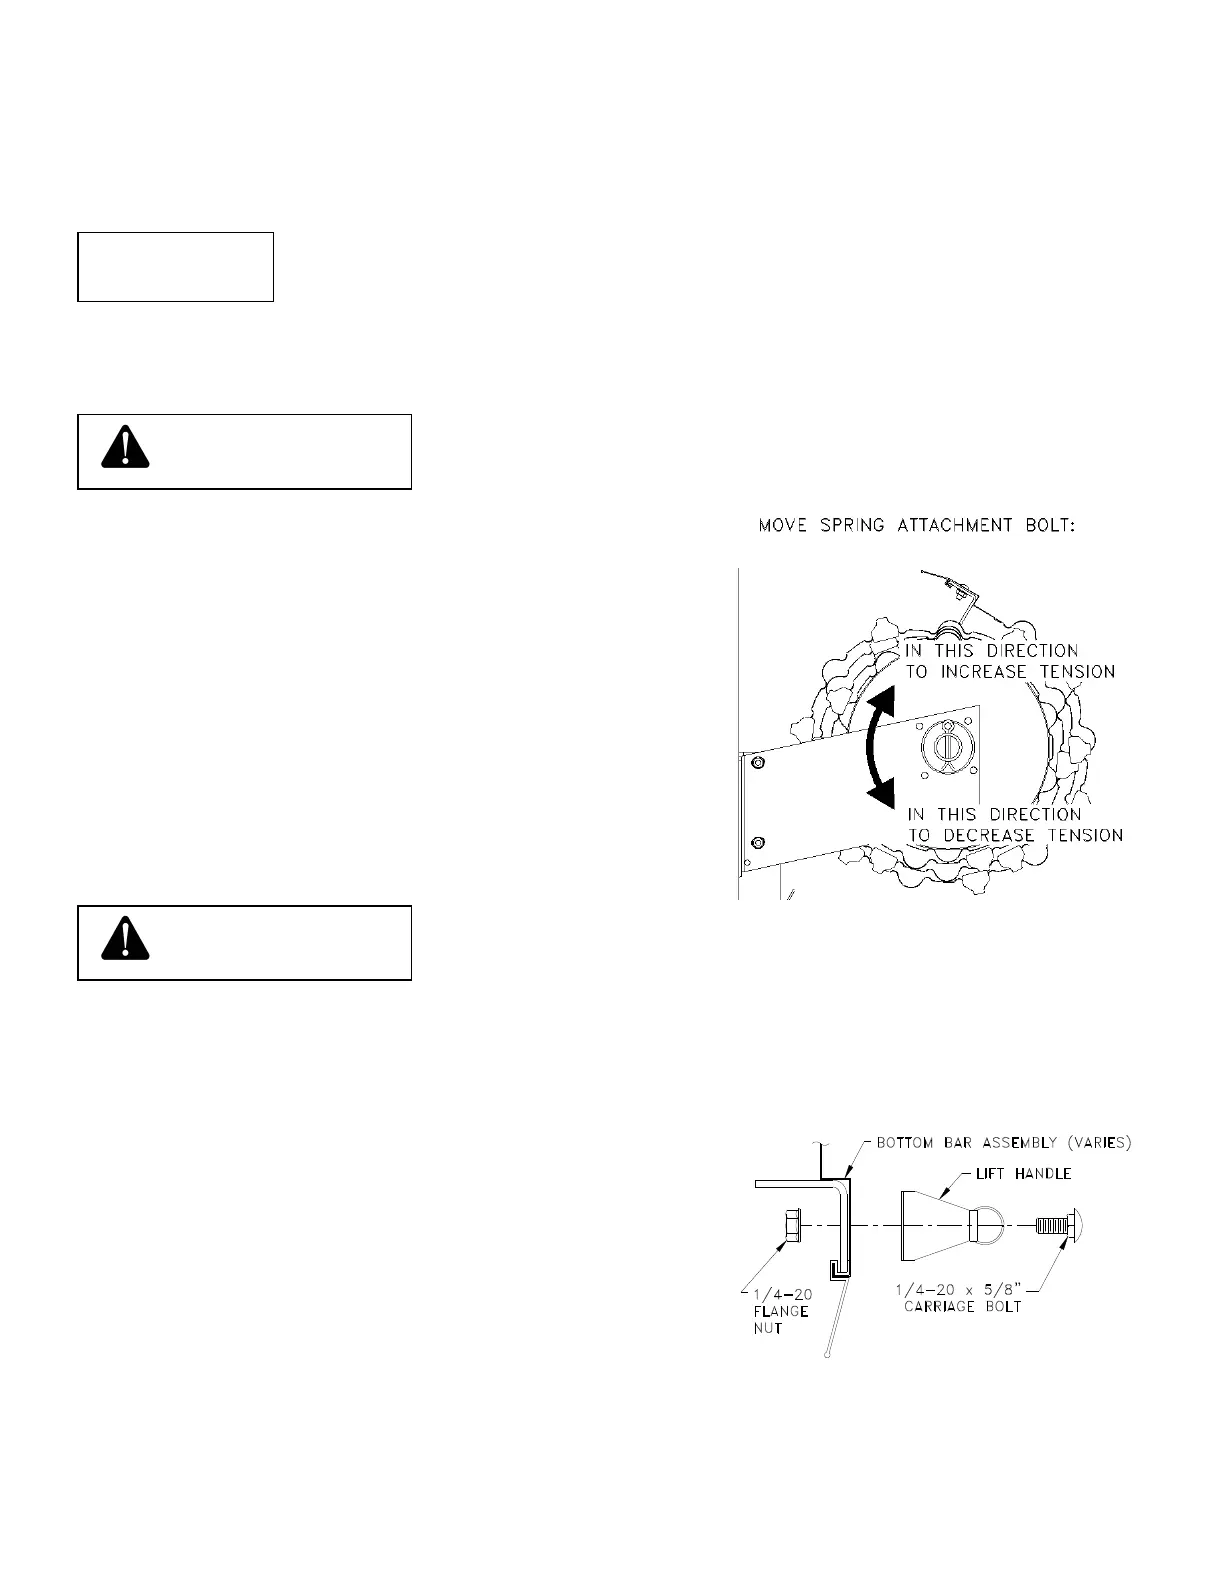
CHECKING AND ADJUSTING SPRING BALANCE
Spring tension can cause curtain assembly to rotate rapidly,
possibly resulting in severe or fatal injury. To prevent such
injury, securely hold curtain assembly to prevent rotating.
Move the door up and down to check for proper spring tension. If
the door lowers easily and raises hard, more spring tension is
required. If the door lowers hard and raises easily, less spring
tension is required. If a tension adjustment is necessary, secure the
door in position and remove the bottom bar stops. Carefully roll
the curtain all the way up without letting go of the bottom bar. Tie
a rope around the curtain roll and slowly rotate the curtain roll in
the opposite direction as tension was applied until spring is neutral.
Change the location of the spring attachment bolt in the required
direction as shown. Repeat STEPS 6, 7, 8, and 9. See STEP #12
for Tension-Pro™ bracket spring tension adjustment.
Securely hold curtain assembly until bottom bar stop fasteners
have been tightened. If not securely held, curtain could rotate,
possibly causing severe or fatal injury.
STEP 10
INSTALLING LIFT HANDLE, STOP CLIPS AND OPTIONAL SLIDE BOLT LOCKS
Install a lift handle in the center of the bottom bar using 1/4-20 x 5/8”
carriage bolts and flange nuts, placed so the nut is on the coil side, or
inside of door as shown. If the opening width is greater than 5 foot
and the door does not have slide bolt locks, install a second lift
handle on the right hand side of the bottom bar (outside looking in).
Install 1/4-20 x 5/8” carriage bolts and flange nuts in all remaining
bottom bar holes.
WARNING
WARNING
 Loading...