9
WARNING:
DO NOT RUN OPENER UNTIL INSTRUCTED TO DO SO!
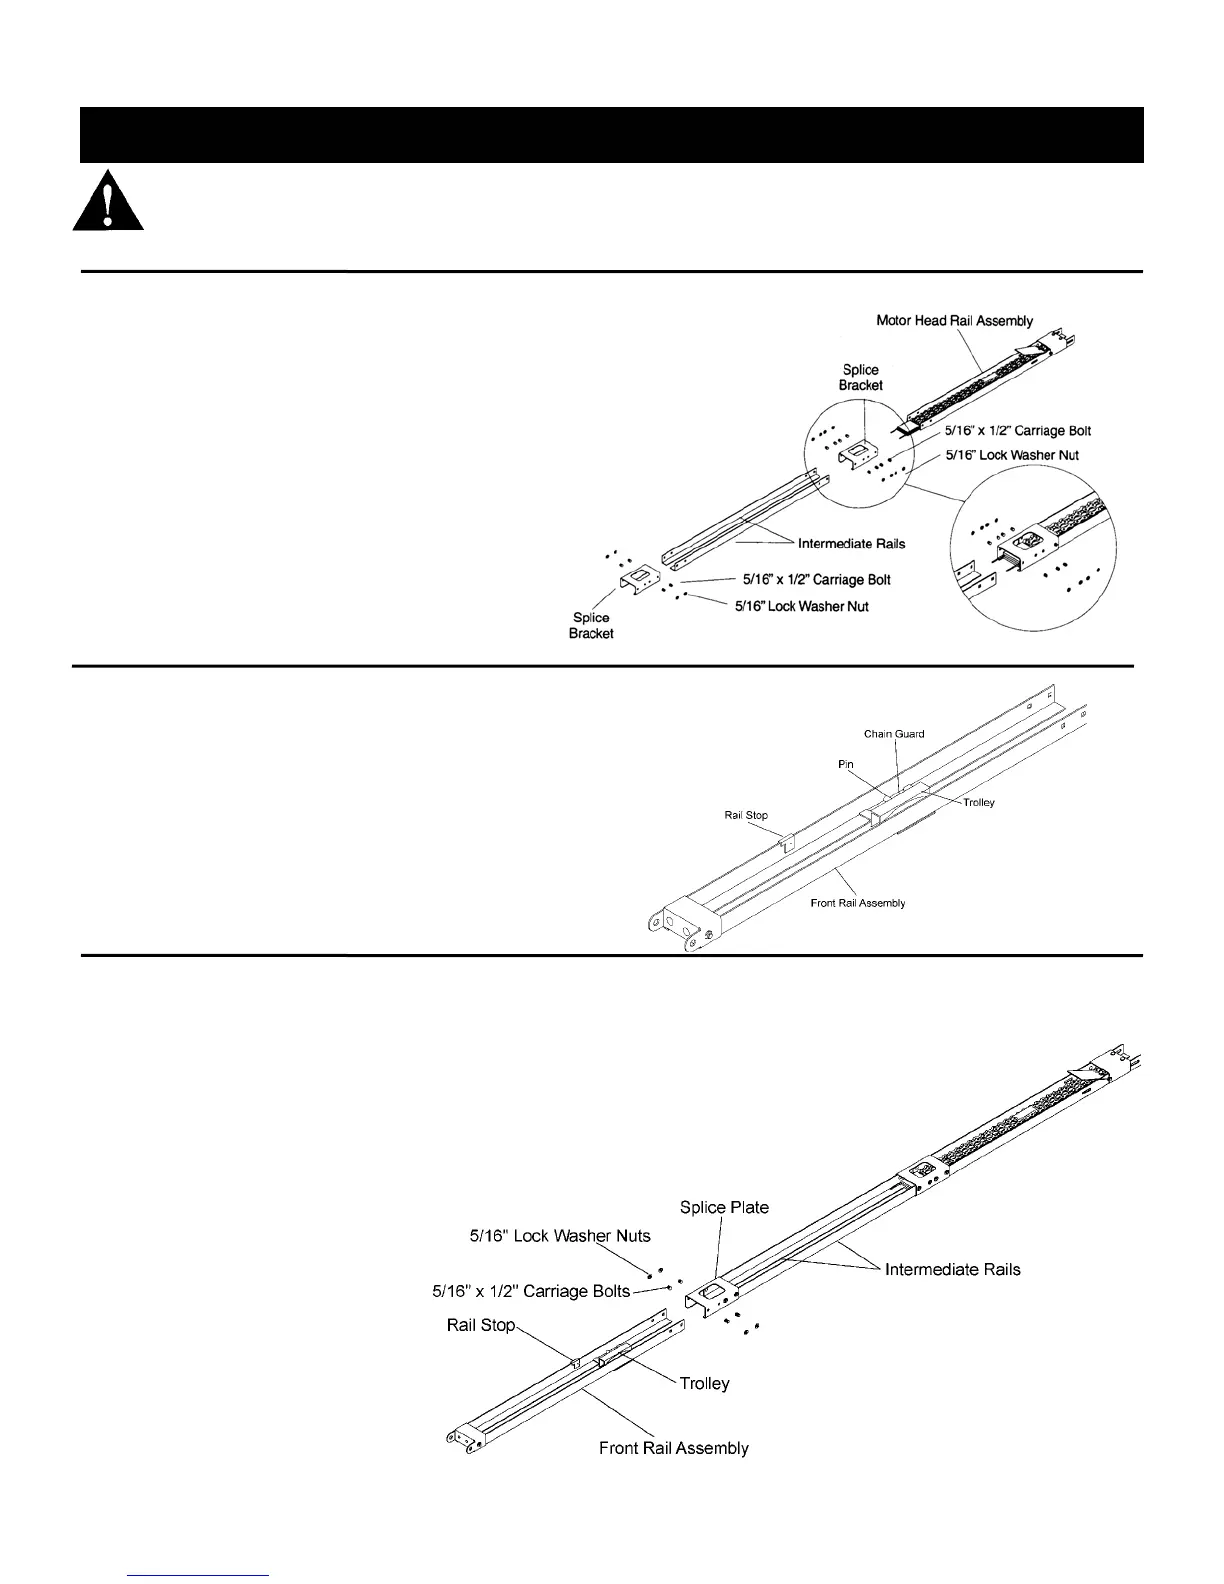
Step One: Rail Assembly
Pre-position parts for assembly. Bolt a splice
bracket to the motor head assembly and bolt the
intermediate rails to the same splice bracket,
using 5/16” x 1/2” carriage bolts and 5/16” lock
washer nuts. The rounded head must be on the
inside of the rails and the nuts outside. Bolt the
other splice bracket to the intermediate rails,
leaving the four holes on the splice bracket open
for the front rail assembly.
NOTE: Keep in mind that the rails will have to
be adjusted later, so only finger tighten the
bolts first. The bolts will have to be tightened
after the rail alignment is achieved.
Step Two: Trolley Alignment
Ensure the rails fit between the upper and lower trolley guides
and the chain guard and pin are oriented as shown in the
illustration.
Step Three: Mounting Front Rail Assembly
Fasten the front rail assembly to the
intermediate rails using the splice
bracket and four 5/16” x 1/2” carriage
bolts and 5/16” lock washer nuts.
Rail Assembly