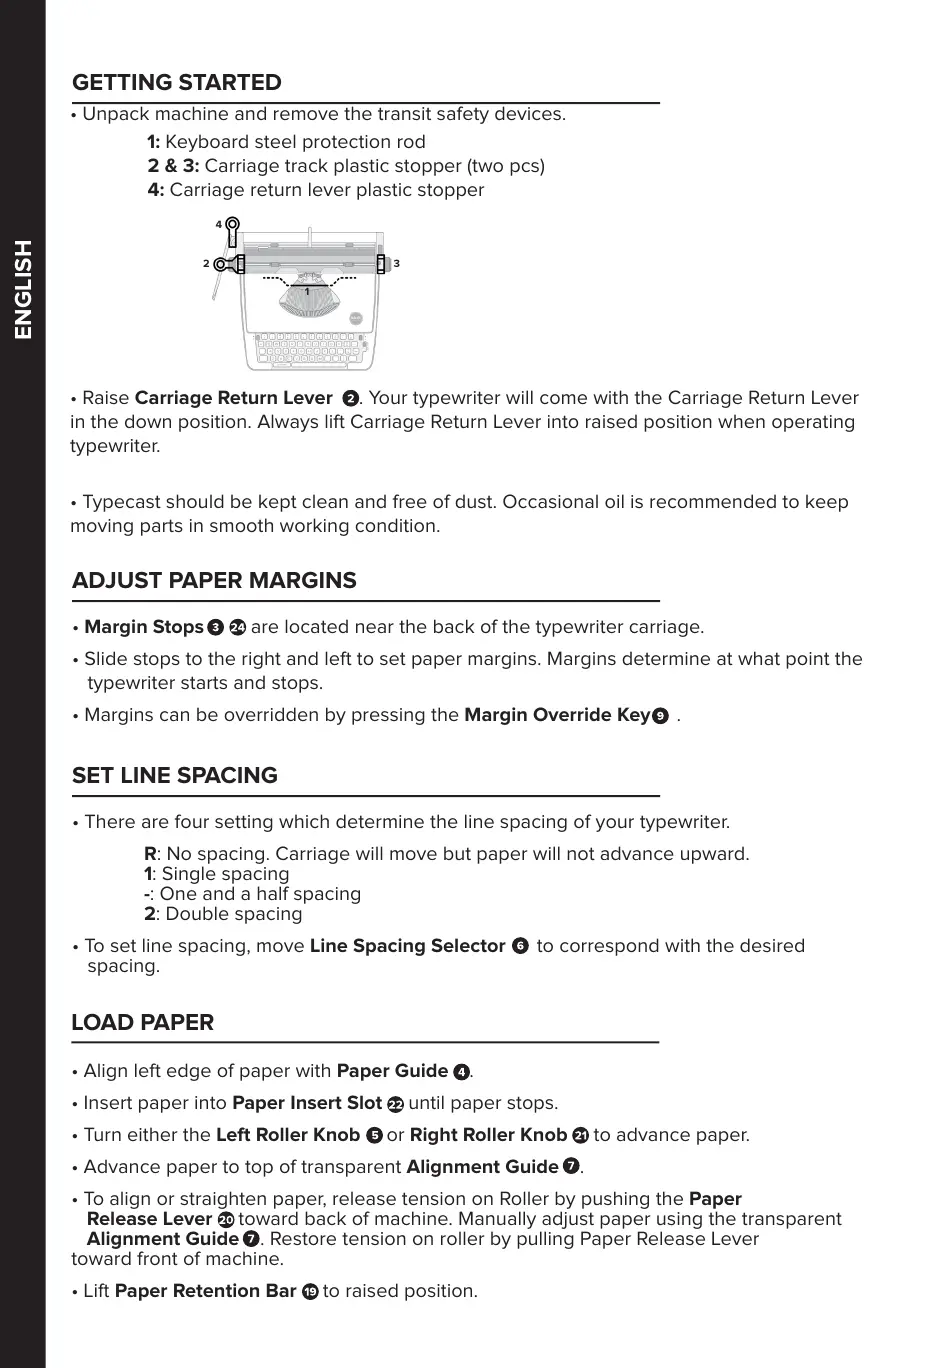
• Unpack machine and remove the transit safety devices.
1: Keyboard steel protection rod
2 & 3: Carriage track plastic stopper (two pcs)
4: Carriage return lever plastic stopper
• Raise Carriage Return Lever . Your typewriter will come with the Carriage Return Lever
in the down position. Always lift Carriage Return Lever into raised position when operating
typewriter.
• Typecast should be kept clean and free of dust. Occasional oil is recommended to keep
moving parts in smooth working condition.
GETTING STARTED
ADJUST PAPER MARGINS
• Margin Stops are located near the back of the typewriter carriage.
• Slide stops to the right and left to set paper margins. Margins determine at what point the
typewriter starts and stops.
• Margins can be overridden by pressing the Margin Override Key .
SET LINE SPACING
• There are four setting which determine the line spacing of your typewriter.
R: No spacing. Carriage will move but paper will not advance upward.
1: Single spacing
-: One and a half spacing
2: Double spacing
• To set line spacing, move Line Spacing Selector to correspond with the desired
spacing.
LOAD PAPER
• Align left edge of paper with Paper Guide .
• Insert paper into Paper Insert Slot until paper stops.
• Turn either the Left Roller Knob or Right Roller Knob to advance paper.
• Advance paper to top of transparent Alignment Guide .
• To align or straighten paper, release tension on Roller by pushing the Paper
Release Lever toward back of machine. Manually adjust paper using the transparent
Alignment Guide . Restore tension on roller by pulling Paper Release Lever
toward front of machine.
• Lift Paper Retention Bar to raised position.
1
2
3
4
ENGLISH