weaverleathersupply.com
800-932-8371
9
STITCHING
Figure 18 Figure 20Figure 19 Figure 21
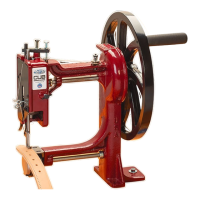
Please Note: This machine does not have reverse. DO NOT attempt to turn the crank in
reverse or “backstitch.” You may choose to turn your work and take a “forward stitch”
for a “backstitch,” or tie the thread off manually. (Figure 18)
1) Begin by lifting the presser foot by raising the Foot Lift Lever located directly behind it.
(Figure 19)
2) Hold the upper thread and bobbin thread under the presser foot and to the rear. Insert
your work under the foot, positioning it so the needle is directly above the desired point
of entry for your first stitch. (Figure 20)
3) While still holding the thread to the rear, lower the foot and turn the crank to complete
your first couple stitches. After the stitches are made, you can release the thread.
(Figure 21)
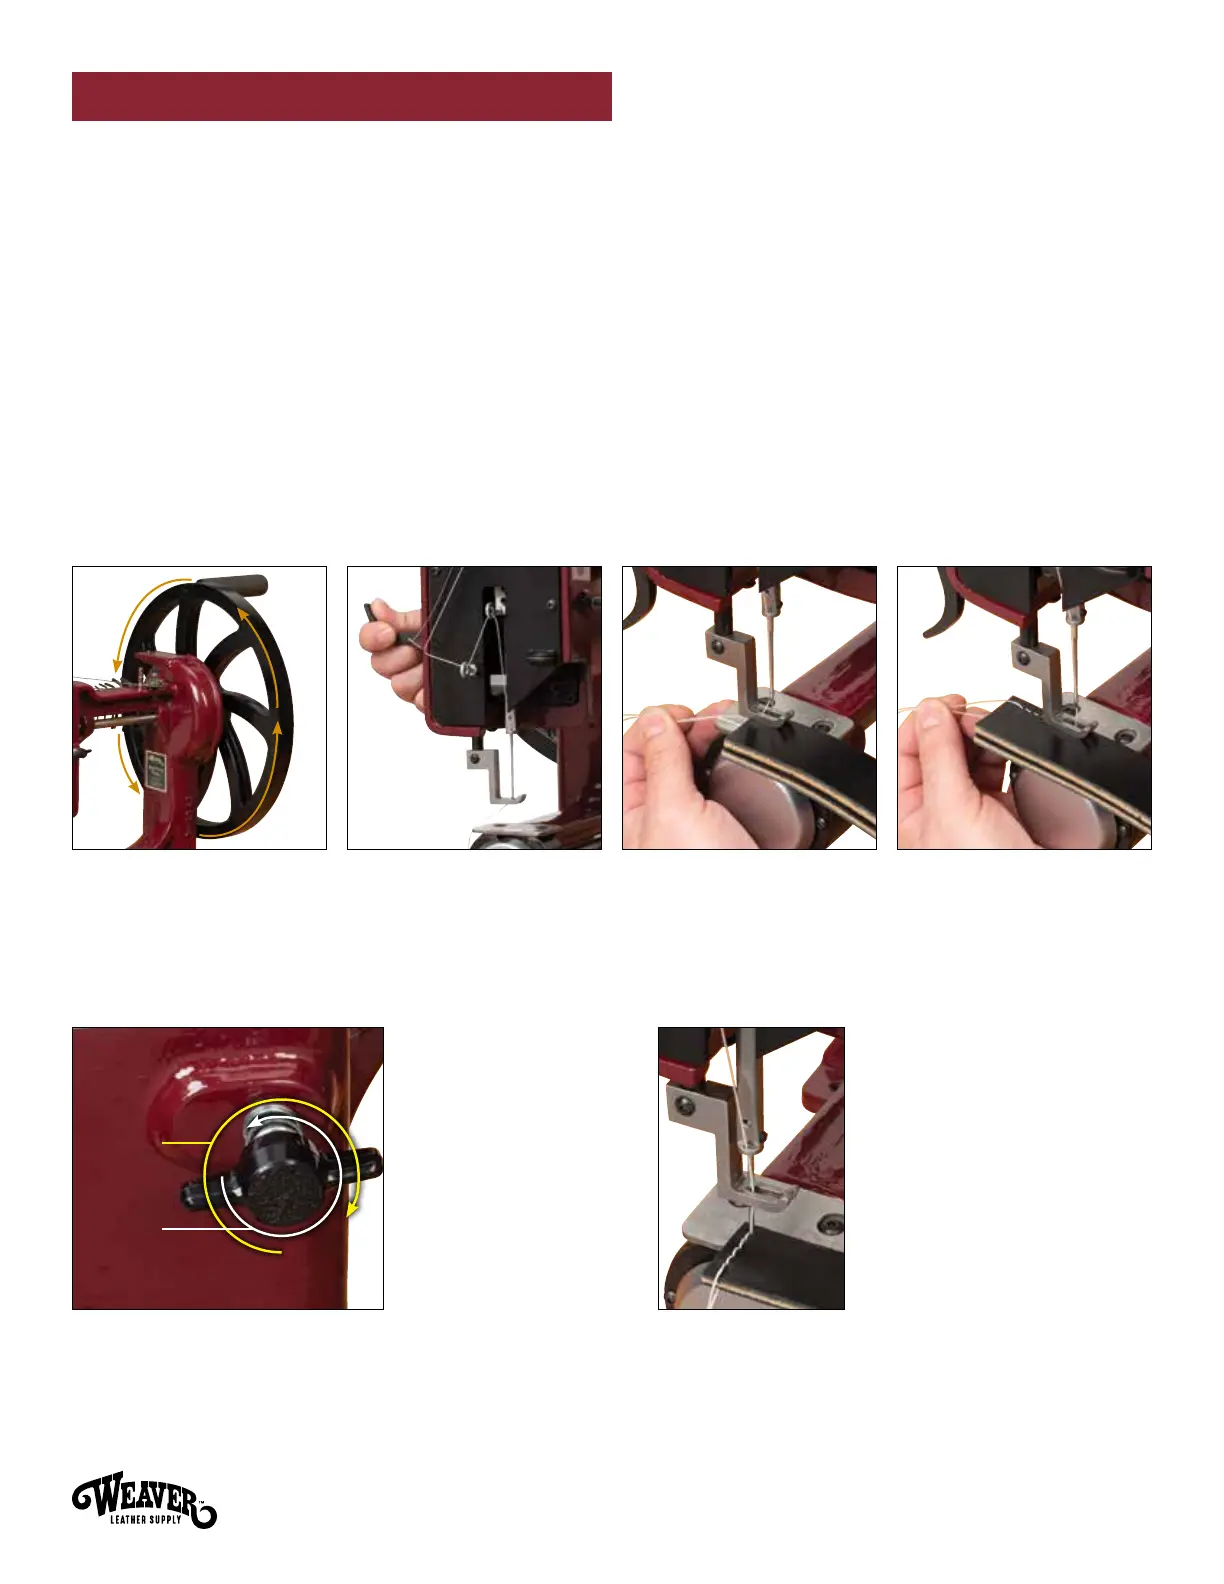
ADJUSTING STITCH LENGTH TURNING YOUR WORK AT CORNERS
Figure 22 Figure 23
Locate the Stitch
Length Dial on the
front of the machine.
For a longer stitch
length, turn the dial
counterclockwise.
For a shorter stitch
length, turn the
dial clockwise.
(Figure 22)
Please note: Your work
should be turned before
your needle exits the
material. At this point,
raise the presser foot
slightly, pivot your work
to the new position,
and resume stitching.
(Figure 23)
Longer Longer
StitchStitch
Shorter Shorter
StitchStitch