• ATTACH MOWER SIDE SUSPENSION ARMS (A)
TO CHASSIS - Position hole in arm over pin (B) on
outside of tractor chassis and secure with retainer
spring.
• Repeat on opposite side of tractor.
• ATTACH REAR LIFT LINKS (C) - Lift rear corner of
mower and position slot in link assembly over pin
on rear mower bracket (D) and secure with washer
and retainer spring.
• ATTACH FRONT LINK (E) - Work from left side of
tractor. Insert rod end of Iink assembly through
front hole in tractor front suspension bracket (F).
• Insert end of link (E) into hole in front mower
bracket (H) and secure with washer and retainer
spring (J).
• Install belt onto electric clutch pulley (M).
IMPORTANT:
• Raise attachment lift lever to highest position.
• If necessary, adjust gauge wheels before operating
mower as shown in the Operation section on this
manual.
TO LEVEL MOWER
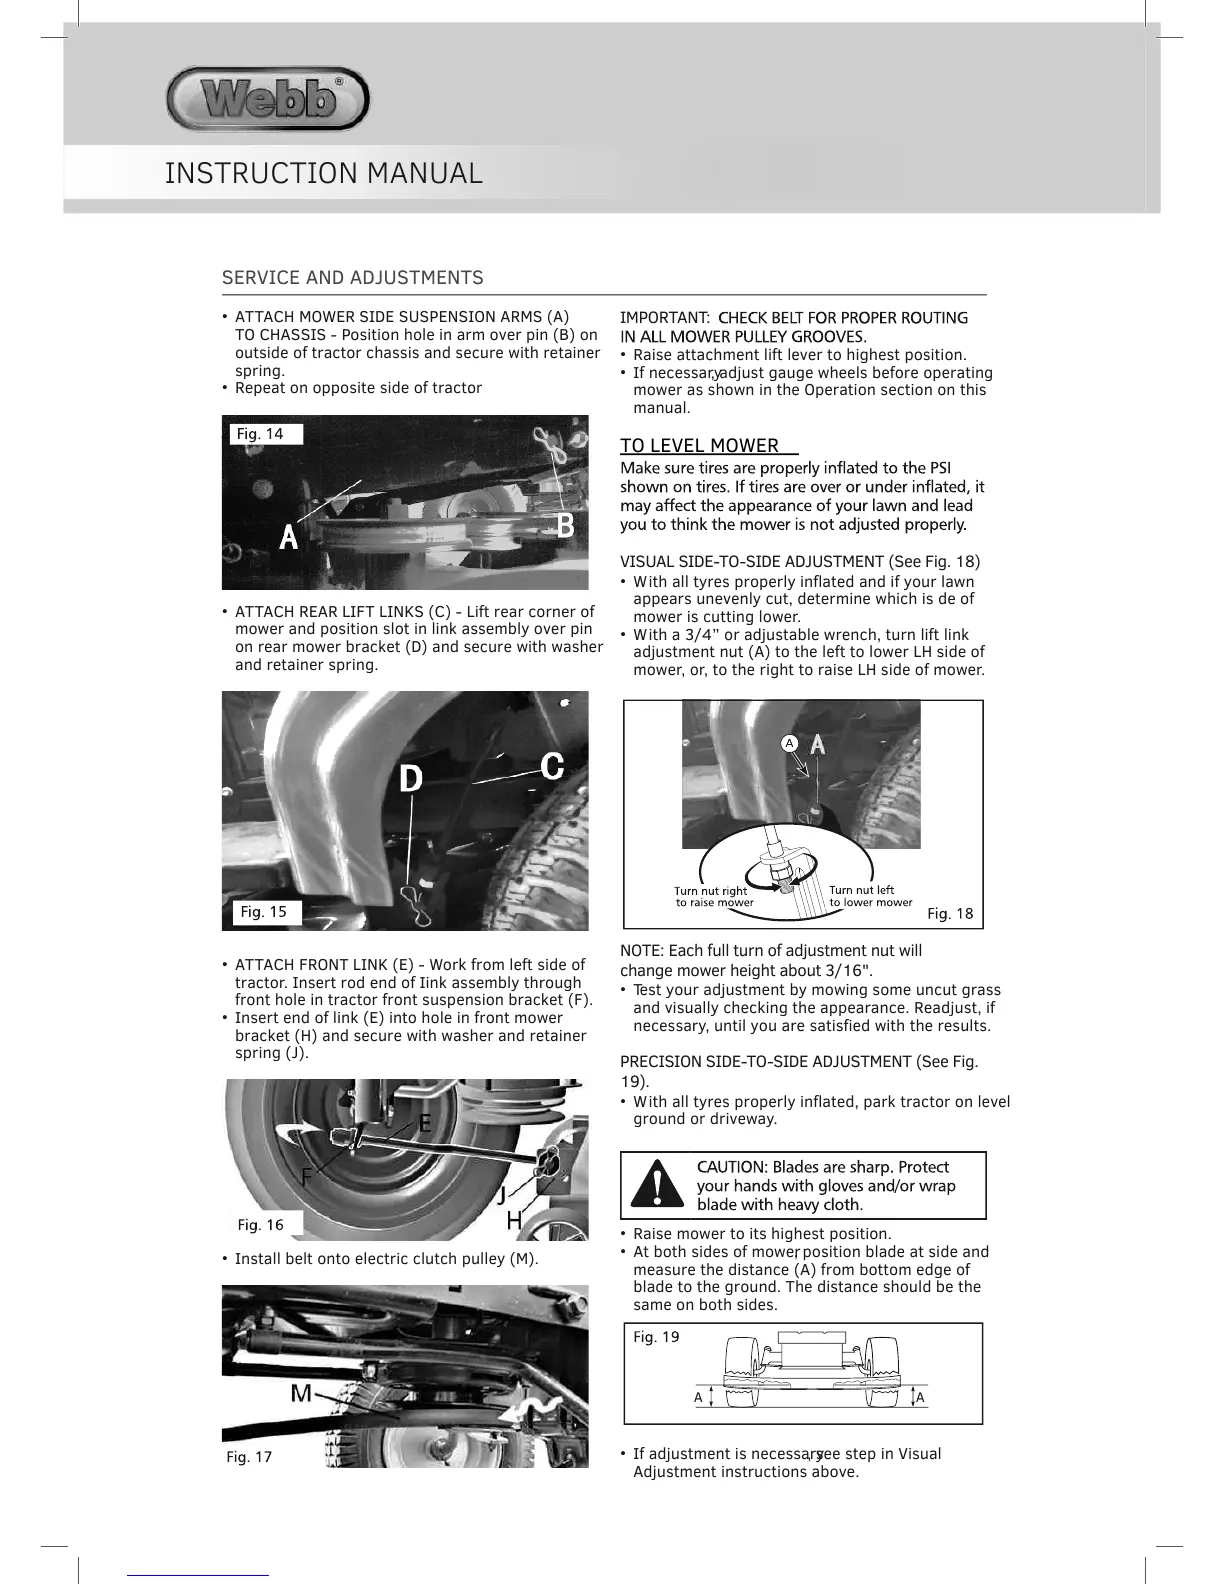
VISUAL SIDE-TO-SIDE ADJUSTMENT (See Fig. 18)
• With all tyres properly inflated and if your lawn
appears unevenly cut, determine which is de of
mower is cutting lower.
• With a 3/4” or adjustable wrench, turn lift link
adjustment nut (A) to the left to lower LH side of
mower, or, to the right to raise LH side of mower.
NOTE: Each full turn of adjustment nut will
change mower height about 3/16".
• Test your adjustment by mowing some uncut grass
and visually checking the appearance. Readjust, if
necessary, until you are satisfied with the results.
PRECISION SIDE-TO-SIDE ADJUSTMENT (See Fig.
19).
• With all tyres properly inflated, park tractor on level
ground or driveway.
• Raise mower to its highest position.
• At both sides of mower, position blade at side and
measure the distance (A) from bottom edge of
blade to the ground. The distance should be the
same on both sides.
A
A
• If adjustment is necessary, see step in Visual
Adjustment instructions above.
.
.
.
.
.
.