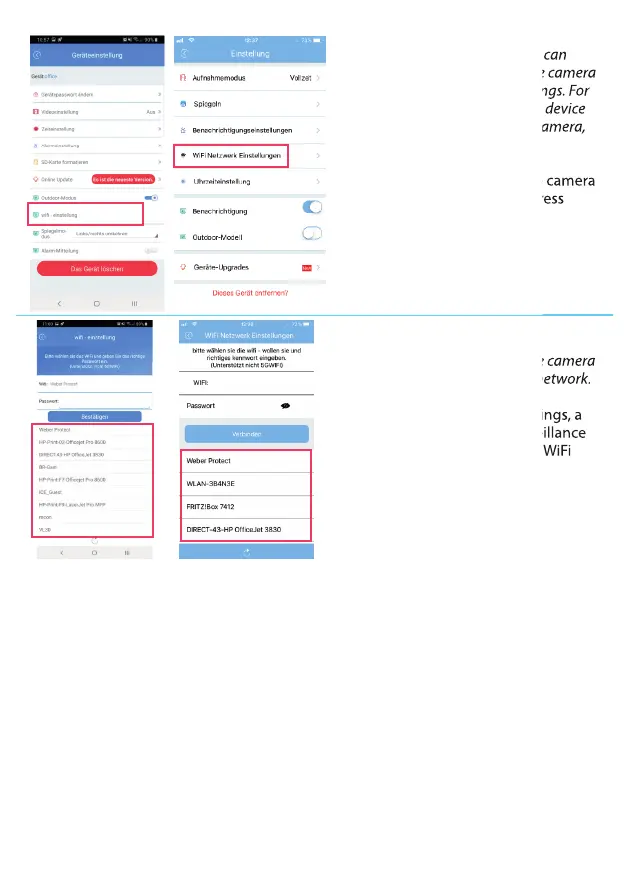
In the device settings you can
individualize your surveillance camera
and customize dierent settings. For
more information about the device
settings of the surveillance camera,
see page: 25
To connect your surveillance camera
to your WiFi network, press
‘WiFi Settings’.
In Wi-Fi settings your surveillance camera
can be connected to your Wi-Fi network.
After clicking on the WiFi settings, a
new window opens. The surveillance
camera now searches for all WiFi
networks in your area and displays
them at the bottom of the page.
1) Select your home WiFi network.
2) Your WiFi network will now be displayed below ‘WiFi’.
3) Now enter your WiFi password in the 'Password' eld and click on 'Conrm' /
'Connect'.
4) Wait until the surveillance camera connects to your WiFi and the following message
appears: 'Connection successful'
5) You can disconnect the LAN cable from the surveillance camera after a successful
connection has been established.
6) You have connected your surveillance camera to the WiFi and can now mount it at
the nal installation location.
7) If the surveillance camera does not connect after removing the LAN cable and
appears as 'oine', you must plug the LAN cable back into the surveillance camera and
reconnect to the WiFi.
11
In the device settings you can
individualize your surveillance camera
and customize dierent settings. For
more information about the device
settings of the surveillance camera,
To connect your surveillance camera
to your WiFi network, press
In Wi-Fi settings your surveillance camera
can be connected to your Wi-Fi network.
After clicking on the WiFi settings, a
new window opens. The surveillance
camera now searches for all WiFi
 Loading...