2
Step 5
FOR MODELS THAT USE THE ENCLOSED
BRASS FITTING
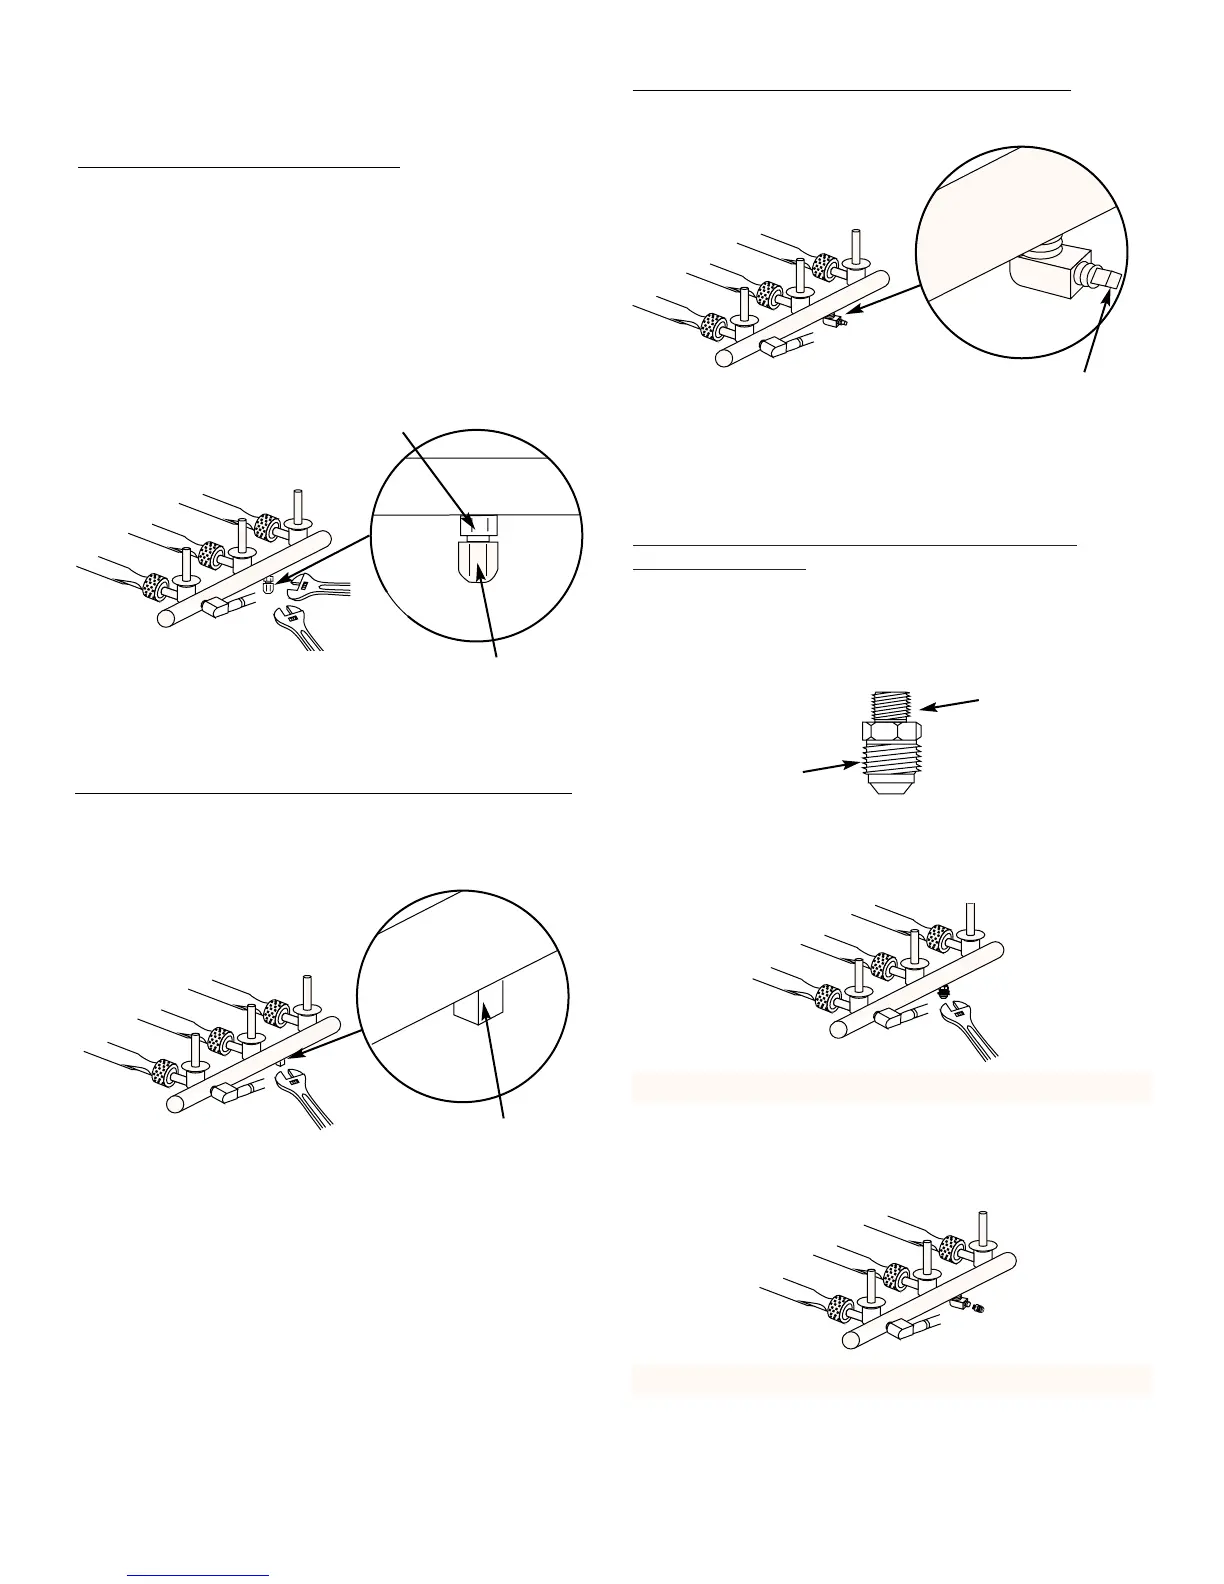
Apply pipe sealant to only the area indicated. Figure 5.
몇WARNING: Use a pipe sealant compound on the
threads that is approved for natural or LP gas.
Screw the fitting into the manifold using the 5/8 inch wrench.
Figure 6(a).
Only use pipe
sealant here
NO pipe
sealant here
Figure 5
Figure 6(a)
Black pipe plug
Brass cap
Side burner fitting
MODELS WITH A BLACK SQUARE PIPE PLUG:
Using an adjustable wrench, remove the pipe plug from
the manifold. Figure 3.
Step 4
SIDE BURNER GAS CONNECTIONS
MODELS WITH A BRASS CAP:
Using two adjustable wrenches, remove the brass cap
from the side burner fitting. Figure 2.
몇CAUTION: When removing the cap “hold” the side
burner fitting to keep it from becoming loose. If the
side burner fitting should loosen, tighten before
attaching side burner hose.
Note: After you complete this step, skip Steps 5 and 6
and please go onto Step 7.
Figure 2
Figure 3
MODELS WITH A BRASS SQUARE PLUG:
Using an adjustable wrench, remove the pipe plug from
the manifold. Figure 4.
Brass square plug
Figure 4
Figure 6(b)
Screw the fitting into the brass plug elbow. Figure 6(b).
OR