5
CORRECT OPERATING POSITION
Trimming
Edging
(XT & TE)
WARNING: Always wear eye pro-
tection. Never lean over the trimmer
head. Rocks or debris can ricochet or be
thrown into e yes and face and c ause
blindness or other serious injury.
When operat ing uni t , stand as shown and
check for t he f oll owi ng:
S Wear eye protect i on and heavy clot hi ng.
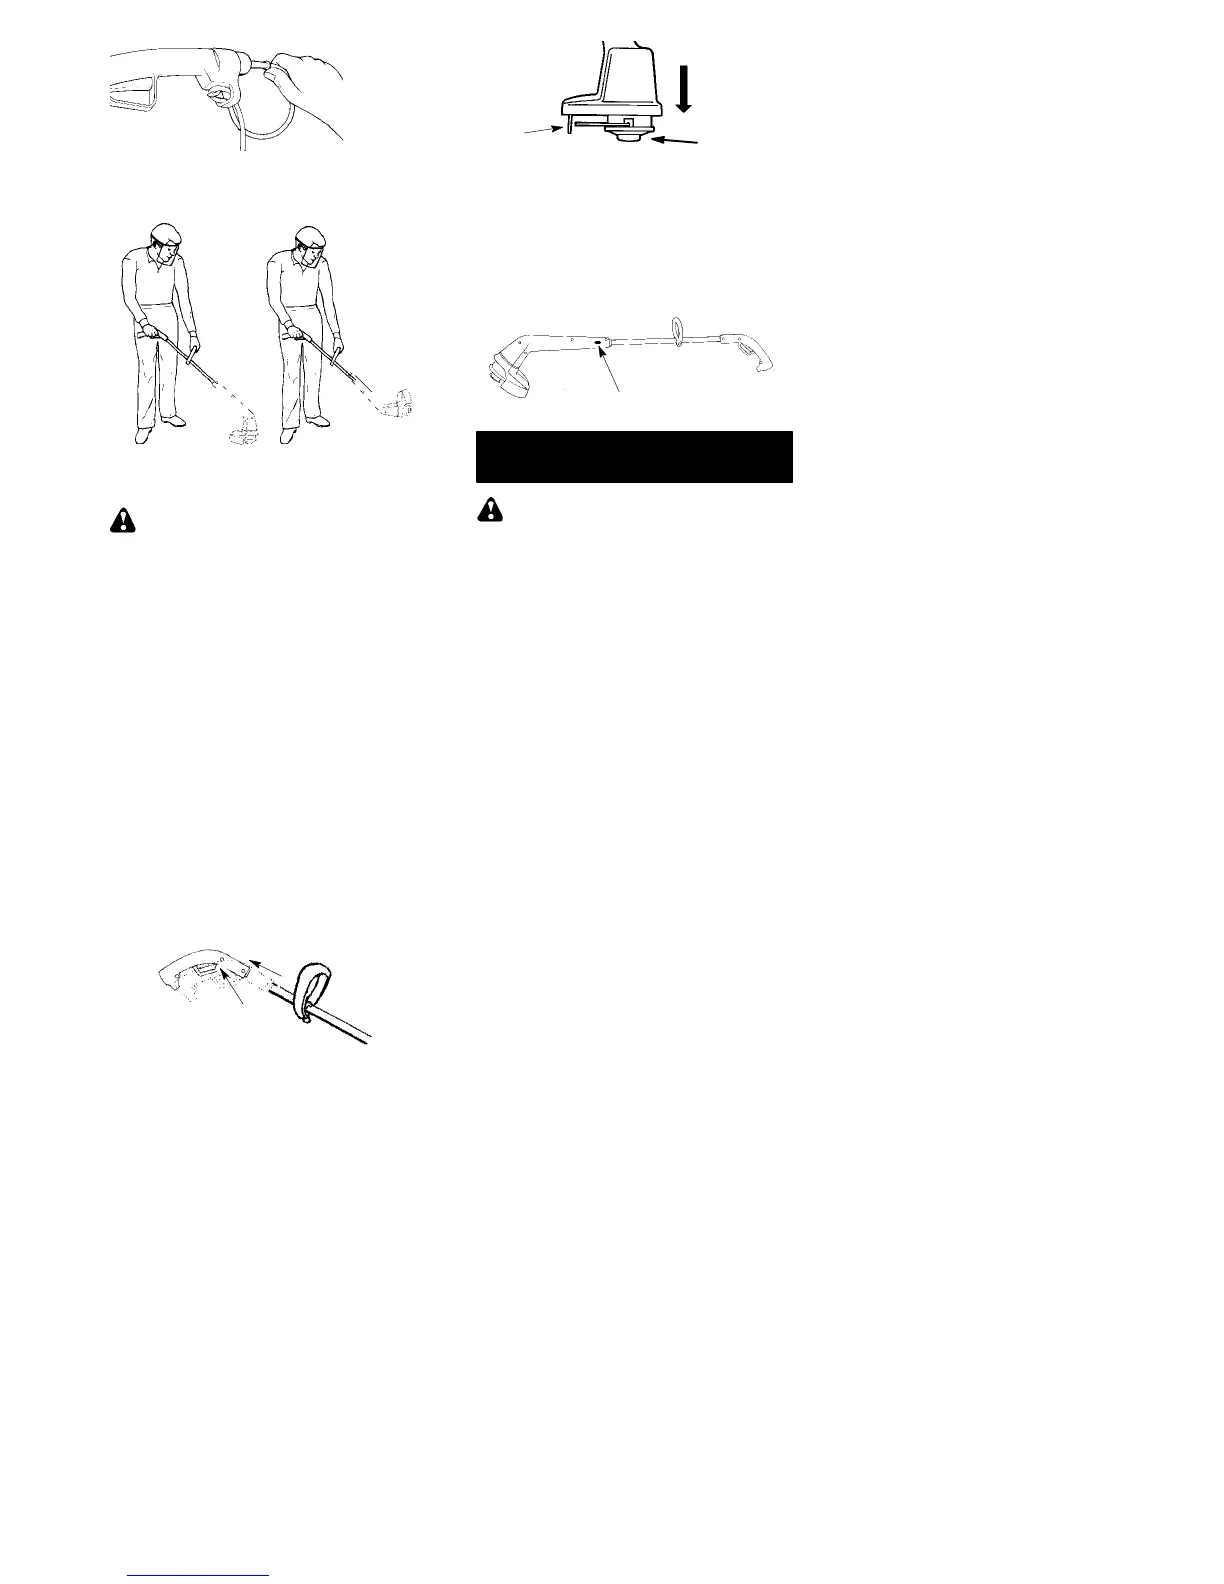
S Hold trigger handle with right han d and
assist handle with le ft hand.
S Keep unit below waist level.
S Cut from your right to your left to ensure
debris is thrown away from you. With-
out bending over, keep line near and
parallel to the ground (perpendicular
when edging) and not crowded into
material be ing cut.
ADJUSTING UPPER HANDL E
(XT Series only)
S Press button located on the underside
of the upper handle and ex tend handle
to a comfortable position.
Button
ADVANCING THE CUTTING LINE
To advance the line, tap the bottom of the
cuttin g head on the ground while the trim-
mer is running at full speed. The metal
blade attached to the shield will cut the
line to the proper length.
Cutting
Head
TAP
Metal Blade
TWIST ‘N EDGEr FEATURE
XT & TE series units are equipped with a
button on the side of the unit. If your u nit
includes this feature you can press this
button and twist the lower portion 180_
counterclockwise into an edging po si-
tion.
Twist ‘N Edge Button
MAINTENANCE
WARNING: Disconnect power
source before performing maintenance.
GENERAL RECOMMENDATIONS
The warranty on this unit does not cover
items that have been s ubjected to opera-
tor abuse or negligence. To receive full
value from the warranty, the operator
must maintain unit a s instructed in this
manual. Various adjustments will need to
be made periodically to properly main-
tain your unit.
BEFORE EACH USE
CHECK FOR L OOSE FASTENERS
AND PARTS
S Housing Screws
S Assist Handle
S Debris Shield
CHECK FOR DAMAGED OR
WORN PARTS
Contact an authorized service dealer for
replacement of damaged or worn parts.
S Trigger Switch -- Ensure switch func-
tions properly by pressing and releas-
ing the trigger switch. Make sure motor
stops.
S Debris Shield -- Discontinue use of unit
if debris shield is damaged.
AFTEREACHUSE
INSPECT AND CLEAN UNIT AND LA-
BELS
S After each use, inspect c omplete unit
for loose or damaged parts. Clean the
unit using a damp c loth with a mild de-
tergent.
S Wipe off unit with a c lean d ry c loth.