Wipe off unit with a clean dry cloth.
CLEAN AIR FILTER
A dirty air lter decreases engine performance and
increases fuel consumption and harmful emissions. Always
clean after every 5 hours of operation.
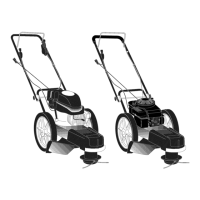
1. Clean the air lter cover and the area around it to keep
dirt from falling into the carburetor chamber when the
cover is opened.
2. Open air lter cover by pushing button (see
illustration). Remove air lter.
a WARNING: Do not clean lter in gasoline or other
ammable solvent.
3. Wash the lter in soap and water.
4. Allow lter to dry.
5. Apply a few drops of oil to the lter: squeeze lter to
distribute oil.
6. Replace air lter and close cover.
A
MUFFLER AND SPARK ARRESTING SCREEN
As your unit is used, carbon deposits build up on the
mufer and spark arresting screen.
For normal homeowner use, however, the mufer and
spark arresting screen will not require any service.
After 50 hours of use, we recommend that your mufer be
serviced or replaced by your authorized service dealer.
REPLACE SPARK PLUG
Replace the spark plug each year to ensure the engine
starts easier and runs better. Set spark plug gap at 0.025
inch (0.6 mm). Ignition timing is xed and nonadjustable.
NOTE: For Canadian models only: This spark ignition
system complies with the Canadian standard ICES-002.
1. Twist, then pull off spark plug boot.
2. Remove spark plug from cylinder and discard.
3. Replace with the specied spark plug:
• For U.S. models only: Replace with Champion RCJ-6Y.
• For Canadian models only: Replace with Champion
QCJ-6Y.
4. Tighten securely with a 3/4 inch (19 mm) socket
wrench.
5. Reinstall the spark plug boot.
SERVICE AND ADJUSTMENTS
LINE REPLACEMENT
a WARNING: Use only 0.080 inch (2 mm) diameter line.
Other sizes of line will not advance properly and will
result in improper cutting head function or can cause
serious injury.
a WARNING: Do not use other materials such as wire,
string, rope, etc. Wire can break off during cutting and
become a dangerous projectile that can cause serious
injury.
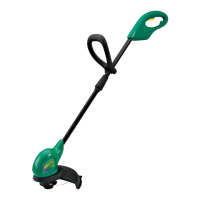
1. Press the tabs on the side of the trimmer head and
remove cover and spool.
2. Remove any remaining line.
3. Clean dirt and debris from all parts. Replace spool if it
is worn or damaged.
4. Cut 25 feet (7.6 meters) length of 0.080 inch (2 mm)
diameter trimmer line. Bend a the line at the midpoint
and insert the bend into the slot in the center rim of the
spool. Ensure line snaps into position in the slot.
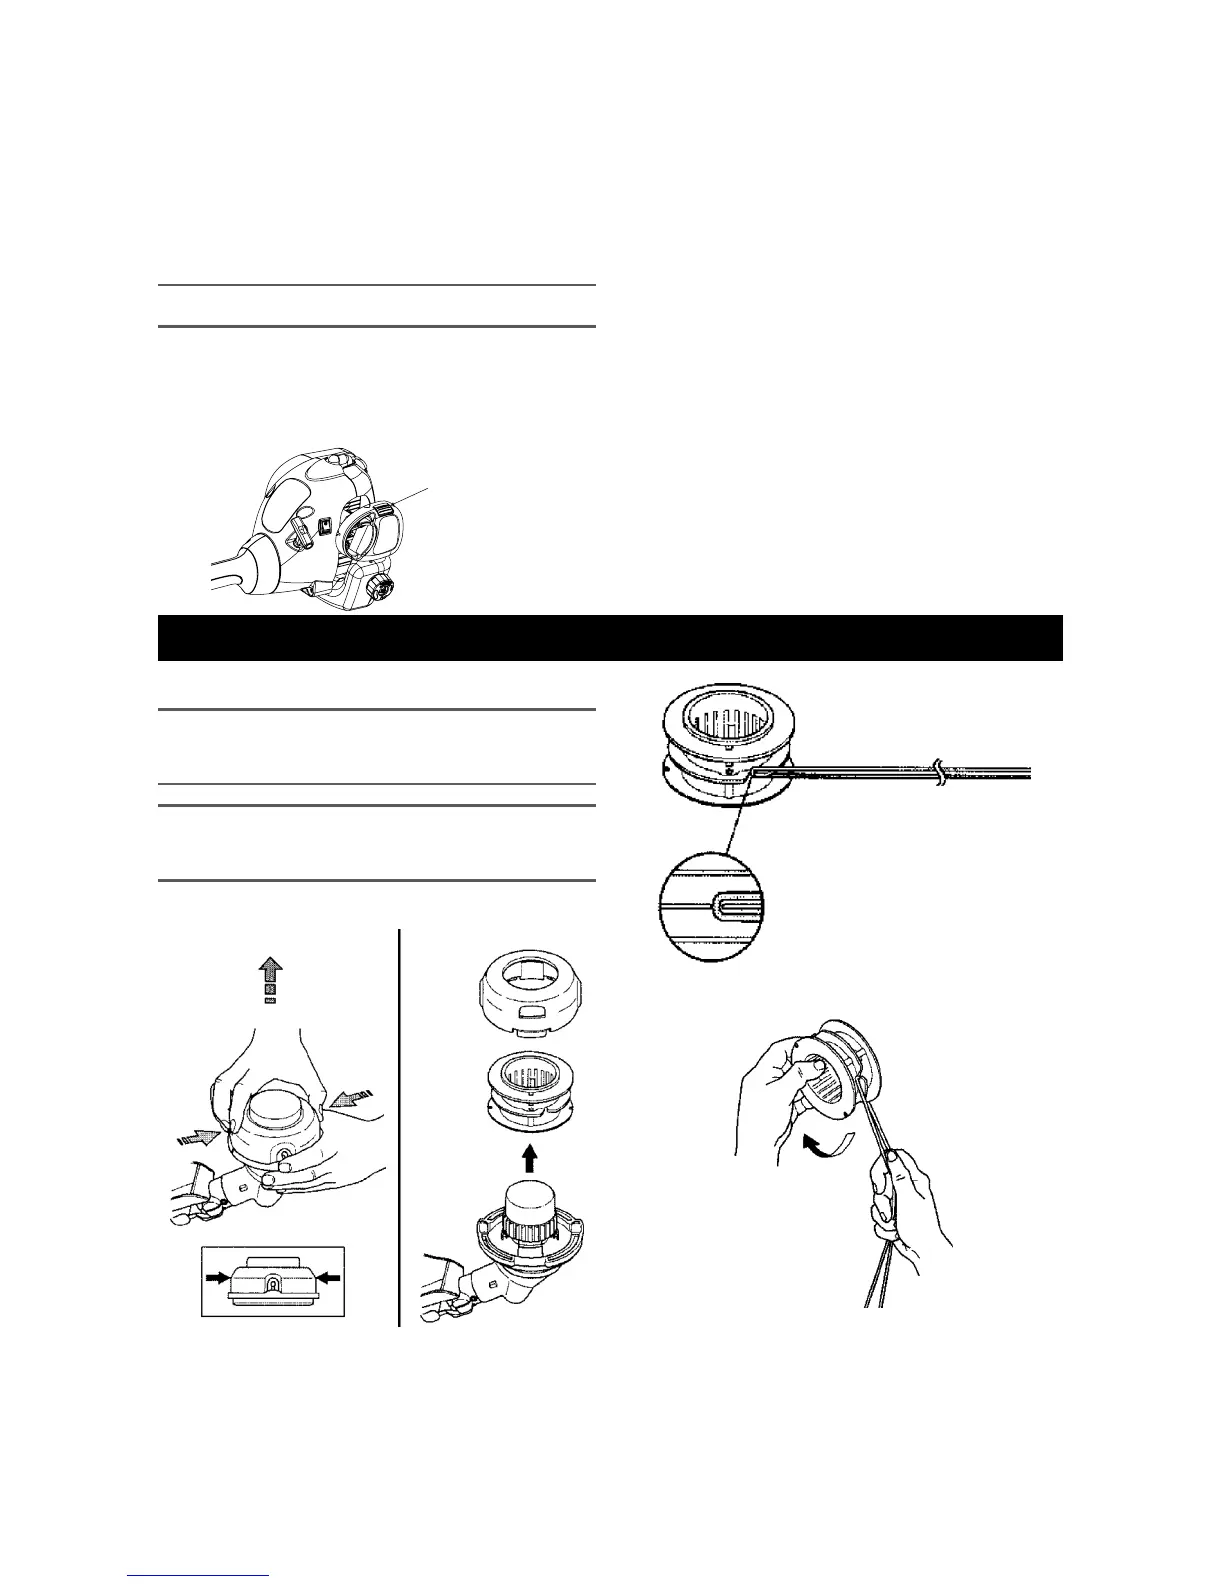
5. When installing new line on an existing spool, hold the
spool as shown in the illustration below.
6. With your nger between the lines, wrap the lines
evenly and rmly around the spool in a clockwise
direction.
7