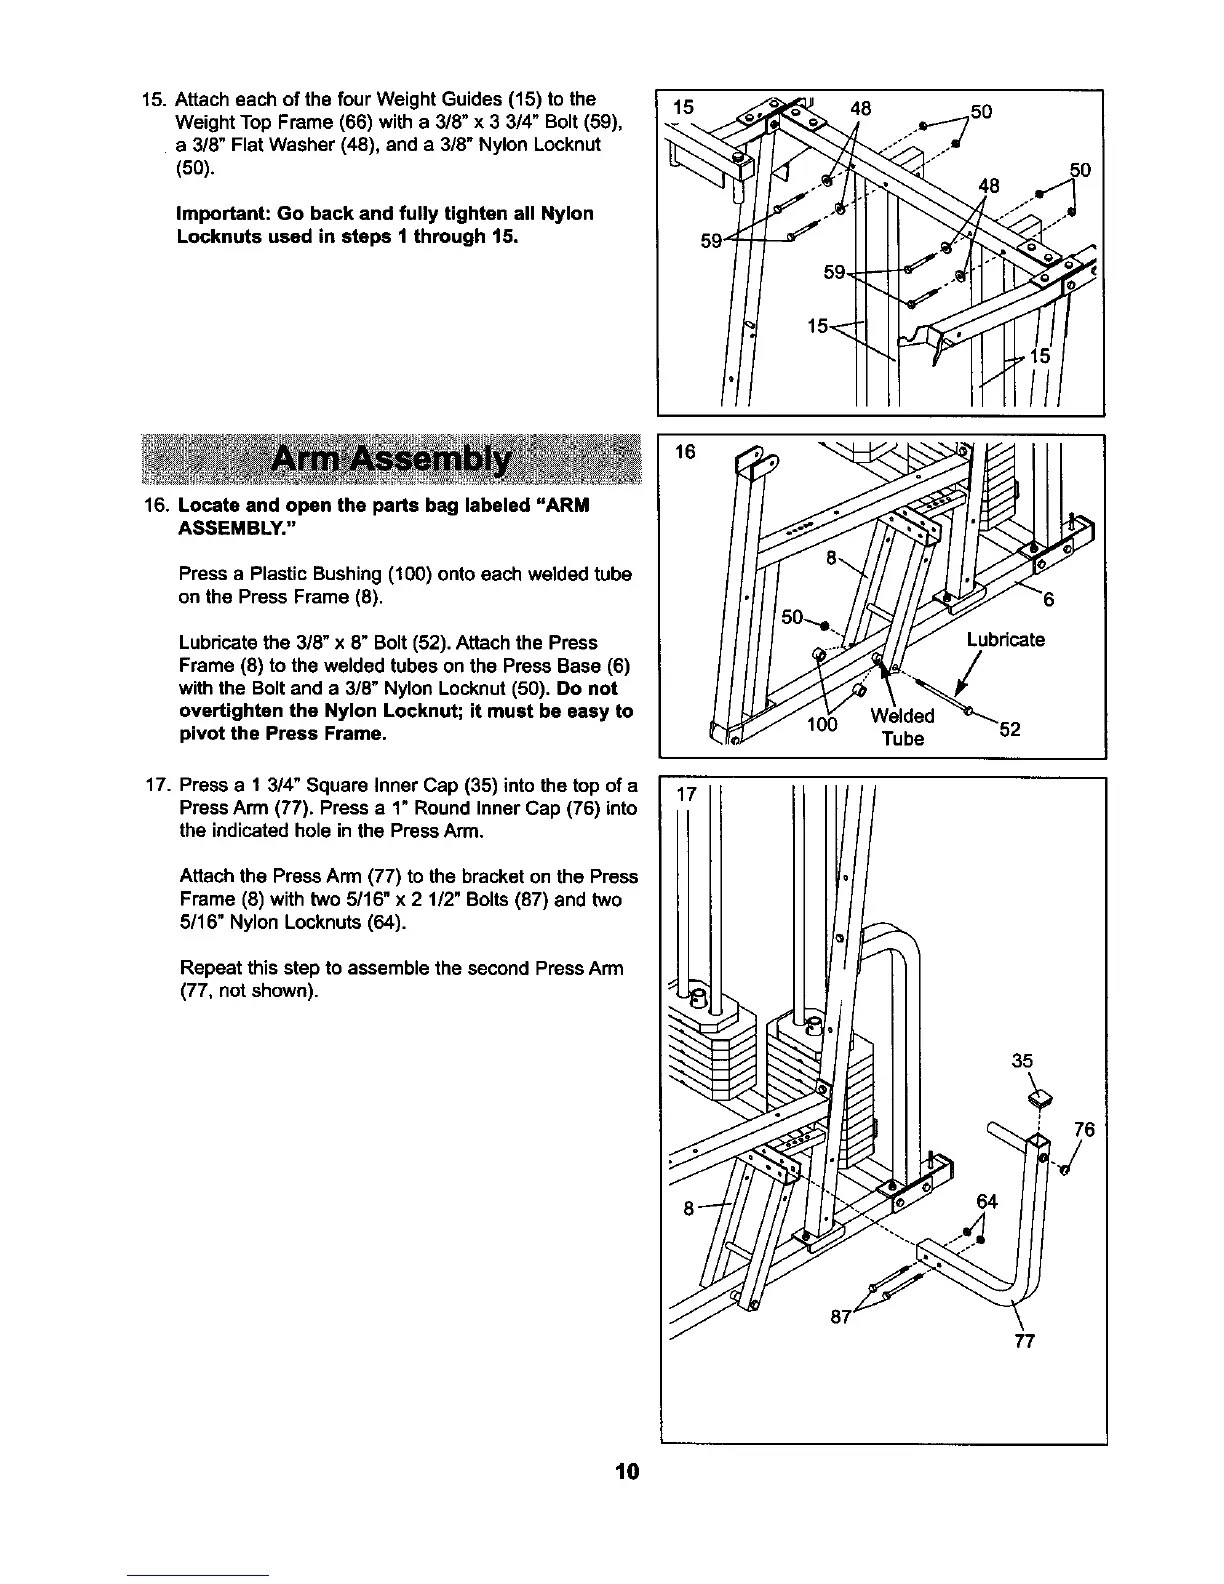
15. Attach each of the four Weight Guides (15) to the
Weight Top Frame (66) with a 3/8" x 3 3/4" Bolt (59),
a 3/8" Flat Washer (48), and a 3/8" Nylon Locknut
(50).
Important: Go back and fully tighten all Nylon
Locknuts used in steps 1 through 15.
16. Locate and open the parts bag labeled "ARM
ASSEMBLY."
Press a Plastic Bushing(100) onto each welded tube
on the Press Frame (8).
Lubricatethe 3/8" x 8" Bolt(52). Attach the Press
Frame (8) tothe welded tubes on the Press Base (6)
with the Boltand a 3/8" Nylon Locknut(50). Do not
overtighten the Nylon Locknut; it must be easy to
pivot the Press Frame,
17. Pressa 1 3/4" Square Inner Cap (35) into the top of a
PressArm (77). Press a 1" Round Inner Cap (76) into
the indicatedholein the PressArm.
Attach the PressArm (77) to the bracket on the Press
Frame (8) with two 5/16" x 2 112"Bolts(87) and two
5/16" Nylon Locknuts(64).
Repeat this stepto assemble the second PressArm
(77, not shown).
15 48 50
Lubricate
52
35
64
77
10



 To Next Page