9
48
62
50
48
33
9
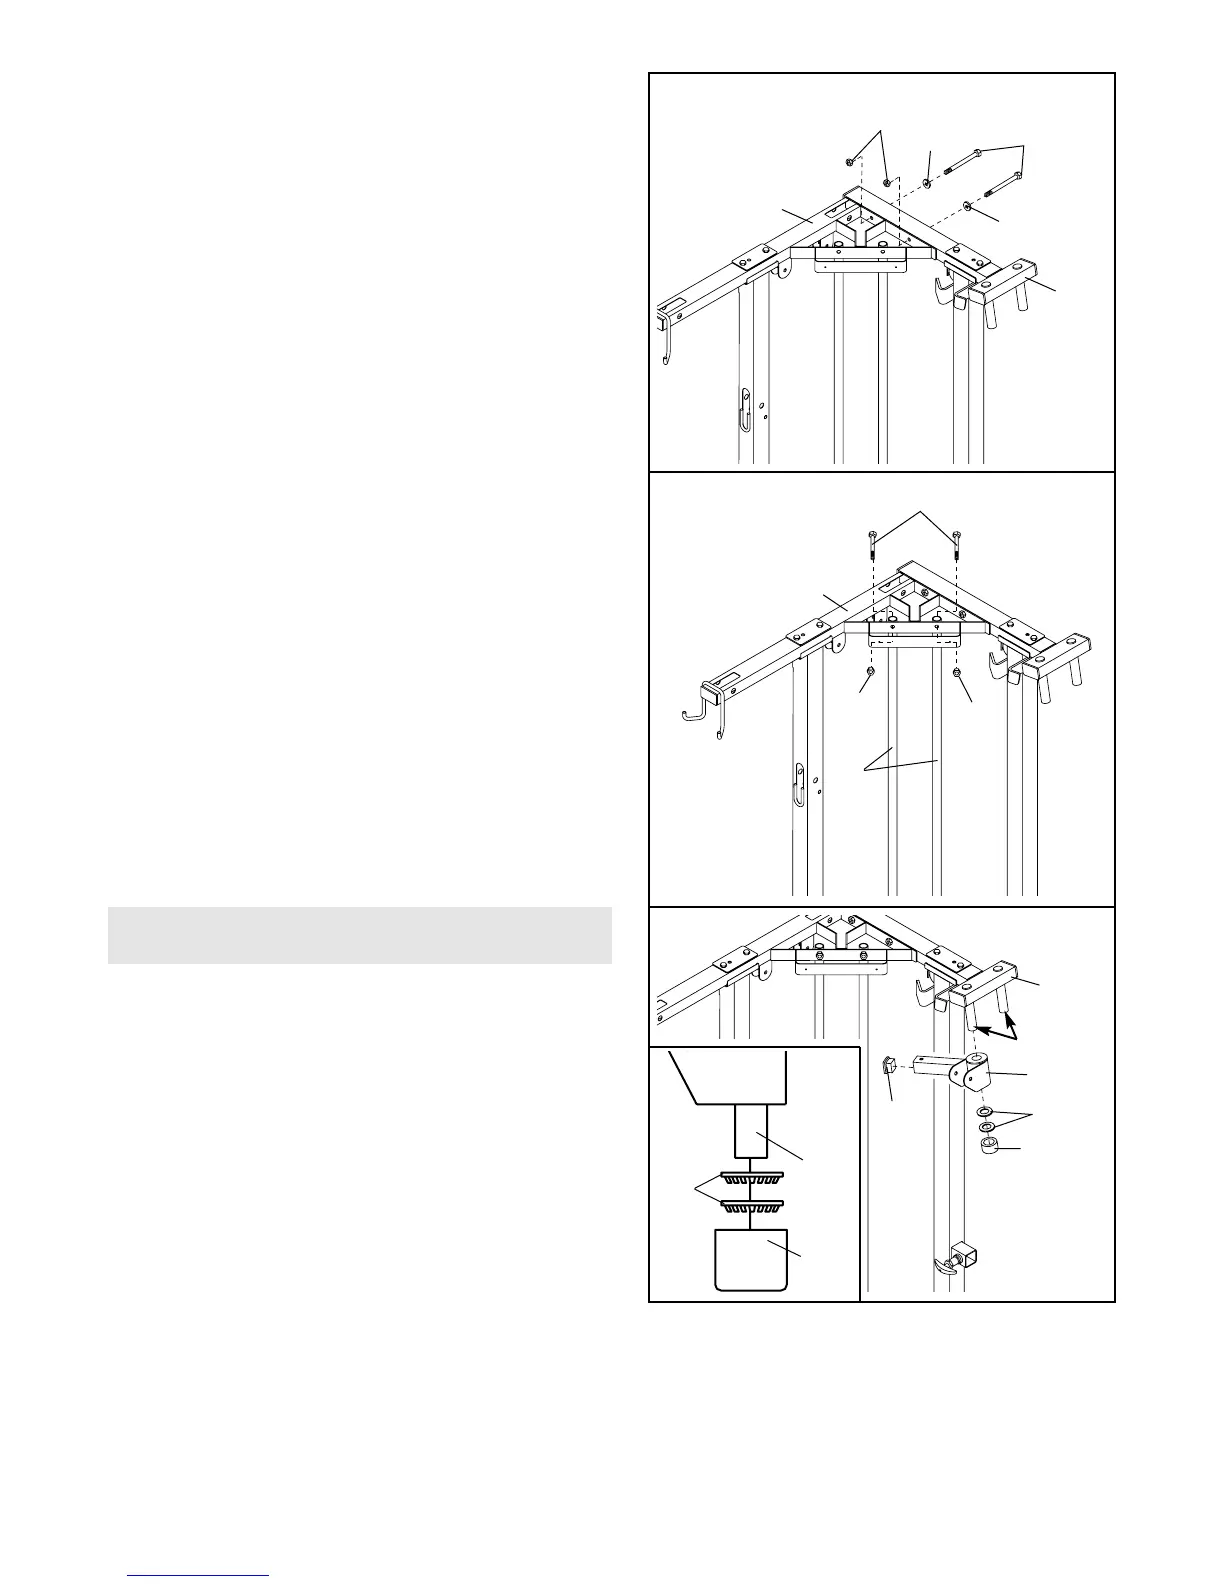
12. Secure the Press Top Frame (9) to the Butterfly Top
Frame (33) with two 3/8” x 3 1/4” Bolts (62), two
3/8” Flat Washers (48), and two 3/8” Nylon
Locknuts (50). Do not tighten the Nylon Locknuts
yet.
13. Secure the Weight Guides (15) to the Press Top
Frame (9) with two 3/8” x 1 3/4” Bolts (57) and two
3/8” Nylon Locknuts (50).
Tighten the Nylon Locknuts used in steps 2–13.
12
13
57
9
50
50
15
14
85
35
Lubricate
31
33
38
Axle
31
38
14. Locate and open the parts bag labeled “ARM
ASSEMBLY.”
Press a 1 1/2” Square Inner Cap (35) into the Right
Pivot Arm (85).
Lubricate the axles on the Butterfly Top Frame (33).
Secure the Right Pivot Arm (85) to the right axle
with two Retainer Rings (31) and a 1” Round Outer
Cap (38). Do not confuse the Right Pivot Arm
with the Left Pivot Arm (not shown). The
Retainer Rings may break if disassembled.
Note: Be sure the Retainer Rings (31) and 1”
Round Outer Cap (38) are oriented as shown in
the inset drawing.
Repeat this step with the Left Pivot Arm (not
shown) and left axle.
ARM ASSEMBLY


 To Next Page