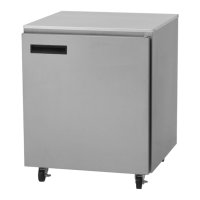
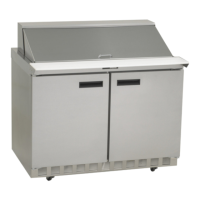
The Delfield Compact Refrigerators & Freezers, 400P & 4000P Series, are designed to provide fresh solutions for various food storage needs. These units are intended for indoor use only and are available in several models, including worktop refrigerator and freezer bases, and undercounter refrigerator and freezer bases, with options for stainless steel tops, backsplashes, and casters. The "P" prefix in model numbers indicates the use of propane as a refrigerant.
Function Description
These compact units are designed for the controlled storage of food items, maintaining specific temperature levels to ensure food safety and quality. They operate as either refrigerators or freezers, depending on the model, utilizing a refrigeration system that includes a compressor, condenser, and evaporator. The units are equipped with an electronic temperature control system that manages the cooling and defrost cycles.
For R290 refrigerators, the control initiates a defrost cycle at start-up, continuing until the cabinet reaches 41°F or for a minimum of 1 minute/maximum of 75 minutes. Evaporator fans run continuously during operation, and there is no drip time after defrost. The compressor powers on immediately after defrost termination. When cooling is called for, there's a minimum compressor on-time of 2 minutes, with condensing unit/evaporator fans powering on to continue the normal cooling cycle. Defrost initiates after 6 hours of actual running time, freezing the last recorded cabinet temperature until defrost is complete and the set point is reached.
Freezers also initiate a defrost cycle at start-up or upon power reconnection. The control manages the compressor, evaporator fan motor, and condenser fan motor to maintain the set box temperature, typically around 0°F (-18°C) within an hour of the freezing cycle beginning. The electronic controller constantly monitors both box and evaporator coil temperatures. For energy efficiency, the evaporator fan motor cycles on and off with the compressor and condenser fan motor. During normal operation, the evaporator fan may cycle or pulse independently of the compressor. Freezer automatic defrost is set to occur every 5 hours, with a maximum duration of 35 minutes. Manual defrost can be initiated by unplugging and re-plugging the unit or by pressing and holding the snowflake button on the control. During defrost, the compressor and condenser fan motor switch on, and the hot gas solenoid energizes to warm the evaporator coil and melt accumulated frost. After defrost, the control returns to normal refrigeration, with a two-minute delay before the evaporator fan motor switches on.
Usage Features
The units are designed for straightforward operation with an electronic temperature control system.
- Start-up: Upon initial power connection or reconnection, the unit will begin a defrost cycle.
- On/Off Control: The unit can be turned on and off by pressing the dedicated button on the control.
- Set Point Adjustment: To adjust the desired temperature, users press and hold the "set" button until the current set point blinks. The up or down arrows are then used to modify the temperature, and pressing "set" again saves the new setting. Factory set points are -1.5°F for 407P Freezers and 33°F for 406P/4048 Coolers.
- Defrost Initiation/Termination: For R290 refrigerators, defrost can be manually initiated or terminated by pressing the snowflake button. For freezers, manual defrost can be triggered by unplugging and re-plugging the unit or by pressing and holding the snowflake button.
- Error Codes: The control displays various error codes (e.g., EO for air probe error, E1 for coil probe error, LO for low temperature alarm, HI for high temperature alarm, Ef for parameter error, Ed for defrost timeout) to assist in troubleshooting.
- Caster/Leg Installation: Units come with options for casters or legs. Swivel casters should be mounted on the front and rigid casters on the rear for single-section units. Proper installation involves securing the casters/legs with Phillips head screws into pre-drilled holes. After caster installation, the unit must remain upright for 24 hours before powering up to allow oil to return to the compressor sump.
- Leg Leveling: All four legs are adjustable to ensure the unit is stable and level. Slightly raising the front legs (approximately 1/8" or 3mm) can help the door remain closed.
- Freezer Compressor Bolts: For semi-hermetic models, the compressor bolts should be loosened (but not removed) before operation to prevent excessive vibration.
Maintenance Features
Regular maintenance is crucial for optimal performance and longevity.
- Interior Cleaning: The interior can be cleaned with soap and warm water. For stubborn stains, ammonia and water or a non-abrasive liquid cleaner can be used.
- Preventing Blower Coil Corrosion: To prevent corrosion, acidic items like pickles and tomatoes should be stored in sealable containers, and spills should be wiped up immediately.
- Exterior Cleaning: The exterior should be cleaned regularly with a damp cloth rinsed in water, rubbing with the "grain" of the stainless steel to avoid marring. Mild dish soap and water solution can be used for greasy residue. Abrasive pads, steel wool, chlorinated, citrus-based, or abrasive cleaners should be avoided. Stainless steel cleaners can be applied to prevent water spotting and fingerprints.
- Drain Maintenance: Each unit has an internal drain that routes condensation to an external evaporator pan. Users should ensure the drain tube is connected and free of obstructions to prevent water accumulation inside or underneath the unit. Proper leveling is important for effective drainage.
- Condenser Coil Cleaning: The condenser fins should be cleaned monthly (or more frequently if conditions are dirty) to remove dust, dirt, and grease. A vacuum cleaner or stiff brush can be used, or a commercial condenser cleaner for extremely dirty coils. Failure to maintain a clean condenser coil can lead to high temperatures, excessive run times, compressor failure, and may void warranties.
- Doors/Hinges: Hinges may loosen over time with heavy use. Users should tighten the screws that mount the hinge brackets to the unit frame to prevent sagging doors and potential damage.
- Door Adjustment: If the door needs lowering or raising at the handle, a 5/16" (8mm) wrench can be used to loosen hinge screws and install a spacer either outside (for lowering) or inside (for raising) the hinge, then retighten the screws.
The manual emphasizes safety, requiring users to read it thoroughly before operation, installation, or maintenance. It warns against damaging the refrigeration circuit, using electrical appliances inside food compartments unless recommended, and handling metal edges. It also highlights the importance of proper grounding, adherence to local and national codes, and professional servicing for repairs.