11
NOTE
t "GUFSDIBOHJOHUIFCBUUFSJFTUIFNFUFSBVUPNBUJDBMMZQSPNQUTZPVUPDIFDLUIFUJNFBOE
date when it is turned on either by inserting a test strip or pressing OK. If it is correct, press
OK to conrm setup and exit, or if the time and date are not correct, refer to the chapter
“Setting the Clock“.
t 5IFEBUFBOETUPSFESFTVMUTXJMMOPUCFFSBTFEXIFOUIFCBUUFSJFTBSFCFJOHDIBOHFE
t %JTDBSEVTFECBUUFSJFTBDDPSEJOHUPZPVSMPDBMHVJEFMJOFT
t 5IFNFUFSVTFTYWPMUMJUIJVNCBUUFSJFTDPJODFMM$35IJTUZQFPGCBUUFSZDBOCF
found in many stores. Always keep a spare packaged battery on hand.
t #FTVSFUIFCBUUFSJFTHPJOXJUIUIFiwTJEFVQ
t 3FNPWFUIFCBUUFSJFTJGZPVBSFOPUHPJOHUPVTFUIFNFUFSGPSBMPOHUJNF
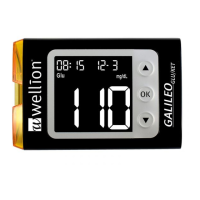
Setting the Clock
Material you will need:
Your Wellion GALILEO GLU/KET (plus) Meter
Step 1: With the meter turned o, press and hold the OK
button until the screen displays “FunC“.
 Loading...