ASSEMBLY & ADJUSTMENTS
INSTALLING THE THATCH BAG
WARNING! Turn the machine OFF, remove the safety key and
the batteries from their terminals, and wait for the tines to come to
a complete stop before attaching or emptying the thatch bag.
Attach the thatch bag to the dethatcher / scarifier before beginning
operation.
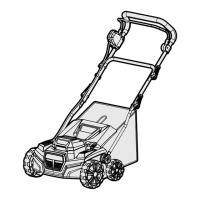
1. Lift up the thatch bag cover (Fig. 5 - 1) and secure the thatch bag
(Fig. 5 - 2) to the dethatcher / scarifier using the mounting hooks lo-
cated on the back of the body, under the cover.
2. Use the clips on either side of the thatch bag to clip it onto the frame
of the thatch bag rack (Fig. 5 - 3).
NOTE: Empty the thatch bag frequently and do not wait until it is com-
pletely full.
To remove the thatch bag for emptying:
1. Lift the thatch bag cover and remove the thatch bag from the mount-
ing hooks.
2. Empty the thatch bag and reattach following the instructions above.
ADJUSTING THE DEPTH
WARNING! The machine must be switched OFF and the safety
key and batteries must be removed from their terminals before
adjusting the tines.
To adjust the depth, move the depth adjustment lever (Fig. 6 - 1) to the right and then down to the preferred gear.
See the chart below for different depth settings:
NOTE: Negative depth settings indicate that the blades are digging into the ground.
Position Setting
Application
Depth Scarifying Dethatching
1 High 1/4" Do not use for scarifying. Transport, removing thin thatch layers.
2 Minimal -1/8" Do not use for scarifying. Dethatching healthy lawn.
3 Medium -1/4" Transport, storage, and scarifying. Storage and dethatching.
4 Deep -3/8" Use for scarifying. Not recommended for dethatching.
5 Deep -1/2" Use for scarifying. Do not use for dethatching.
1
Fig. 5
1
3
2
Fig. 6
13
 Loading...