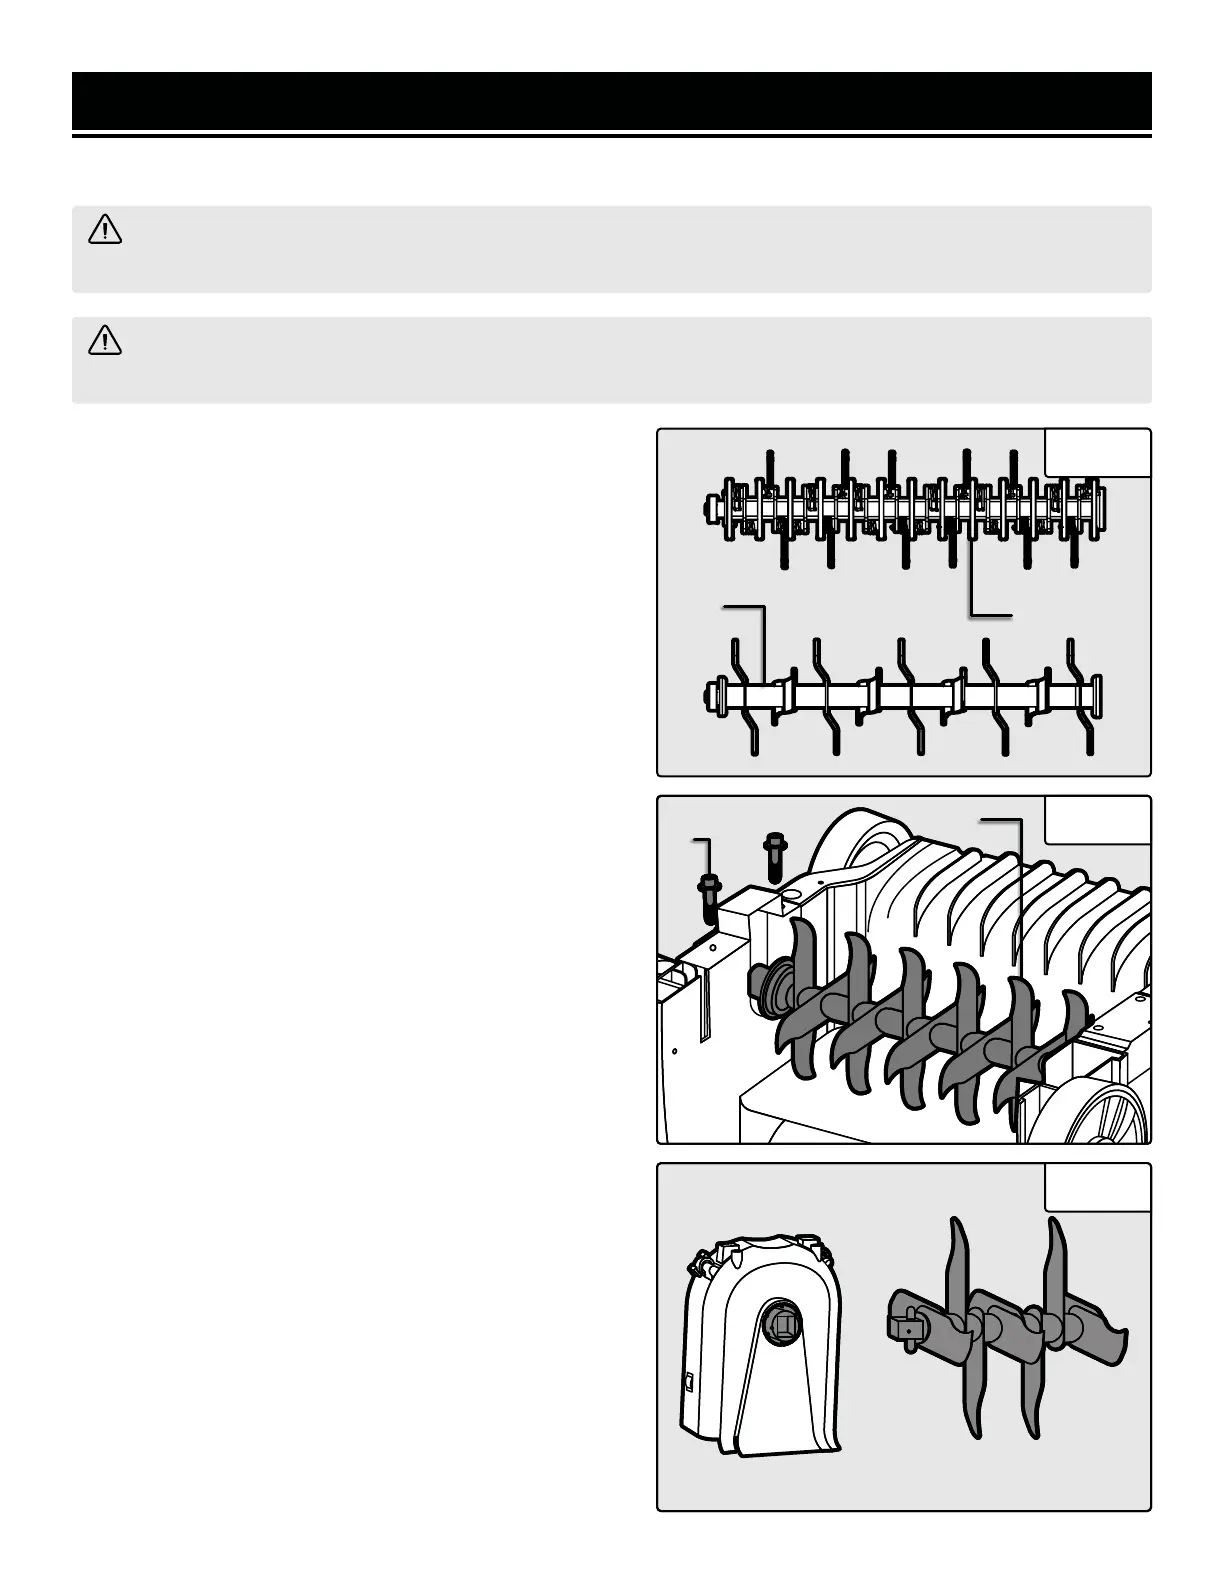
The dethatcher / scarifier comes with two lawn blades with
two different functions. The scarifier blade (Fig. 10 - 1)
comes pre-assembled on the machine. The dethatching /
raking blade (Fig. 10 - 2) is included inside the box and can
be changed out according to your application.
To remove the scarifier or dethatcher blade:
1. Unscrew the hex screws (Fig. 11 - 1) on the bottom of
the dethatcher / scarifier body.
2. Carefully remove the blade bracket and blade (Fig. 11
- 2). When removing the dethatcher blade, wear safety
gloves and take care not to scrape yourself on the sharp
tines. Note that both blades may get hot during operation.
To install the scarifier or dethatcher blade:
1. Align the square end of the blade shaft with the square
hole of the output gear (Fig. 12).
2. Press the bearing on the blade into the blade bracket
slot. Secure the blade in place by reinstalling the blade
bracket and hex screws using the included hex wrench.
MAINTENANCE
WARNING! Make sure that the machine is switched OFF and that the safety key and batteries are removed
from their terminals before removing or replacing the blade.
WARNING! The tines are very sharp and become hot during use. Handle with care when removing or replac-
ing. Wear safety gloves when handling the tines to avoid burns and / or cuts.
REPLACING / CHANGING THE BLADE
Fig. 12
1
1
2
2
18
Fig. 11
Fig. 10
 Loading...