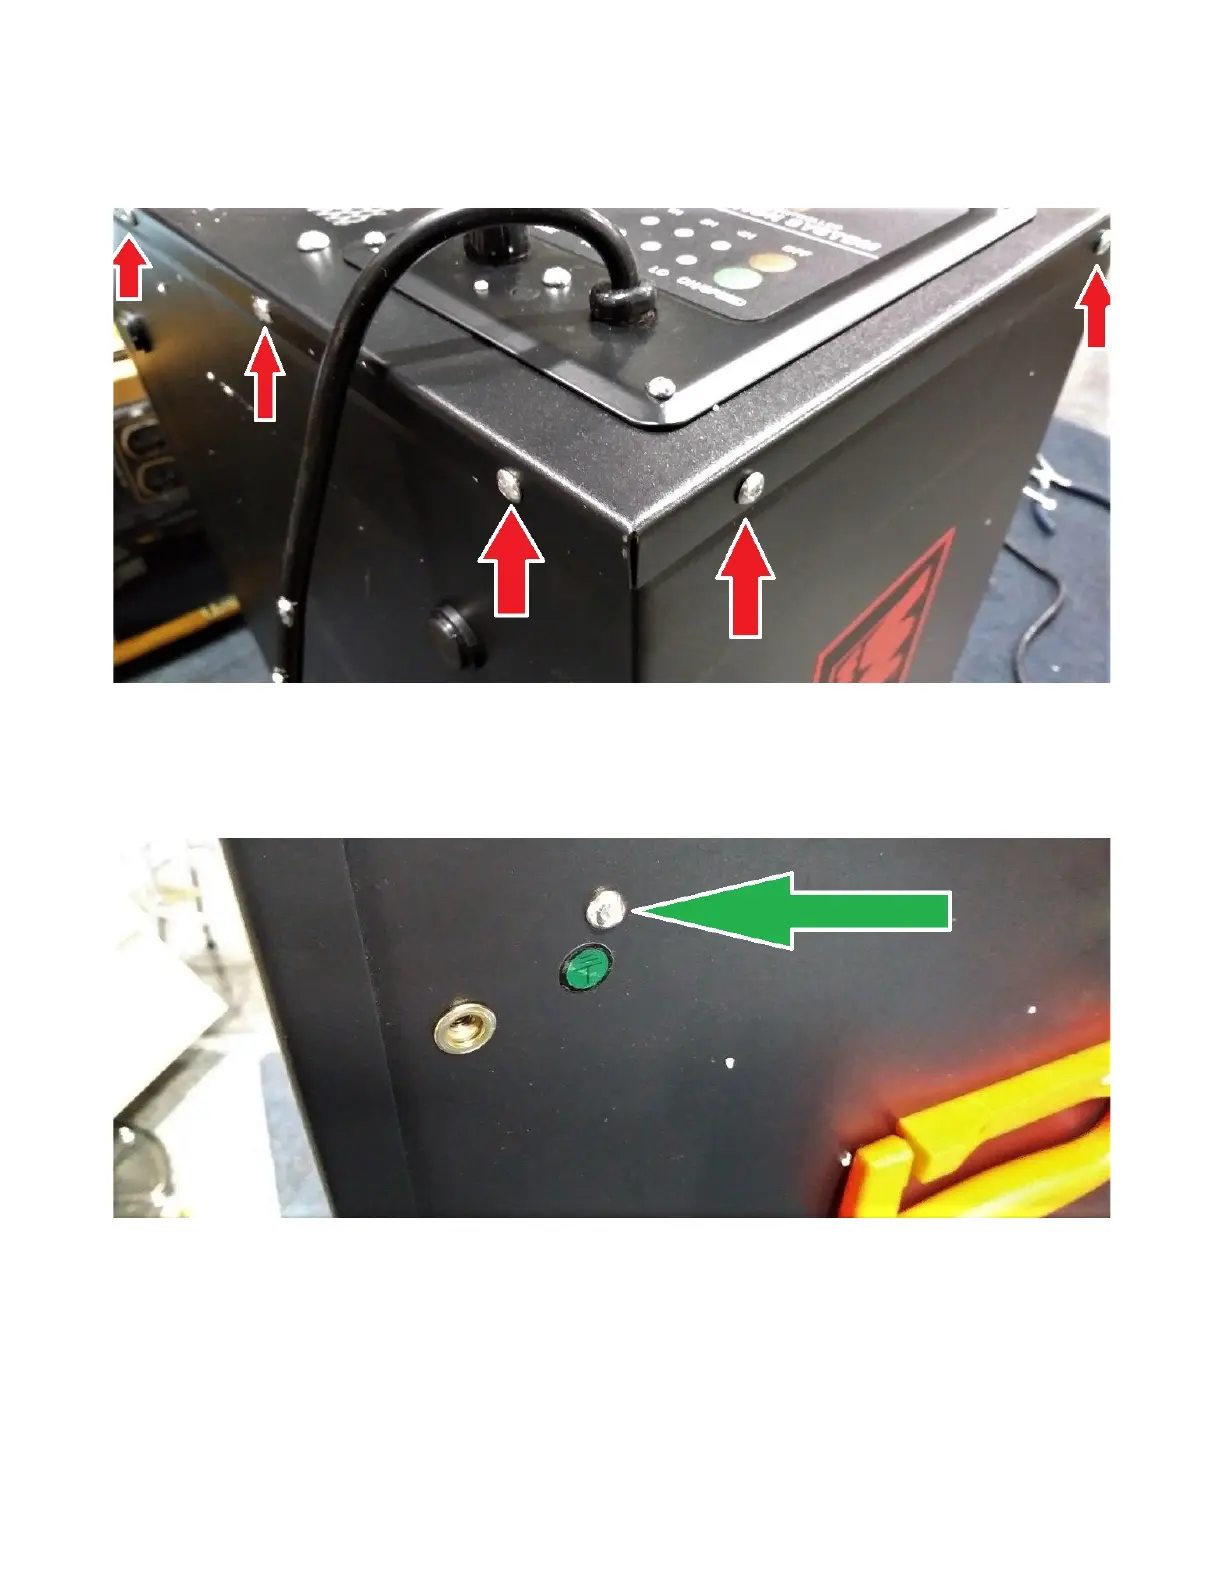
3. Using the Phillips head screwdriver, remove the ten screws found around the perimeter of the front
panel, as indicated by the red arrows in Figure 2 below.
4. Set the screws aside. Look on the top of the unit near the handle. Notice the grounding bolt shown in
Figures 3 and 4 below.
Gently lift the front panel up and slide it towards the bottom of the unit. This exposes the inside of the
grounding bolt, shown in Figure 4 below.
Figure 2: Remove these ten screws.
Figure 3: Grounding bolt, indicated by green arrow.
 Loading...