10
FILLING THE AUTO OIL SYSTEM
This chainsaw features an auto-oiling system to keep the chain and guide bar properly lubricated. The oil level indi-
cator shows the remaining oil in the chainsaw. If the oil level decreases to below one quarter capacity, refill it with
the proper bar and chain oil. To fill the oil reservoir:
1. Remove oil cap. Fill the reservoir with bar and chain oil (not included) until the oil level has reached full capacity.
2. Put the oil cap back on. Make sure to check the oil level after every 10 minutes of use. Unplug the chainsaw before
checking oil levels or filling the oil reservoir.
NOTE: Drain saw of oil after use to reduce the amount of oil that leaks from the saw. Some oil leakage is normal.
ASSEMBLY & ADJUSTMENTS
WARNING! Do not plug in or turn on the tool until it is fully assembled according to the instructions. Failure
to follow the safety instructions may result in serious personal injury.
WARNING! Do not turn on the tool until it is fully assembled according to the instructions. Failure to follow
the safety instructions may result in serious personal injury.
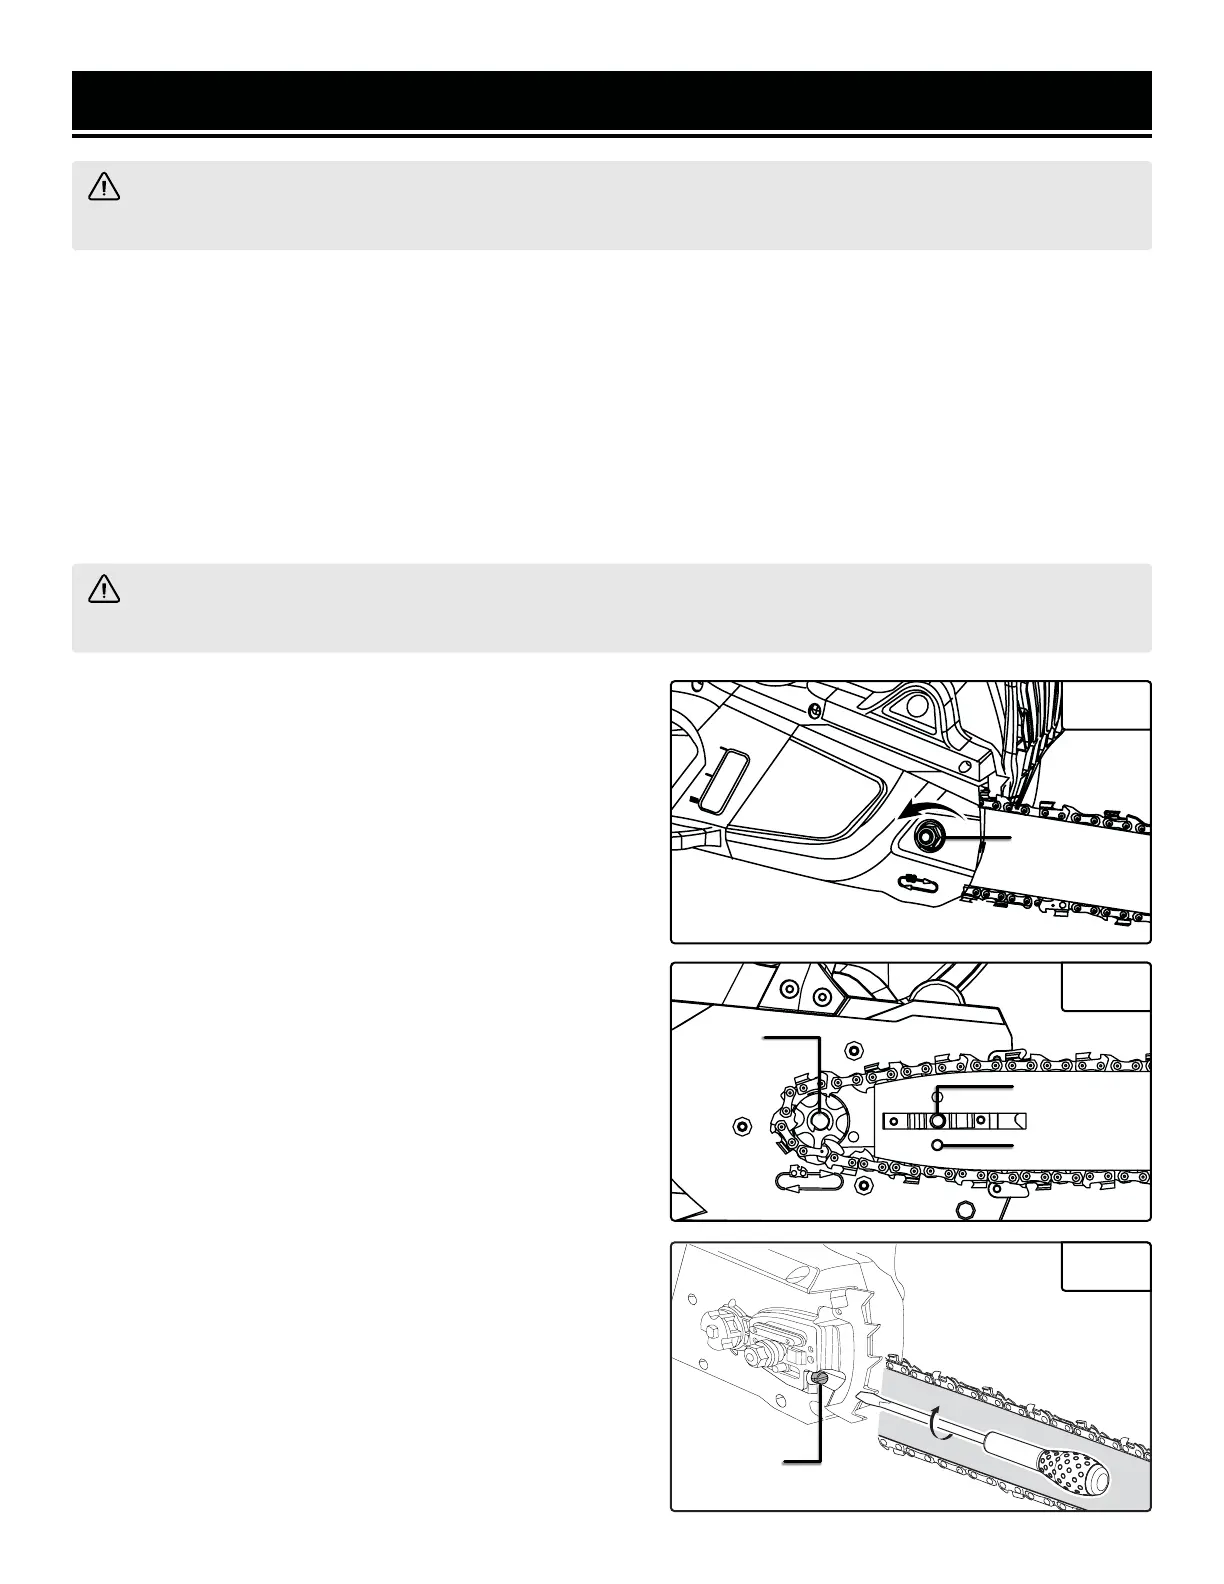
INSTALLING THE GUIDE BAR AND CHAIN
1. Place the saw on a firm and level surface.
2. Turn the blade cover nut counterclockwise (Fig. 1 - 1) to
remove the cover from the saw’s body.
3. While wearing protective gloves, wrap the saw chain
around the guide bar, making sure that the teeth are aimed
in the direction of rotation. There is also a handy decal on the
bar. The chain should be properly set in the slot running along
the entire outside edge of the guide bar.
4. Place the saw chain around the sprocket (Fig. 2 - 1) while
lining up the slot in the guide bar with the bolt (Fig. 2 - 2) at
the base of the saw and the chain tensioning pin (Fig. 2 - 3)
in the guide bar’s pin hole. The chain tensioning pin may need
adjustment to properly align with the hole in the guide bar.
Use the chain tensioning screw (Fig. 3 - 1) to adjust its loca-
tion until it fits in the guide bar.
5. Turn the chain tensioning screw to preliminarily tighten the
guide bar enough that it stays in place. While holding the bar
still, place the cover back onto the saw. Make sure the tab on
the left end of the cover goes into the slot on the body of the
saw. Lock the cover in place by tightening the blade cover nut
with the included hex wrench. Adjust tension (next section).
Fig. 1
1
1
2
3
Fig. 2
Fig. 3
1

 Loading...