EasyManua.ls Logo

WESTEK BL-BAR12RC User Manual

WESTEK BL-BAR12RC
6 pages
To Next Page IconTo Next Page
Page #1 background imageLoading...
Page #1 background image
Instructions for Installation of Rechargeable Light Bars
A. Micro USB Micro charging port
B. Charge Indicator: Red when charging, Blue when fully charged
C. Slide Switch: 3000K / 4000K / 5000K / OFF used to set CCT or turn OFF
D. PIR senses motion when AUTO mode is selected
E. Touch Switch: change from Manual / AUTO
F. Slide Magnets
G. Key hole
Models: BL-BAR12RC / BL-CLN5RC / BL-BAR4RC
INCLUDES
BL-BAR12RC/ BL-CLNG5RC/ BL-BAR4RC Series
Rechargeable Light Fixture
4 USB charging Cord, (2)Metal plates with 3M
tape, (2)screws
IMPORTANT SAFETY INSTRUCTIONS
For use with 5VDC USB charger only
CAUTION: This product comes with the battery installed internally. DO NOT install or remove the battery
from the product. DO NOT dispose of batteries in trash, consult your local waste authorities for your
disposal/recycling options.
SECTION 1 PREPARATION FOR INSTALLATION
Become familiar with the parts of the light fixture, see diagram1.
FEATURES
Slide magnets on for easy installation
Dimmable long life LED technology
3000/4000/5000K switch
Auto/Manual ON touch switch
Before first use, make sure to fully charge with Micro
USB cord (included) and wall charger (not included).
The charge indicator light will turn blue when fully
charged. See diagram 2
E
D
C
A
B
G
F
E
D
B
A
C
F
G
Diagram 1.
Diagram 2.
Question and Answer IconNeed help?

Do you have a question about the WESTEK BL-BAR12RC and is the answer not in the manual?

WESTEK BL-BAR12RC Specifications

General IconGeneral
ModelBL-BAR12RC
BrandWESTEK
CategoryLighting Equipment
TypeLED Light Bar
ControlRemote Control
Length12 inches
Beam Angle120 degrees
IP RatingIP20
Lifespan50, 000 hours
DimmableYes
CertificationETL Listed
Power SourceElectric
Input Voltage120V

Summary

Important Safety Instructions

Battery Handling and Disposal

Caution regarding internal battery installation, removal, and proper disposal methods.

Preparation for Installation

Component Identification and Charging

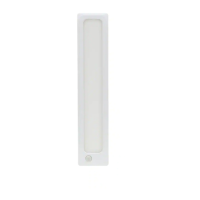
Identifies light fixture parts (A-G) and instructions for initial charging before first use.

Installation Options

Magnet Mounting Method

Instructions for attaching the light fixture using its built-in slide magnets and metal plates.

Screw Mounting Method

Instructions for securing the light fixture using screws and keyhole slots.

Functions and Settings

Manual and Auto Mode Switching

Guide to switching between Manual (always ON) and AUTO (motion-sensing) modes via the touch switch.

Related product manuals