20
Product information from westerbergs Box 525, 301 80 Halmstad, Sweden
20
Product information from westerbergs Box 525, 301 80 Halmstad, Sweden
Installation instructions
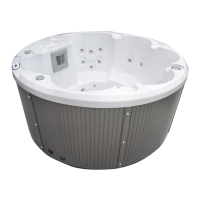
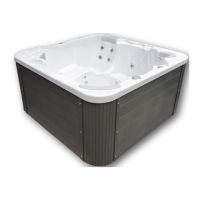
Your spa is equipped with one massage pump,
one diverter and several air valves, allowing you to
run the various parts of the jet system separately
or together. Do not connect an empty spa to the
electricity supply. This can damage components
such as the control unit, heater, circulation pump
and other parts of the system.
PREPARING THE SITE
1. INSTALLATION INDOORS/IN A BASEMENT
When placing your spa indoors a number of particular conditions
need to be observed. The floor around the spa will become wet and
must therefore provide a good grip when moist. Correct drainage is
needed to prevent the accumulation of water around the spa. If you
are building a new room for the spa, we recommend that you install a
drain in the floor. Humidity levels will rise with the spa installed, which
can cause fungal growth, mould and other problems. For this reason,
you should check the effect of humidity on exposed wood, wallpa-
per, etc., in the room. To minimise these effects, thorough ventilation
of the area around the spa is advised.
2. INSTALLATION OUTDOORS AND ON PATIOS/BALCONIES
It is important to install the new spa on a stable base. To be certain
that your wooden deck or base can cope with the spa you must
check the maximum load of the deck. Consult a qualified builder or
designer for advice. The weight of the spa and its contents, and the
maximum number of users, can be found in the specifications for
the spa. This weight per square metre must not exceed the nomi-
nal capacity of the structure, as otherwise serious damage to the
structure may result. If you install the spa outdoors, we recommend
a reinforced concrete plate with a thickness of at least 10 cm. Do not
forget to provide sufficient runoff around the spa to ensure that water
will run away during heavy rain, for example. Try to protect the spa
from rain and snow and, if possible, build a conservatory for the spa.
Servicing and installation
must be performed by a
qualified technician.
Basic guidelines for installation and configuration
On installation, an access route must be prepared for when discon-
necting.
Permanently connected. Connect only to a circuit that is protected
by an RCD and an isolating switch.
See the circuit diagram on the inside of the lid of the control unit.
See the installation and safety instructions.
NB:
• People with infectious conditions should not use the spa.
• To avoid injury, take care when getting into and out of the spa.
• Do not use the spa immediately after performing strenuous
exercise.
• Prolonged bathing in the spa can be damaging to health.
• Ensure that the chemical levels of the water are kept in accord-
ance with the manufacturer’s instructions.
RCD
The owner must regularly test and reset the RCD to ensure that it is work-
ing.
Risk of electric shock!
No electrical components should be maintained by the user.
Do not try to carry out maintenance work on the control system. Contact
Westerbergs and our service organisation. Follow all instructions for the
owner’s manual electrical connections. In order for the product warranty to
remain valid, the installation must be carried out by an authorised electri-
cian and all earth connections must be installed correctly.
BASIC RULES
The spa must be installed such that service employees can gain access
from all sides if necessary. It is the customer's responsibility to ensure that
the spa is accessible and, if necessary, to remove/move any obstacles or
housings/sunken installation constructions to secure access to the spa.
Any time that a service employee spends (if possible) on gaining access to
the spa is debited at the applicable hourly rate for each full or partial hour.
Caution:
• Read the instructions.
• Test the RCD each time before using the spa bath.
• Sufficient drainage must be provided if the equipment is to be installed
in a pit.
• Connect only to a circuit that is protected by an RCD and an isolating
switch.
• For continued protection against electric shock, use only identical
replacement components when servicing.
• Water temperatures exceeding 38°C can be damaging to health.
• Disconnect from the power supply before servicing. Always keep all
hatches in the panel closed except during servicing.
installation
1. Read the user manual carefully and have the spa installed and
configured by a professional.
N.B. Prior to installation, an isolating switch and a separate RCD must
be installed.
2. Check that all bolted joints on the pumps and the heater are properly
tightened as they can come loose during transit and cause leakage.
Leakage due to insufficiently tightened joints is not covered by the
warranty. Also refit the bolted joint on the compressor, which is
removed for transit (only Luxury).
3. Remove the packaging and move the spa to the prepared foundation.
4. Open the control box of the computer control to prepare the electrical
connection. Prepare a copper cable of sufficient length and cross-
section for connection to the power supply. Drill a hole in the upright
part of the base of the unit near the control box and fit a cable bushing
with strain relief (not included). Use this to feed the power cable into
the box and connect in accordance with the instructions on the next
page. Ensure that nothing is in the way on the inside before drilling.
5. Clean and wax the spa and lid. The spa has been thoroughly testing
during the manufacturing process to ensure that it works correctly.
There may, therefore, be small amounts of water and possibly a certain
amount of lubricant grease remaining in the pipes after testing. This
may have left stains on the spa, lid or sides. You must therefore clean
it using water and then mop it clean using a soft rag or a cleaning agent
designed for acrylic plastic before waxing if possible.
Product information from westerbergs PO Box 525, SE-301 80 Halmstad, Sweden
 Loading...