EasyManua.ls Logo

Westinghouse WBE5300 - User Manual

Westinghouse WBE5300
16 pages
Print Icon
To Next Page IconTo Next Page
Loading...
INSTALLATION MANUAL
REFRIGERATION
IK009 INTEGRATION KIT
W
TB4600, WTB4604, WTB5400,
WTB5404, WBE4500, WBE4502,
WBE4504, WBE5300, WBE5304,
WFB4204, WRB5004
Al
so suitable on selected Electrolux and Kelvinator 400L - 500L
Tom Mount, Bottom Mount and Single Door Fridges and Freezers
Question and Answer IconNeed help?

Do you have a question about the Westinghouse WBE5300 and is the answer not in the manual?

Summary

Refrigerator Integration Kit Items

Dimensions

Cupboard Dimensions

Detailed internal dimensions for required cabinetry, essential for proper installation.

Clearances

Ensuring adequate air ventilation around the refrigerator for optimal performance and longevity.

Cabinet Construction

Guidelines for constructing the cabinet, including hinge placement and door opening considerations.

Installation

Installation of 120° Hinge

Instructions for fitting the specialised 120-degree hinges for cupboard door attachment.

Preparation

Essential preliminary steps including unpacking, handling, and preparing the appliance for installation.

Attaching the Rear Rollers

Guidance on fitting and adjusting the rear rollers to ensure the refrigerator is stable and level.

Attaching the Top Hinge Bracket

Steps to correctly attach the top hinge bracket to the refrigerator and cabinet for secure door mounting.

Attaching Slide-Housing to Refrigerator Doors

Procedure for attaching the slide-housing components securely to the refrigerator doors.

Placing Refrigerator in Cupboard

Instructions for safely positioning the refrigerator within the prepared cupboard space.

Refrigerator Alignment

Methods for accurately aligning the refrigerator within the cupboard for proper door closure and aesthetics.

Securing the Refrigerator in the Cupboard

Steps to firmly fix the refrigerator to the cupboard structure using provided screws and brackets.

Attaching Slide-Bar to the Cupboard Door

Process for attaching the slide-bar to the cupboard door for smooth operation with the refrigerator.

Overview

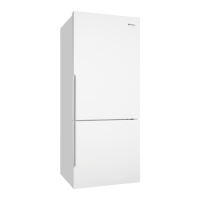
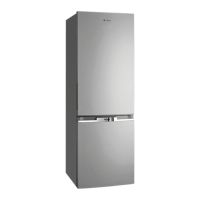
This document is an installation manual for the Westinghouse IK009 Refrigeration Integration Kit, designed for various Westinghouse refrigerator models, as well as selected Electrolux and Kelvinator 400L - 500L top mount, bottom mount, and single door fridges and freezers. The kit facilitates the integration of these appliances into custom cabinetry, providing a seamless built-in look.

Function Description:

The IK009 Integration Kit provides all the necessary components and instructions to securely install a compatible refrigerator into a custom-built cupboard. The primary function is to enable the refrigerator door to operate in conjunction with a matching cupboard door, creating a unified aesthetic in the kitchen. This is achieved through a slide-housing and slide-bar mechanism that connects the appliance door to the cabinetry door, allowing them to open and close together. The kit also includes components for securing the refrigerator within the cupboard and ensuring proper ventilation.

Important Technical Specifications:

The manual provides detailed cupboard dimensions (internal and in millimetres) crucial for proper installation. These dimensions vary depending on the specific refrigerator model (2-door top freezer, 2-door bottom freezer, single door). Key dimensions include:

  • Dim 'A' (min.): Minimum height, ranging from 1820mm for all listed models.
  • Dim 'B': Width, consistently 780mm for all listed models.
  • Dim 'C': Depth, varying between 800mm and 896mm depending on the model.
  • Dim 'D': Cabinetry depth, varying between 702mm and 1217mm.
  • Dim 'E': Airflow cut-out depth, consistently 600mm.
  • Dim 'G': Hinge side clearance, varying between 241mm and 278mm.
  • Dim 'H': Opposite hinge side clearance, varying between 395mm and 495mm.
  • Dim 'I': Calculated based on Dim 'A' - (Dim 'D' + 5mm) mm, representing the remaining height.

The kit includes specific hardware:

  • Top hinge bracket: 1 unit (PNº A02986001).
  • Slide-housing: 2 units for two-door models, 1 for single-door models. Available in "Curve door" (PNº A04098601) and "Flat door" (PNº A04098602) versions to match the refrigerator door profile.
  • Slide-bar: 2 units for two-door models, 1 for single-door models (PNº A04098501).
  • Location bracket front footing: 2 units (PNº A02986101).
  • Refrigerator screws: 8 units for two-door models, 4 for single-door models (PNº A04120701).
  • Cupboard screws: 14 units for two-door models, 11 for single-door models (PNº A04120801).
  • 120º hinge: 5 units (3+2) for two-door models, 3 for single-door models (PNº A04120901).
  • Mounting plate for hinge: 5 units (3+2) for two-door models, 3 for single-door models (PNº A04121001).
  • Self-tapping wood screws: 20 units for two-door models, 12 for single-door models (PNº A04121101).
  • Service Kit Rear Rollers: 1 unit (PNº A04078201).
  • Screw Rear Rollers: 2 units (PN° 811949503).
  • Installation Instruction Sheet: 1 unit (PNº A04633102).

Crucial design requirements for the cabinetry include:

  • All sizes are internal and in millimetres.
  • Adequate air circulation is vital, with specific cut-outs required for front, bottom rear, and top rear airflow.
  • Cupboard hinges must be a 120° opening type (supplied in the kit).
  • Three hinges are required for cupboard doors higher than 1000mm; two are sufficient for doors smaller than 1000mm.
  • A 4mm gap between the refrigerator door and the cabinet edge is necessary for a good gasket seal.

Usage Features:

The integration kit allows the refrigerator to be concealed behind a custom cupboard door, blending it seamlessly with kitchen cabinetry. The slide-housing and slide-bar mechanism ensures that the refrigerator door opens and closes in unison with the cupboard door, providing a smooth and integrated user experience. The adjustable rear rollers and height-adjusting screws facilitate precise levelling and alignment of the refrigerator within the cupboard, which is critical for proper door operation and gasket sealing. The design accounts for both curved and flat refrigerator door profiles, offering appropriate slide-housing options.

Maintenance Features:

The manual emphasizes the importance of proper installation for long-term functionality. While the kit itself doesn't have specific maintenance features, the design considerations for airflow (front, bottom rear, top rear cut-outs) are crucial for the refrigerator's efficient operation and longevity. The installation process includes steps for ensuring the refrigerator door gasket acts correctly, preventing air leaks and maintaining cooling efficiency.

A significant note regarding maintenance and warranty: In the event that service is required for an integrated refrigerator during the warranty period, it is the customer's responsibility to remove the refrigerator from the cupboard. The removal of the refrigerator from the cupboard is not covered by warranty. This highlights that while the kit enables integration, the appliance itself remains a separate entity for servicing purposes, and the integration process adds a layer of complexity to accessing the appliance for repairs. The manual also advises against using the integration kit if it is damaged and to contact customer care in such cases. For improved aesthetics, painting the location bracket front footings to match the cupboard floor colour is suggested.

Westinghouse WBE5300 Specifications

General IconGeneral
BrandWestinghouse
ModelWBE5300
CategoryRefrigerator
LanguageEnglish

Related product manuals