ix. The combustion air inlet flue can be terminated underneath the vehicle. The open end of it must be
at least 500mm away from the open end of the exhaust flue, and pointing in the same direction. Take
care to ensure that both flues have a slight downward slope from as close to the heater as possible
to prevent any possibility of water traps. Make sure neither the exhaust nor the combustion air inlet
flues are terminated in an under-floor box section.
x. The minimum length of the exhaust flue is 0.75m, and maximum length 2m. The minimum length of
the combustion air inlet flue inlet must be 0.75m, and maximum length 2m.
xi. When operating using gas, the combustion air inlet flue and outlet openings for the products of
combustion (exhaust flue) must never be obstructed. They should be checked regularly, and if
necessary cleaned by the user (e.g. in winter, snow shall be removed from the combustion outlet flue
and combustion flue intake).
xii. Where the open end of the exhaust flue terminates, three sides of the under-floor space are to be
kept open and not obstructed, and not contain through-floor ventilation openings.
xiii. The heater, its gas supply, ducting and flues are to be inspected in accordance with national
regulations or if these do not exist, the manufacturer’s recommendations, however, it is advised that
this should be done at least every year.
xiv. The heater must not be used when the vehicle is in motion unless the vehicle in motion flues and
bracket are fitted. The vehicle in motion kit is not standard and is available separately. Please refer to
the vehicle in motion kit instruction for further fitting considerations or contact Whale® Support for
more information.
If installing on the underside of the vehicle floor skip Steps 2 and 3.
Step 2 Cut out holes for exhaust and combustion air flues
Position the template on the floor where the heater is to be mounted. Mark the position of the two holes for the
combustion air inlet and exhaust flues, then drill holes with a 51mm (2”) minimum diameter hole saw.
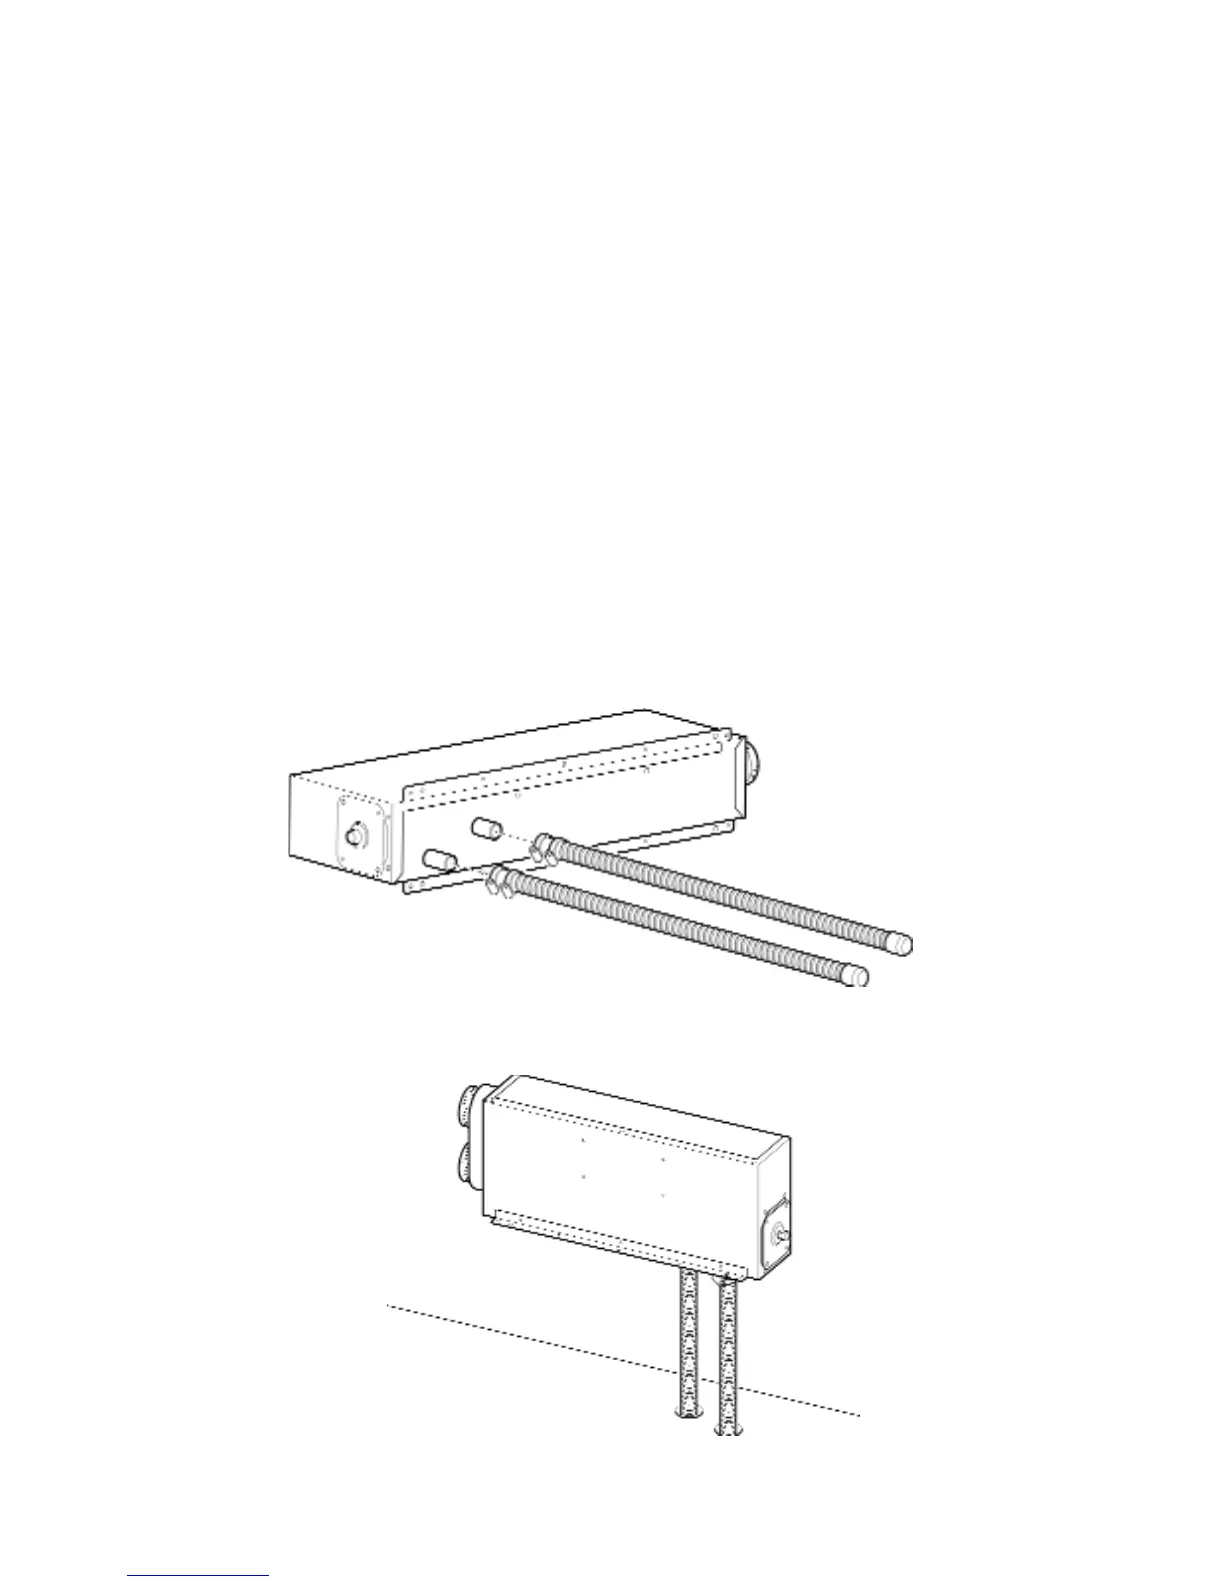
Fig. 11
Push on the ends of the flues with the blue adaptor to the pipes on the underside of the Space Heater ensuring they
are fully pushed on, and secure with supplied hose clips.
Fig.12
10
 Loading...