Installation Manual: GM LT1_A1R13E
Last Updated: February 12th, 2019
Page 33 of 36
www.whipplesuperchargers.com
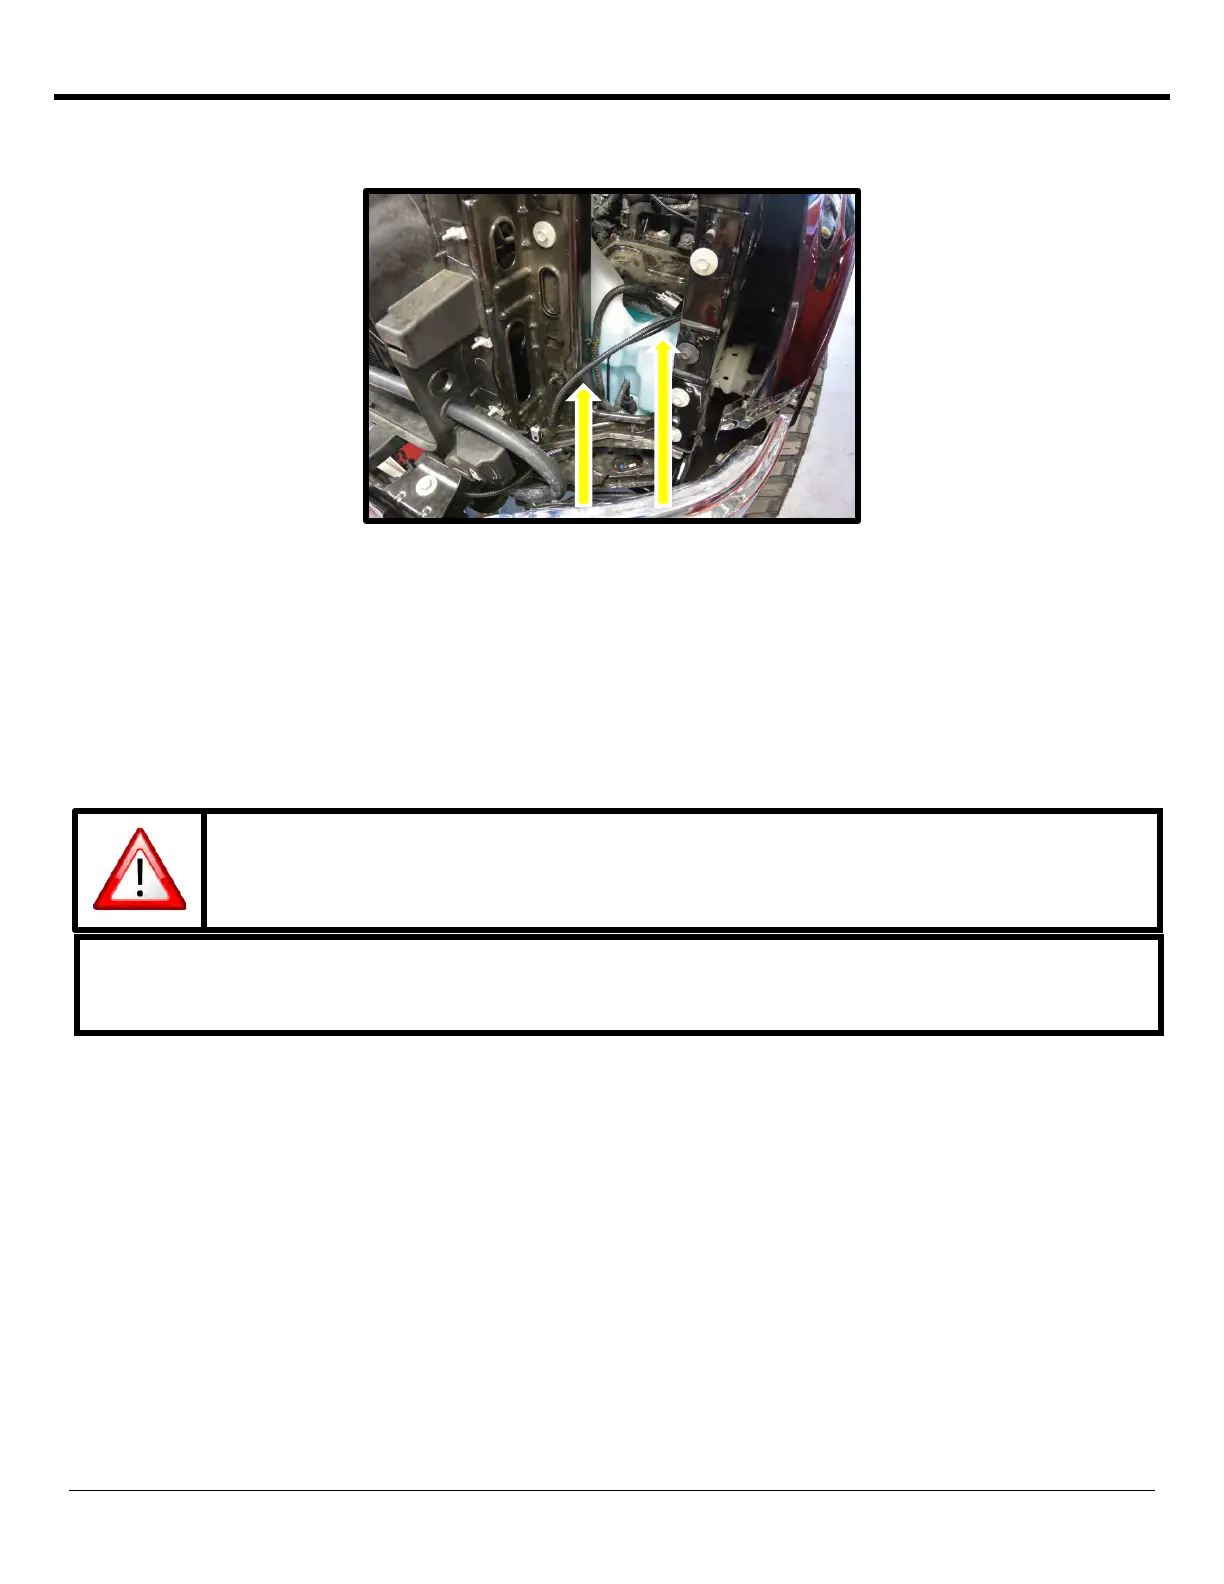
106. Route the IC pump 2-way connector up front under driver side headlight area, below bumper and to the IC pump.
Push connector until it clicks and locks in place.
107. Connect MAF connector to MAF sensor by routing under the MAF sensor. Press together until it clicks and locks and
place.
108. Reinstall front driver side headlight by using the factory (4) fasteners and a 10mm socket.
109. Remove the front fascia from the front grille by releasing the tabs.
110. Reinstall factory grille assembly by installing the (10) factory fasteners (T15 torx and 7mm socket wrench).
111. Reinstall the front fascia by pressing back into place until it locks in place.
112. Using a Lisle 24680 Spill-Free Funnel, or equivalent, secure the appropriate filler neck adapter to the filler
neck/surge tank.
113. Attach the funnel and fill with a 50/50 mixture of coolant and distilled water until the funnel is half full. Whipple
recommends Zerex G-05 to match the stock color. The Whipple IC system is compatible with all common types of
antifreeze, it is customer preference. Note: Whipple also recommends 1 bottle of Red Line Water Wetter or
equivalent. Never use tap water, this will cause corrosion and destroy the system.
The electric water pump used on the Whipple SC system has a built-in micro-processor that
will vary pump cycle speed when air bubbles are present in the system. If a significant
amount of air is trapped in the system, the pump may cycle at a lower speed and pulsations
are likely to occur resulting in poor cooling performance.
For the best result, it is highly recommended to use a Radiator Cooling System Vacuum Purge and Refill
Kit to properly evacuate the air from the intercooler system before filling the 50/50 mixture of coolant
and distilled water. If one is not available, the following procedure will be adequate.
 Loading...