2-2
6. To convert the oven burner:
a)Remove the oven burner from over the
orifice (see pages 3-6 and 3-7 for the
procedure).
7. Reassemble the range.
FOR RANGES WITH PILOT LIGHT
1. To convert a range that uses a pilot light
ignition system:
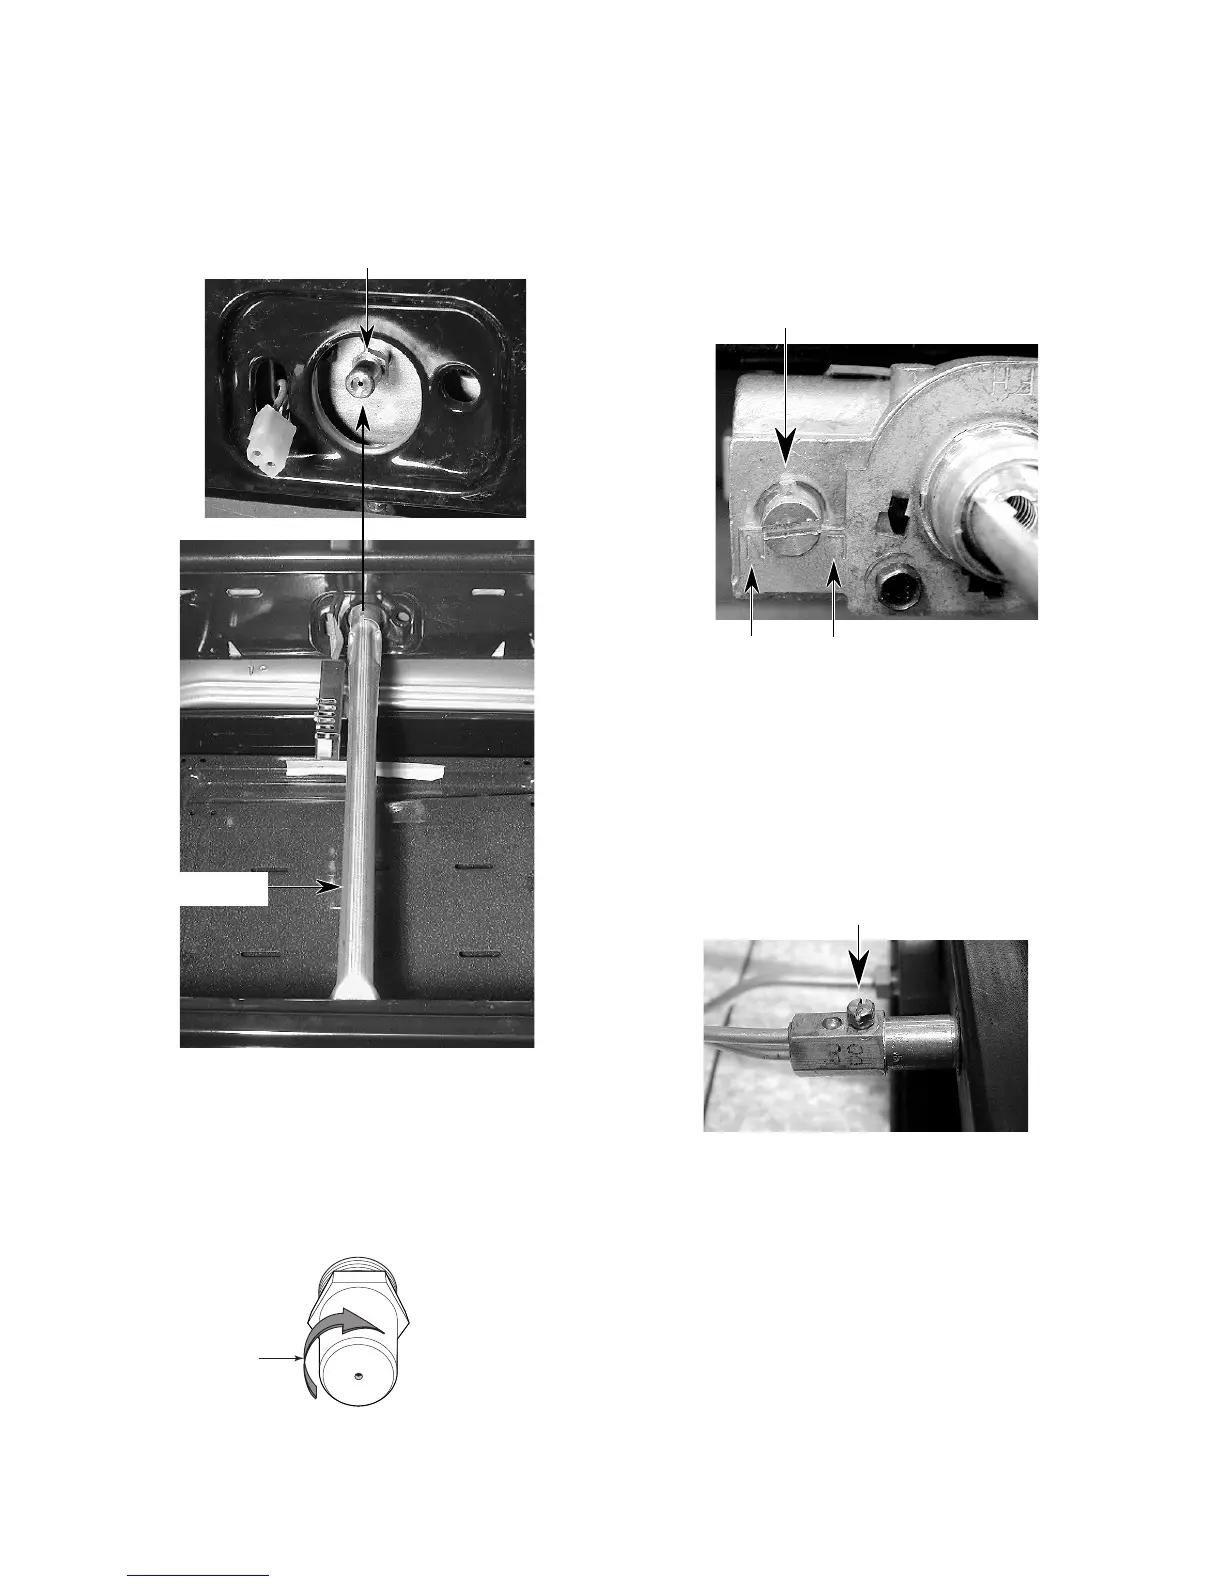
a)Remove the front panel.
b)Turn the thermostat screw so that the
pin is pointing at the “L” position.
Oven Burner Orifice
Oven Burner
L.P. Gas:
Turn down 2-1/2 turns
in this direction
2. If it is necessary to adjust the cooktop pilot
flame:
a)Raise the cooktop.
b)Turn the cooktop pilot flame adjustment
screw to obtain the best flame. The
flame should have a solid blue cone with
a lighter blue inner flame.
Cooktop Pilot Flame Adjustment Screw
b)Use a 1/2˝ socket and turn the oven
burner orifice hood clockwise until it is
snug (approximately 2-1/2-turns). DO
NOT OVERTIGHTEN THE ORIFICE.
The burner flame cannot be properly ad-
justed if this conversion is not made.
Screw Pin
Natural L.P.
NOTE: There is no pilot adjustment for the oven
burner. It is preset at the thermostat.
 Loading...