This document provides comprehensive instructions for the use, maintenance, and installation of a refrigerator appliance. It covers various aspects from initial setup to troubleshooting and electrical connection.
Function Description
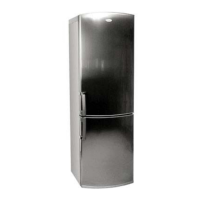
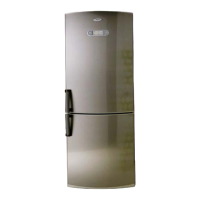
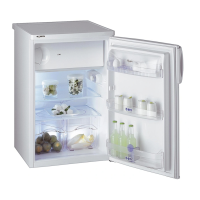
The appliance is designed for domestic use, featuring two main compartments:
- Refrigerator Compartment: This section is equipped with an automatic defrost feature and is primarily used for storing fresh food and beverages.
- Low Temperature Compartment: This compartment, marked with a four-star rating (****), is used for making ice cubes, storing frozen and deep-frozen foods, and freezing fresh and cooked foods. Defrosting of this compartment is a manual procedure.
Important Technical Specifications
- Refrigerant: The appliance uses either R134a or R600a (Isobutane) as a refrigerant. R600a is a natural gas with low environmental impact, but it is flammable, requiring careful handling to ensure refrigerant pipelines are not damaged.
- Freezing Capacity: The quantity of fresh food that can be frozen in 24 hours is indicated on the appliance's rating plate.
- Electrical Connection: The appliance operates on a specific voltage and power consumption, as indicated on its rating plate. It must be earthed in accordance with local regulations. For Great Britain, it is fitted with a BS 1363A 13amp fused plug, requiring a BS 1362 type fuse for replacement.
Usage Features
Before Using the Refrigerator:
- Unpacking and Inspection: After unpacking, ensure the door shuts properly. Report any damage to the dealer within 24 hours of delivery.
- Initial Power-Up Delay: Wait at least two hours before connecting the appliance to the power supply to ensure the refrigerant circuit is fully efficient.
- Installation: Installation and electrical connections must be performed by a qualified electrician according to manufacturer's instructions and local regulations.
Operating the Refrigerator Compartment:
- Switching On: Plug in the appliance. The internal light will illuminate when the door is opened.
- Temperature Adjustment: The thermostat knob, located either inside the compartment or on the top section, controls the temperature of both compartments. Refer to the enclosed product sheet for specific thermostat adjustment instructions.
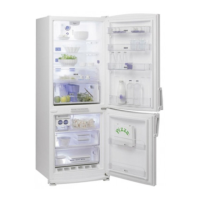
- Food Placement:
- Cooked food, fish, meat, fruit, vegetables, bottles, and cheese should be placed as illustrated in the manual.
- Maintain space between shelves and the rear wall for air circulation.
- Avoid direct contact of food with the rear wall.
- Do not place hot food in the refrigerator.
- Store liquids in closed containers.
- Condensation: Storing high-water-content vegetables may cause condensation on the crisper drawer's glass shelf, which is normal and does not affect appliance operation.
Operating the Low Temperature Compartment:
- Freezing Fresh Food (for **** compartments):
- Wrap and seal fresh food in aluminum foil, cling film, airtight plastic bags, or suitable freezer containers.
- Arrange food in the top compartment, leaving space for air circulation.
- Turn the thermostat down by half a point when freezing fresh foods.
- Food will be completely frozen in 24 hours.
- Purchasing Frozen Food:
- Check packaging for damage; avoid swollen or damp packages.
- Transport frozen food in a thermally insulated cool bag.
- Place items in the compartment immediately upon returning home.
- Do not refreeze partially defrosted food; consume within 24 hours.
- Minimize temperature variations.
- Observe best-before dates and storage information on packaging.
- Making Ice Cubes:
- Fill the ice cube tray 2/3 full and place it in the compartment.
- Do not use sharp instruments to detach the tray.
- Bend the tray slightly to remove cubes.
- Power Cut: The compartment will maintain a low temperature during a power cut, but avoid opening the door.
Maintenance Features
Defrosting and Cleaning the Refrigerator:
- Safety First: Unplug the appliance or disconnect it from the electrical supply before any cleaning or maintenance.
- Refrigerator Compartment Defrosting: This is automatic. Water droplets on the rear wall indicate the defrost cycle is in progress. Defrost water drains automatically and evaporates. Regularly clean the drain outlet with the supplied tool to ensure proper water removal.
- Low Temperature Compartment Defrosting: Defrost once or twice a year, or when ice buildup is excessive.
- Remove food, wrap it in newspaper, and store in a cool place or portable cooler.
- Leave the door open to melt the frost.
- Clean the interior with a sponge soaked in warm water and/or neutral detergent. Avoid abrasive substances.
- Rinse and dry thoroughly.
- Return food, close the door, plug in, and switch on the appliance.
Care and Maintenance:
- External Cleaning: Periodically clean air vents and the condenser at the rear with a vacuum cleaner or brush. Clean the outside with a soft, damp cloth. Avoid abrasive products, scourers, stain-removers (e.g., acetone, trichloroethylene), or vinegar.
- Internal Cleaning: Periodically clean the inside of the refrigerator compartment with a sponge dampened in warm water and/or neutral detergent. Rinse and dry with a soft cloth.
- Prolonged Disuse:
- Empty the refrigerator.
- Disconnect from power supply.
- Defrost and clean the interior.
- Leave the door open to prevent mold, odors, and oxidation.
Troubleshooting Guide:
The manual provides solutions for common issues such as:
- Appliance not working (power failure, plug, switch, fuse, power cord, thermostat setting).
- Insufficient temperature in compartments (door closure, food obstruction, heat source proximity, thermostat setting, blocked air vents).
- Excessively low temperature in the refrigerator compartment (thermostat setting).
- Excessive noise (installation, vibrating pipes).
- Water collection at the bottom of the refrigerator compartment (blocked defrost drain).
- Excessive frost build-up in the low temperature compartment (door closure, food obstruction).
- Note: Gurgling and hissing noises from the refrigerant circuit are normal.
After-Sales Service:
If troubleshooting fails:
- Attempt to resolve the problem using the guide.
- Switch off, wait an hour, then switch on again.
- If the problem persists, contact After-Sales Service, providing:
- Nature of the problem.
- Model.
- Service number (from the data plate).
- Full address.
- Telephone number and area code.
- Note: Changing the direction of door opening is not covered by the warranty if performed by After-sales Service.
Installation:
- Location: Install away from heat sources (heaters, radiators, cookers, direct sunlight) to prevent increased power consumption. Maintain minimum distances: 30 cm from coal/paraffin stoves, 3 cm from electric/gas stoves.
- Spacers: Fit spacers (if supplied) on the rear condenser.
- Air Circulation: Leave a 5 cm gap above the appliance and ensure adjacent kitchen units allow air circulation.
- Leveling: Install on a dry, well-ventilated, level surface using front adjustment feet.
- Preparation: Clean the interior and fit accessories.
- Electrical Connection:
- Must comply with local regulations.
- Appliance must be earthed. Manufacturer disclaims liability for injury or damage due to non-compliance.
- If plug/socket types differ, have a qualified electrician replace the socket.
- Do not use extension leads or adapters.
- Disconnection: The appliance must be disconnectable by unplugging or via a two-pole switch upline of the socket.